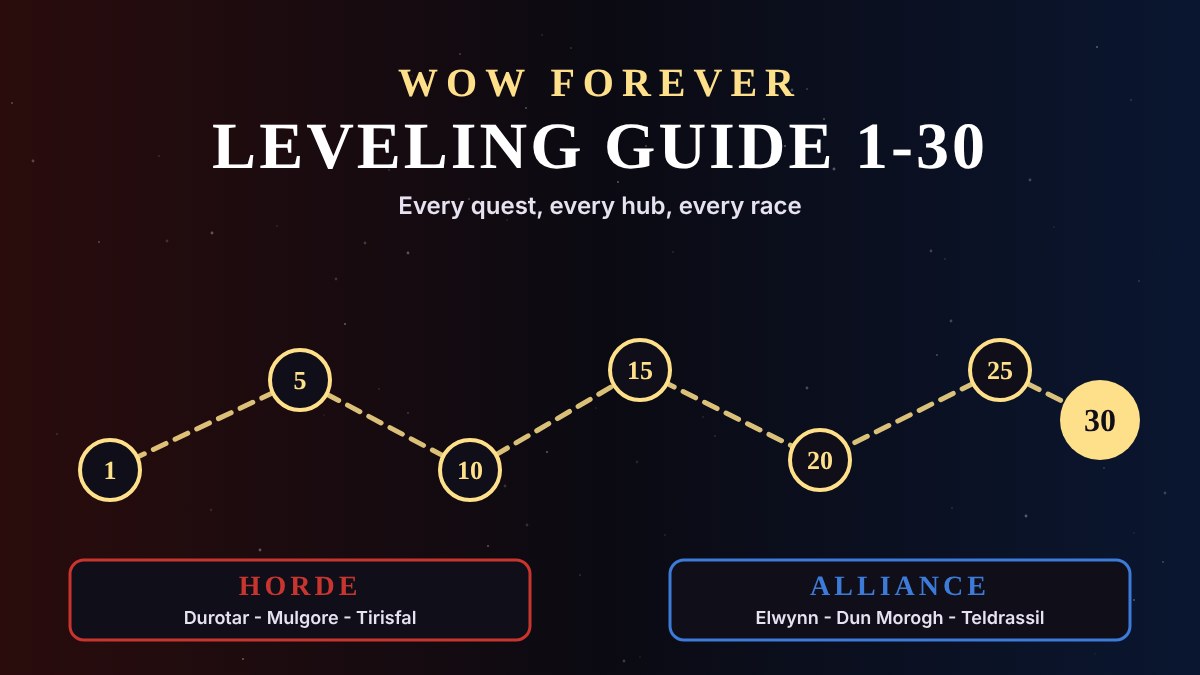
This is our WoW Forever leveling guide for levels 1 to 30. It's a full quest route for every Horde and Alliance race: for each zone it tells you which quests to accept, from whom and where, what to kill or collect and where to find it, and where to hand each quest in, in an order that keeps the running about to a minimum. The Horde leveling route comes first; the Alliance leveling route is further down the page.
How to use this WoW Forever leveling guide
Each zone is split into hubs - a town or an area you work from - and each hub is a list of steps, in order. Accept means pick the quest up, Do means go and complete its objective, and Turn in means hand it in. A step that says if you have it is for a quest that only some races or routes will be carrying. Every quest name links to its page on our site, with the full objective, rewards and the quest chain.
The numbers in brackets are map coordinates, as the percentage across and down that zone's map - the same numbers our quest pages use. Unless a step says otherwise, they're on the map of the zone that section is about. Where a quest giver or target is in another zone or a city, the step names it, for example "(62, 43 in Undercity)". The "Find:" part of each Do step lists the creatures or objects you need and the spot where most of them are.
- Elite quests are flagged in the notes. They're meant for a group, so the route doesn't count on them.
- Level ranges in each hub's title are the levels of its quests, not the level you have to be. If you're a little behind, do the hub anyway; if you're far ahead, skip to the next one.
- Class quests aren't in this route, because they differ for every class. Find yours on our quest lists: Warrior, Paladin, Hunter, Rogue, Priest, Shaman, Mage, Warlock, Druid.
- Talents and rotations are covered in our class leveling guides: Warrior, Paladin, Hunter, Rogue, Priest, Shaman, Mage, Warlock, Druid.
- Quest XP: our quest pages estimate XP with the Classic formula - full XP up to five levels above the quest's level, then less for each level after that. A quest that's gone grey still pays a little, but it's usually faster to move on.
Where this leveling route comes from
WoW Forever is a new version of the game, so we built this route from the game itself. Every quest below is a quest that exists in the WoW Forever client files. For the details - who gives it, where its targets are, what comes before and after it - we use Classic quest data from CMaNGOS classic-db, matched to the quests in the client. That's the same data our quest pages use, and they're marked Classic route for the same reason.
That has two consequences you should know about. First, quests that are new in WoW Forever have no Classic data, so they aren't in this route - if you see a quest giver this guide doesn't mention, it may well be one of them, and it's worth a look. Second, Blizzard may have moved or changed some Classic quests. Where our data had no location for something, or had coordinates that were clearly on the wrong map, we say so in the step rather than guess.
Horde leveling guide: levels 1 to 30
The Horde races start in three places, but Orcs, Trolls and Tauren all meet in the Barrens at about level 12, and the Undead join them later via Hillsbrad Foothills. Here's the order of the zones for each race; the sections below follow the same order.
- Orc and Troll: Durotar (1-12), the Barrens part 1 (12-18), the Barrens part 2 (17-25), Stonetalon Mountains (18-26), Ashenvale (20-30), Hillsbrad Foothills (20-30), Thousand Needles (25-30).
- Tauren: Mulgore (1-12), then the same route as Orcs and Trolls from the Barrens part 1.
- Undead: Tirisfal Glades (1-12), Silverpine Forest (10-20), Hillsbrad Foothills (20-30). Then take the zeppelin from Tirisfal Glades to Orgrimmar for the Barrens part 2, Stonetalon Mountains, Ashenvale and Thousand Needles. The Barrens part 1 is optional for Undead - by then most of its quests will be low for you.
Hillsbrad Foothills and Ashenvale overlap in level, so you don't need to do every quest in both. If a zone starts to feel slow, move on to the next one and come back if you need the XP.
Orc and Troll: Durotar, levels 1 to 12
Orcs and Trolls start in the Valley of Trials, the small valley at the southern end of Durotar. You'll finish there at about level 5 or 6, then work out of Sen'jin Village and Razor Hill until you're ready for the Barrens at 11 or 12. Every coordinate below is on the Durotar map unless it says otherwise.
Valley of Trials (quests level 1-5). Talk to Kaltunk right where you appear, then follow the boars, scorpids and imps out from the Den.
- Accept Your Place In The World from Kaltunk (43, 68).
- Turn in Your Place In The World to Gornek (42, 68).
- Accept Cutting Teeth from Gornek (42, 68).
- Gornek also has your first class quest, which sends you to your class trainer in the Den - do it whenever you pass by.
- Accept Lazy Peons from Foreman Thazz'ril (45, 69).
- Accept Vile Familiars (not Warlock) from Zureetha Fargaze (43, 69).
- Do Cutting Teeth: Kill 10 Mottled Boars then return to Gornek at the Den. Find: Mottled Boar (level 1-2) (44, 65).
- Do Lazy Peons: Use the Foreman's Blackjack on Lazy Peons when they're sleeping. Wake up 5 peons, then return the Foreman's Blackjack to Foreman Thazz'ril in the Valley of Trials. Find: Peons Awoken (44, 60).
- Do Vile Familiars (not Warlock): Kill 12 Vile Familiars. Return to Zureetha Fargaze outside the Den. Find: Vile Familiar (level 3-4) (44, 56).
- Turn in Cutting Teeth to Gornek (42, 68).
- Accept Sting of the Scorpid from Gornek (42, 68).
- Accept Galgar's Cactus Apple Surprise from Galgar (43, 67).
- Turn in Lazy Peons to Foreman Thazz'ril (45, 69).
- Accept Thazz'ril's Pick from Foreman Thazz'ril (45, 69).
- Turn in Vile Familiars to Zureetha Fargaze (43, 69).
- Accept Burning Blade Medallion from Zureetha Fargaze (43, 69).
- Do Sting of the Scorpid: Get 10 Scorpid Worker Tails for Gornek in the Den. Find: Scorpid Worker Tail from Scorpid Worker (43, 62).
- Do Galgar's Cactus Apple Surprise: Bring Galgar 10 Cactus Apples. You remember him saying that they could be found near cactuses. Find: Cactus Apple (44, 62).
- Do Thazz'ril's Pick: Bring Thazz'ril's Pick to Foreman Thazz'ril. Find: Thazz'ril's Pick (44, 54).
- Accept Sarkoth from Hana'zua (41, 63).
- Do Sarkoth: Kill Sarkoth and bring his claw back to Hana'zua. Find: Sarkoth's Mangled Claw from Sarkoth (40, 67).
- Turn in Sarkoth to Hana'zua (41, 63).
- Accept Sarkoth from Hana'zua (41, 63).
- Do Burning Blade Medallion: Bring the Burning Blade Medallion to Zureetha Fargaze, outside The Den. Find: Burning Blade Medallion from Yarrog Baneshadow (43, 53). Yarrog is at the back of the cave north of the Den.
- Turn in Sting of the Scorpid and Sarkoth to Gornek (42, 68).
- Turn in Galgar's Cactus Apple Surprise to Galgar (43, 67).
- Turn in Thazz'ril's Pick to Foreman Thazz'ril (45, 69).
- Turn in Burning Blade Medallion to Zureetha Fargaze (43, 69).
- Accept Report to Sen'jin Village from Zureetha Fargaze (43, 69).
- Accept A Peon's Burden from Ukor (52, 68).
Sen'jin Village (quests level 5-10). Leave the valley by the road east. Sen'jin Village is on the coast in the south-east of Durotar.
- Turn in Report to Sen'jin Village to Master Gadrin (56, 75).
- Accept Report to Orgnil, Minshina's Skull and Zalazane from Master Gadrin (56, 75).
- Accept A Solvent Spirit from Master Vornal (56, 74).
- Accept Practical Prey from Vel'rin Fang (56, 74).
- Accept Thwarting Kolkar Aggression from Lar Prowltusk (54, 73).
- Do Thwarting Kolkar Aggression: Lar Prowltusk outside of Sen'jin Village wants you to destroy the 3 sets of Attack Plans held within Kolkar Crag. Find: Attack Plan: Valley of Trials destroyed (50, 81); Attack Plan: Sen'jin Village destroyed (48, 77); Attack Plan: Orgrimmar destroyed (46, 79). The three tents are in Kolkar Crag, just west of Sen'jin.
- Do Practical Prey: Bring 4 Durotar Tiger Furs to Vel'rin Fang in Sen'jin Village. Find: Durotar Tiger Fur from Durotar Tiger (64, 84).
- Pick up the crawler half of A Solvent Spirit on the beach south of the village; the Makrura are near Tiragarde Keep, so leave them for later.
- Turn in Thwarting Kolkar Aggression to Lar Prowltusk (54, 73).
- Turn in Practical Prey to Vel'rin Fang (56, 74).
Razor Hill (quests level 6-10). Follow the road north to Razor Hill, the orc town in the middle of Durotar.
- Turn in Report to Orgnil to Orgnil Soulscar (52, 43).
- Accept Dark Storms from Orgnil Soulscar (52, 43).
- Turn in A Peon's Burden to Innkeeper Grosk (52, 42).
- Make Razor Hill your home at Innkeeper Grosk - you'll come back here a lot.
- Accept Vanquish the Betrayers from Gar'Thok (52, 44).
- Accept Break a Few Eggs from Cook Torka (51, 42).
- Accept Carry Your Weight from Furl Scornbrow (50, 40).
Tiragarde Keep and the coast (quests level 6-9). Tiragarde Keep is the human fort on the coast south-east of Razor Hill.
- Do Vanquish the Betrayers: Kill 10 Kul Tiras Sailors, 8 Kul Tiras Marines and Lieutenant Benedict and return to Gar'Thok in Razor Hill. Find: Kul Tiras Sailor (level 5-6) (58, 56); Kul Tiras Marine (level 6-7) (59, 57); Lieutenant Benedict (level 8) (60, 58).
- Do Carry Your Weight: Furl Scornbrow in the Razor Hill watchtower wants 8 Canvas Scraps. Find: Canvas Scraps from Kul Tiras Sailor (58, 56).
- Loot Aged Envelope - it starts The Admiral's Orders. Right-click it to accept the quest.
- The Aged Envelope drops in Tiragarde Keep - keep killing there until you have it.
- Do A Solvent Spirit: Bring 4 Intact Makrura Eyes and 8 vials of Crawler Mucus to Master Vornal in Sen'jin Village. Find: Intact Makrura Eye from Makrura Clacker (64, 54); Crawler Mucus from Surf Crawler (66, 76).
- Do Break a Few Eggs: Bring 3 Taillasher Eggs to Cook Torka in Razor Hill. Find: Taillasher Egg from Taillasher Eggs (66, 73). The nests are on the east coast, north of Sen'jin Village.
- Turn in Vanquish the Betrayers to Gar'Thok (52, 44).
- Accept From The Wreckage.... from Gar'Thok (52, 44).
- Turn in Carry Your Weight to Furl Scornbrow (50, 40).
- Turn in The Admiral's Orders to Gar'Thok (52, 44).
- Accept The Admiral's Orders from Gar'Thok (52, 44).
- Turn in Break a Few Eggs to Cook Torka (51, 42).
- Do From The Wreckage....: Gar'Thok of Razor Hill wants you to retrieve 3 Gnomish Tools from the wreckage off the coast. Find: Gnomish Tools from Gnomish Toolbox (63, 55). The toolboxes are underwater in the wreckage just off the coast east of the keep.
- Turn in From The Wreckage.... to Gar'Thok (52, 44).
Echo Isles (quests level 8-10). Back to Sen'jin first, then swim across to the Echo Isles south-east of the village.
- Turn in A Solvent Spirit to Master Vornal (56, 74).
- Do Minshina's Skull: Retrieve Minshina's skull from the circle of power on the Echo Isles. Bring it to Master Gadrin in Sen'jin Village. Find: Minshina's Skull from Imprisoned Darkspear (67, 88).
- Do Zalazane: Defeat Zalazane. Kill 8 Voodoo Trolls and 8 Hexed Trolls. Bring Zalazane's Head to Gadrin. Find: Hexed Troll (level 8-9) (68, 85); Voodoo Troll (level 8-9) (67, 85); Zalazane's Head from Zalazane (68, 88).
- Turn in Minshina's Skull and Zalazane to Master Gadrin (56, 75).
Northern Durotar (quests level 7-12). Pick up Encroachment from Gar'Thok in Razor Hill before you head north.
- Accept Encroachment from Gar'Thok (52, 44).
- Do Encroachment: Kill 4 Razormane Quilboars, 4 Razormane Scouts, 4 Razormane Dustrunners and 4 Razormane Battleguards for Gar'Thok at Razor Hill. Find: Razormane Quilboar (level 6-7) (49, 49); Razormane Scout (level 7-8) (47, 50); Razormane Dustrunner (level 8-9) (43, 39); Razormane Battleguard (level 9-10) (43, 39). The Razormane are west and north-west of Razor Hill.
- Turn in Encroachment to Gar'Thok (52, 44).
- Do Dark Storms: Bring Fizzle's Claw to Orgnil Soulscar in Razor Hill. Find: Fizzle's Claw from Fizzle Darkstorm (42, 27). Fizzle Darkstorm is in the camp north-west of Razor Hill.
- Accept Lost But Not Forgotten from Misha Tor'kren (43, 30).
- Do Lost But Not Forgotten: Bring a sign of Kron's fate to Misha Tor'kren at the farmstead northwest of Razor Hill. Find: Kron's Amulet from Dreadmaw Crocolisk (35, 28). The Dreadmaw Crocolisks are along the river on Durotar's western edge.
- Turn in Lost But Not Forgotten to Misha Tor'kren (43, 30).
- Accept Winds in the Desert from Rezlak (46, 23).
- Do Winds in the Desert: Retrieve 5 Sacks of Supplies and return them to Rezlak near Orgrimmar. Find: Sack of Supplies from Stolen Supply Sack (49, 28).
- Turn in Winds in the Desert to Rezlak (46, 23).
- Accept Securing the Lines from Rezlak (46, 23).
- Do Securing the Lines: Kill 12 Dustwind Savages and 8 Dustwind Storm Witches for Rezlak near Drygulch Ravine. Find: Dustwind Savage (level 9-10) (53, 24); Dustwind Storm Witch (level 10-11) (52, 22).
- Turn in Securing the Lines to Rezlak (46, 23).
- Accept Need for a Cure from Rhinag (42, 19).
- Turn in Dark Storms to Orgnil Soulscar (52, 43).
- Accept Margoz from Orgnil Soulscar (52, 43).
- Turn in Margoz to Margoz (56, 20).
- Accept Skull Rock from Margoz (56, 20).
- Do Skull Rock: Gather Searing Collars from the cultists in Skull Rock. Bring them to Margoz at his camp. Find: Searing Collar from Burning Blade Fanatic (54, 10). Skull Rock is the cave north of Margoz's camp.
- Loot Eye of Burning Shadow from Gazz'uz (73, 86 in Orgrimmar) - it starts Burning Shadows. Right-click it to accept the quest.
- The Eye of Burning Shadow drops from Gazz'uz inside Skull Rock.
- Turn in Skull Rock to Margoz (56, 20).
- Accept Neeru Fireblade from Margoz (56, 20).
Orgrimmar. Orgrimmar's gate is at the northern end of Durotar.
- Turn in Neeru Fireblade to Neeru Fireblade (50, 51 in Orgrimmar).
- Accept Ak'Zeloth from Neeru Fireblade (50, 51 in Orgrimmar).
- Turn in Burning Shadows to Neeru Fireblade (50, 51 in Orgrimmar).
- Turn in The Admiral's Orders to Nazgrel (32, 36 in Orgrimmar).
- Do Need for a Cure: Find Kor'ghan in Orgrimmar and get the Venomtail Antidote. Then bring the antidote to Rhinag near the northwestern border of Durotar. Find: Venomtail Antidote. Kor'ghan is in Orgrimmar - he has the antidote.
- Train your class and professions while you're in the city.
- Turn in Need for a Cure to Rhinag (42, 19).
On to the Barrens. Back at Razor Hill, Takrin Pathseeker sends you west over the bridge to Far Watch, where the Barrens begin.
- Accept Conscript of the Horde from Takrin Pathseeker (51, 44).
- Turn in Conscript of the Horde to Kargal Battlescar (33, 43).
- Accept Crossroads Conscription from Kargal Battlescar (33, 43).
- Turn in Ak'Zeloth to Ak'Zeloth (33, 44).
- Accept The Demon Seed from Ak'Zeloth (33, 44).
- Keep Crossroads Conscription and The Demon Seed for the Barrens.
Tauren: Mulgore, levels 1 to 12
Tauren start at Camp Narache in southern Mulgore. You'll move up to Bloodhoof Village at about level 5 or 6 and finish the zone around Thunder Bluff before heading east into the Barrens. Every coordinate below is on the Mulgore map unless it says otherwise.
Camp Narache (quests level 1-5). Grull Hawkwind and Chief Hawkwind are next to you when you log in.
- Accept The Hunt Begins from Grull Hawkwind (44, 78).
- Accept A Humble Task from Chief Hawkwind (44, 77).
- Your class trainer is in Camp Narache too - Grull Hawkwind's next quest unlocks your first class quest.
- Do The Hunt Begins: Grull Hawkwind in Camp Narache wants you to bring him 7 Plainstrider Feathers and 7 pieces of Plainstrider Meat. Find: Plainstrider Meat from Plainstrider (47, 81); Plainstrider Feather from Plainstrider (47, 81).
- Turn in A Humble Task to Greatmother Hawkwind (49, 81).
- Accept A Humble Task from Greatmother Hawkwind (49, 81).
- Do A Humble Task: Take a Water Pitcher from the water well. Return the pitcher to Chief Hawkwind in Camp Narache which is northwest from the water well. Find: Water Pitcher (49, 81).
- Turn in The Hunt Begins to Grull Hawkwind (44, 78).
- Accept The Hunt Continues from Grull Hawkwind (44, 78).
- Turn in A Humble Task to Chief Hawkwind (44, 77).
- Accept Rites of the Earthmother from Chief Hawkwind (44, 77).
- Do The Hunt Continues: Grull Hawkwind in Camp Narache wants you to bring him 10 Mountain Cougar Pelts. Find: Mountain Cougar Pelt from Mountain Cougar (48, 88).
- Turn in The Hunt Continues to Grull Hawkwind (44, 78).
- Accept The Battleboars from Grull Hawkwind (44, 78).
- Turn in Rites of the Earthmother to Seer Graytongue (in the hills south of Camp Narache).
- Accept Rite of Strength from Seer Graytongue (in the hills south of Camp Narache).
- Accept Break Sharptusk! from Brave Windfeather (44, 77).
- Do Rite of Strength: Kill Bristlebacks in Brambleblade Ravine and bring 12 Bristleback Belts to Chief Hawkwind in Camp Narache. Find: Bristleback Belt from Bristleback Quilboar (58, 80).
- Do The Battleboars: Grull Hawkwind in Camp Narache wants you to kill Battleboars and bring back 8 Battleboar Snouts and 8 Battleboar Flanks. Find: Battleboar Snout from Battleboar (54, 83); Battleboar Flank from Battleboar (54, 83).
- Do Break Sharptusk!: Bring the head of Chief Sharptusk Thornmantle to Brave Windfeather in Red Cloud Mesa. Find: Chief Sharptusk Thornmantle's Head from Chief Sharptusk Thornmantle (61, 78).
- Loot Dirt-stained Map - it starts Attack on Camp Narache. Right-click it to accept the quest.
- The Dirt-stained Map drops from the quilboar around Camp Narache.
- Turn in Rite of Strength and Attack on Camp Narache to Chief Hawkwind (44, 77).
- Accept Rites of the Earthmother from Chief Hawkwind (44, 77).
- Turn in The Battleboars to Grull Hawkwind (44, 78).
- Turn in Break Sharptusk! to Brave Windfeather (44, 77).
Bloodhoof Village (quests level 5-10). Follow the road north from Camp Narache. Bloodhoof Village is in the middle of Mulgore.
- Turn in Rites of the Earthmother to Baine Bloodhoof (47, 63).
- Accept Rite of Vision and Sharing the Land from Baine Bloodhoof (47, 63).
- Turn in Rite of Vision to Zarlman Two-Moons (47, 61).
- Accept Rite of Vision from Zarlman Two-Moons (47, 61).
- Accept Swoop Hunting from Harken Windtotem (48, 63).
- Accept Poison Water from Mull Thunderhorn (48, 64).
- Accept Mazzranache from Maur Raincaller (46, 61).
- Accept Dangers of the Windfury from Ruul Eagletalon (46, 65).
- Accept The Ravaged Caravan from Morin Cloudstalker (55, 64).
- Do Poison Water: Bring 6 Prairie Wolf Paws and 4 Plainstrider Talons to Mull Thunderhorn in Bloodhoof. Find: Prairie Wolf Paw from Prairie Wolf (40, 69); Plainstrider Talon from Adult Plainstrider (41, 69).
- Do Sharing the Land: Kill 10 Palemane Tanners, 8 Palemane Skinners, and 5 Palemane Poachers, then return to Baine Bloodhoof in Bloodhoof Village. Find: Palemane Tanner (level 5-6) (35, 65); Palemane Skinner (level 6-7) (34, 64); Palemane Poacher (level 7-8) (33, 64).
- Do Rite of Vision: Collect 2 Well Stones and 2 Ambercorn and bring them back to Zarlman Two-Moons in Bloodhoof Village. Find: Well Stone (52, 69); Ambercorn (48, 67).
- Turn in Poison Water to Mull Thunderhorn (48, 64).
- Accept Winterhoof Cleansing from Mull Thunderhorn (48, 64).
- Do Winterhoof Cleansing: Use the Winterhoof Cleansing Totem at the Winterhoof Water Well, then return to Mull Thunderhorn.
- Turn in Winterhoof Cleansing to Mull Thunderhorn (48, 64).
- Accept Thunderhorn Totem from Mull Thunderhorn (48, 64).
- Turn in Rite of Vision to Zarlman Two-Moons (47, 61).
- Accept Rite of Vision from Zarlman Two-Moons (47, 61).
- Do Rite of Vision: Consume the Water of the Seers in front of the tribal fire in Bloodhoof Village and follow the vision once it appears. Drink the water by the fire and follow the spirit wolf - it leads you north to Seer Wiserunner.
- Turn in Rite of Vision to Seer Wiserunner (34, 43).
- Accept Rite of Wisdom from Seer Wiserunner (34, 43).
- Do Swoop Hunting: Bring 8 Trophy Swoop Quills to Harken Windtotem in Bloodhoof Village. Find: Trophy Swoop Quill from Swoop (51, 50).
- Do Thunderhorn Totem: Bring 6 Stalker Claws and 6 Cougar Claws to Mull Thunderhorn. Find: Stalker Claws from Prairie Stalker (50, 51); Cougar Claws from Flatland Cougar (51, 46).
- Do The Ravaged Caravan: Morin Cloudstalker wants you to examine the contents of a supply crate at the Ravaged Caravan.
- Turn in The Ravaged Caravan to Sealed Supply Crate (52, 53).
- Accept The Ravaged Caravan from Sealed Supply Crate (52, 53).
- Turn in The Ravaged Caravan to Morin Cloudstalker (55, 64).
- Accept The Venture Co. and Supervisor Fizsprocket from Morin Cloudstalker (55, 64).
- Turn in Swoop Hunting to Harken Windtotem (48, 63).
- Turn in Thunderhorn Totem to Mull Thunderhorn (48, 64).
- Accept Thunderhorn Cleansing from Mull Thunderhorn (48, 64).
- Turn in Sharing the Land to Baine Bloodhoof (47, 63).
- Do Thunderhorn Cleansing: Use the Thunderhorn Cleansing Totem at the Thunderhorn Water Well, then return to Mull.
- Do Dangers of the Windfury: Bring 8 Windfury Talons to Ruul Eagletalon in Bloodhoof Village. Find: Windfury Talon from Windfury Harpy (61, 72).
- Turn in Thunderhorn Cleansing to Mull Thunderhorn (48, 64).
- Accept Wildmane Totem from Mull Thunderhorn (48, 64).
- Turn in Dangers of the Windfury to Ruul Eagletalon (46, 65).
Northern Mulgore and Thunder Bluff (quests level 8-12). Finish the Bloodhoof quests in the north of the zone, then ride the lift up into Thunder Bluff.
- Do Wildmane Totem: Bring 8 Prairie Alpha Teeth to Mull Thunderhorn in Bloodhoof Village. Find: Prairie Alpha Tooth from Prairie Wolf Alpha (60, 66).
- Do The Venture Co.: Kill 14 Venture Co. Workers and 6 Venture Co. Supervisors for Morin Cloudstalker at Bloodhoof Village. Find: Venture Co. Worker (level 8-9) (60, 48); Venture Co. Supervisor (level 9-10) (59, 47).
- Do Supervisor Fizsprocket: Kill Supervisor Fizsprocket and return his clipboard to Morin Cloudstalker at Bloodhoof Village. Find: Fizsprocket's Clipboard from Supervisor Fizsprocket (61, 49).
- Do Mazzranache: Bring a Prairie Wolf Heart, Flatland Cougar Femur, Plainstrider Scale and Swoop Gizzard to Maur Raincaller at Bloodhoof Village. Find: Prairie Wolf Heart from Prairie Wolf Alpha (60, 66); Flatland Cougar Femur from Flatland Cougar (51, 46); Plainstrider Scale from Elder Plainstrider (54, 34); Swoop Gizzard from Taloned Swoop (52, 35).
- The Venture Co. camp is in the north-east of Mulgore, by the mine.
- Turn in The Venture Co. and Supervisor Fizsprocket to Morin Cloudstalker (55, 64).
- Turn in Wildmane Totem to Mull Thunderhorn (48, 64).
- Accept Wildmane Cleansing from Mull Thunderhorn (48, 64).
- Turn in Mazzranache to Maur Raincaller (46, 61).
- Accept The Hunter's Way from Skorn Whitecloud (46, 63).
- Do Wildmane Cleansing: Use the Wildmane Cleansing Totem at the Wildmane Water Well, then return to Mull Thunderhorn.
- Turn in Wildmane Cleansing to Mull Thunderhorn (48, 64).
- Do Rite of Wisdom: Travel to Red Rocks east of Thunder Bluff and speak with the Ancestral Spirit. The Ancestral Spirit is on top of Red Rocks, north-east of Thunder Bluff.
- Turn in Rite of Wisdom to Ancestral Spirit (58, 31).
- Accept Journey into Thunder Bluff from Ancestral Spirit (58, 31).
- Accept A Sacred Burial from Lorekeeper Raintotem (57, 34).
- Do A Sacred Burial: Lorekeeper Raintotem wants you to kill 8 Bristleback Interlopers at Red Rocks. Find: Bristleback Interloper (level 9-10) (58, 31).
- Turn in A Sacred Burial to Lorekeeper Raintotem (57, 34).
- Do The Hunter's Way: Bring 4 Flatland Prowler Claws to Melor Stonehoof in Thunder Bluff. Find: Flatland Prowler Claw from Flatland Prowler (50, 28).
- Turn in Journey into Thunder Bluff to Cairne Bloodhoof (60, 52 in Thunder Bluff).
- Accept Rites of the Earthmother from Cairne Bloodhoof (60, 52 in Thunder Bluff).
- Turn in The Hunter's Way to Melor Stonehoof (62, 81 in Thunder Bluff).
- Train in Thunder Bluff. Rites of the Earthmother (the Horn of Arra'chea) is a level 14 quest - come back for it later or skip it.
On to the Barrens. Leave Mulgore by the road east of Bloodhoof Village. It brings you to Camp Taurajo in the southern Barrens, where Kirge Sternhorn has your first Barrens quest.
- Accept Journey to the Crossroads from Kirge Sternhorn (45, 59 in The Barrens).
- Keep it - you'll hand it in at the Crossroads, where the Barrens route below starts.
Undead: Tirisfal Glades, levels 1 to 12
The Forsaken wake up in Deathknell, at the western end of Tirisfal Glades. You'll move to Brill at about level 5 or 6 and finish the zone at 11 or 12, then carry on in Silverpine Forest to the south. Every coordinate below is on the Tirisfal Glades map unless it says otherwise.
Deathknell (quests level 1-5). Undertaker Mordo is next to your crypt. Shadow Priest Sarvis and the rest of Deathknell are just up the path.
- Accept Rude Awakening from Undertaker Mordo (30, 72).
- Turn in Rude Awakening to Shadow Priest Sarvis (31, 66).
- Accept The Mindless Ones from Shadow Priest Sarvis (31, 66).
- Accept The Damned from Novice Elreth (31, 66).
- Do The Mindless Ones: Shadow Priest Sarvis wants you to kill 8 Mindless Zombies and 8 Wretched Zombies. Find: Mindless Zombie (level 1) (33, 64); Wretched Zombie (level 1-2) (33, 63).
- Do The Damned: Novice Elreth requires 6 Scavenger Paws and 6 Duskbat Wings. Find: Scavenger Paw from Ragged Scavenger (36, 60); Duskbat Wing from Duskbat (31, 68).
- Turn in The Mindless Ones to Shadow Priest Sarvis (31, 66).
- Accept Rattling the Rattlecages from Shadow Priest Sarvis (31, 66).
- Turn in The Damned to Novice Elreth (31, 66).
- Accept Night Web's Hollow from Executor Arren (32, 66).
- Accept Scavenging Deathknell from Deathguard Saltain (32, 66).
- Accept Marla's Last Wish from Novice Elreth (31, 66).
- Do Rattling the Rattlecages: Kill 12 Rattlecage Skeletons, and then return to Shadow Priest Sarvis in Deathknell when you are done. Find: Rattlecage Skeleton (level 2-3) (33, 62).
- Do Scavenging Deathknell: Search Deathknell and the vicinity for 6 pieces of Scavenged Goods, and return them to Deathguard Saltain. Find: Scavenged Goods from Equipment Boxes (33, 64).
- Do Night Web's Hollow: Executor Arren wants you to kill 10 Young Night Web Spiders and 8 Night Web Spiders. Find: Young Night Web Spider (level 2-3) (28, 58); Night Web Spider (level 3-4) (25, 60).
- Do Marla's Last Wish: Bring Samuel Fipps' Remains to Marla's Grave, then return to Novice Elreth. Find: Samuel's Remains Buried (31, 65).
- Turn in Rattling the Rattlecages to Shadow Priest Sarvis (31, 66).
- Turn in Scavenging Deathknell to Deathguard Saltain (32, 66).
- Turn in Night Web's Hollow to Executor Arren (32, 66).
- Accept The Scarlet Crusade from Executor Arren (32, 66).
- Turn in Marla's Last Wish to Novice Elreth (31, 66).
- Do The Scarlet Crusade: Bring Executor Arren 12 Scarlet Armbands from Scarlet Converts and Scarlet Initiates. Find: Scarlet Armband from Scarlet Initiate (38, 68).
- Turn in The Scarlet Crusade to Executor Arren (32, 66).
- Accept The Red Messenger from Executor Arren (32, 66).
- Do The Red Messenger: Kill Meven Korgal, the messenger, at the Crusader camp, then return any information you find to Executor Arren. Find: Scarlet Crusade Documents from Meven Korgal (36, 69).
- Turn in The Red Messenger to Executor Arren (32, 66).
- Accept Vital Intelligence from Executor Arren (32, 66).
- Accept A Rogue's Deal from Calvin Montague (38, 57).
Brill (quests level 5-10). Brill is the town on the road east, with an inn, a graveyard and most of the zone's quest givers.
- Accept Fields of Grief from Deathguard Simmer (41, 54).
- Accept Gordo's Task from Gordo (43, 55).
- Deathguard Simmer and Gordo are on the road from Deathknell to Brill.
- Turn in Vital Intelligence to Executor Zygand (61, 52).
- Accept At War With The Scarlet Crusade from Executor Zygand (61, 52).
- Turn in A Rogue's Deal to Innkeeper Renee (62, 52).
- Turn in Fields of Grief to Apothecary Johaan (59, 52).
- Accept Fields of Grief from Apothecary Johaan (59, 52).
- Turn in Gordo's Task to Junior Apothecary Holland (57, 49).
- Accept Doom Weed from Junior Apothecary Holland (57, 49).
- Accept A Putrid Task from Deathguard Dillinger (58, 51).
- Accept A New Plague from Apothecary Johaan (59, 52).
- Accept Graverobbers from Magistrate Sevren (61, 51).
- Accept The Chill of Death from Gretchen Dedmar (62, 53).
- Make Brill your home at Innkeeper Renee.
- Do A Putrid Task: Bring 7 Putrid Claws to Deathguard Dillinger in Brill. Find: Putrid Claw from Ravaged Corpse (53, 54).
- Do Graverobbers: Kill Rot Hide Graverobbers and Rot Hide Mongrels. Bring 8 Embalming Ichors to Magistrate Sevren in Brill. Find: Rot Hide Graverobber (level 6-7) (56, 43); Rot Hide Mongrel (level 7-8) (59, 34); Embalming Ichor from Rot Hide Graverobber (56, 43).
- Do Doom Weed: Collect 10 Doom Weed and deliver them back to Junior Apothecary Holland. Find: Doom Weed (57, 39).
- Do A New Plague: Apothecary Johaan in the town of Brill wants you to collect 5 Vials of Darkhound Blood. Find: Darkhound Blood from Decrepit Darkhound (40, 45).
- Do The Chill of Death: Bring five Duskbat Pelts and some Coarse Thread to Gretchen Dedmar in Brill. Find: Duskbat Pelt from Greater Duskbat (45, 53); Coarse Thread.
- Loot A Letter to Yvette from Rattlecage Soldier (48, 40) - it starts A Letter Undelivered. Right-click it to accept the quest.
- A Letter to Yvette drops from Rattlecage Soldiers - keep it if you find one.
- Do At War With The Scarlet Crusade: Executor Zygand of Brill wants you to kill 10 Scarlet Warriors. Find: Scarlet Warrior (level 6-7) (32, 48).
- Do Fields of Grief: Take the Laced Pumpkin to the Captured Scarlet Zealot who is being held in the cellar of the Gallow's End Tavern. The Captured Scarlet Zealot is in the cellar of the Gallows' End Tavern in Brill.
- Turn in Fields of Grief to Captured Scarlet Zealot (62, 51).
- Turn in A Putrid Task to Deathguard Dillinger (58, 51).
- Accept The Mills Overrun from Deathguard Dillinger (58, 51).
- Turn in A New Plague to Apothecary Johaan (59, 52).
- Accept A New Plague from Apothecary Johaan (59, 52).
- Turn in Graverobbers to Magistrate Sevren (61, 51).
- Accept The Prodigal Lich and Forsaken Duties from Magistrate Sevren (61, 51).
- Turn in Doom Weed to Junior Apothecary Holland (57, 49).
- Turn in At War With The Scarlet Crusade to Executor Zygand (61, 52).
- Accept At War With The Scarlet Crusade from Executor Zygand (61, 52).
- Accept Proof of Demise from Deathguard Burgess (61, 52).
- Turn in The Chill of Death to Gretchen Dedmar (62, 53).
- Turn in A Letter Undelivered to Yvette Farthing (62, 53).
Undercity and Gunther's Retreat (quests level 8-12). Undercity is under the ruins of Lordaeron, north-east of Brill. Bethor Iceshard is in the Magic Quarter.
- Turn in The Prodigal Lich to Bethor Iceshard (84, 17 in Undercity).
- Accept The Lich's Identity from Bethor Iceshard (84, 17 in Undercity).
- Do The Lich's Identity: Bring the Lich's Spellbook to Bethor Iceshard in the Undercity. Find: The Lich's Spellbook from Gunther's Books (68, 42). Gunther's Retreat is the small island in the lake north-east of Brill.
- Turn in The Lich's Identity to Bethor Iceshard (84, 17 in Undercity).
- Accept Return the Book from Bethor Iceshard (84, 17 in Undercity).
- Turn in Return the Book to Gunther Arcanus (68, 42).
- Accept Proving Allegiance from Gunther Arcanus (68, 42).
- Proving Allegiance is a level 12 quest - keep it until the end of the zone.
Eastern Tirisfal (quests level 7-10). Deathguard Linnea is at the Brill rear guard, south-east of town. The Scarlet camp for these quests is south-west of Brill.
- Turn in Forsaken Duties to Deathguard Linnea (66, 60).
- Accept Return to the Magistrate and Rear Guard Patrol from Deathguard Linnea (66, 60).
- Do At War With The Scarlet Crusade: Executor Zygand in Brill wants you to kill Captain Perrine, 3 Scarlet Zealots and 3 Scarlet Missionaries. Find: Captain Perrine (level 9) (51, 68); Scarlet Zealot (level 8-9) (52, 67); Scarlet Missionary (level 7-8) (49, 67).
- Do Proof of Demise: Bring 10 Scarlet Insignia Rings to Deathguard Burgess in Brill. Find: Scarlet Insignia Ring from Scarlet Zealot (52, 67).
- Turn in Return to the Magistrate to Magistrate Sevren (61, 51).
- Turn in At War With The Scarlet Crusade to Executor Zygand (61, 52).
- Turn in Proof of Demise to Deathguard Burgess (61, 52).
- Accept At War With The Scarlet Crusade from Executor Zygand (61, 52).
The Agamand Mills and the north (quests level 8-13). Coleman Farthing is in the Brill inn. The Agamand Mills are north-west of Brill.
- Accept Deaths in the Family and The Haunted Mills from Coleman Farthing (62, 52).
- Accept Wanted: Maggot Eye from Wanted! (61, 52).
- Do The Mills Overrun: Gather 5 Notched Ribs and 3 Blackened Skulls, then return to Deathguard Dillinger in Brill. Find: Notched Rib from Cracked Skull Soldier (47, 32); Blackened Skull from Darkeye Bonecaster (47, 36).
- Do The Haunted Mills: Slay Devlin Agamand, and bring Devlin's Remains to Coleman Farthing in Brill. Find: Devlin's Remains from Devlin Agamand (47, 40).
- Do Deaths in the Family: Bring Gregor's Remains, Nissa's Remains and Thurman's Remains to Coleman Farthing in Brill. Find: Gregor's Remains from Gregor Agamand (47, 29); Nissa's Remains from Nissa Agamand (50, 36); Thurman's Remains from Thurman Agamand (44, 34).
- Do Wanted: Maggot Eye: Kill Maggot Eye and return to Executor Zygand in Brill with his paw for a reward. Find: Maggot Eye's Paw from Maggot Eye (59, 31).
- Turn in The Mills Overrun to Deathguard Dillinger (58, 51).
- Turn in Deaths in the Family and The Haunted Mills to Coleman Farthing (62, 52).
- Accept Speak with Sevren from Coleman Farthing (62, 52).
- Turn in Wanted: Maggot Eye to Executor Zygand (61, 52).
- Turn in Speak with Sevren to Magistrate Sevren (61, 51).
- Accept The Family Crypt from Magistrate Sevren (61, 51).
- Do A New Plague: Apothecary Johaan of the town of Brill needs 5 Vile Fin Scales from Murlocs in Tirisfal Glades. Find: Vile Fin Scale from Vile Fin Muckdweller (70, 27).
- Turn in A New Plague to Apothecary Johaan (59, 52).
- Accept A New Plague from Apothecary Johaan (59, 52).
- Do The Family Crypt: Kill 8 Wailing Ancestors and 8 Rotting Ancestors. Kill Captain Dargol, and bring his skull to Magistrate Sevren in Brill. Find: Wailing Ancestor (level 9-10) (53, 28); Rotting Ancestor (level 10-11) (52, 29); Dargol's Skull from Captain Dargol (53, 26).
- Turn in The Family Crypt to Magistrate Sevren (61, 51).
Finishing Tirisfal (quests level 10-12). The last quests send you to the eastern edge of the zone and the Scarlet towers in the north-east.
- Do Rear Guard Patrol: Kill 8 Bleeding Horrors and 8 Wandering Spirits, then report back to Linnea at her camp. Find: Bleeding Horror (level 9-10) (76, 61); Wandering Spirit (level 10-11) (76, 60).
- Do At War With The Scarlet Crusade: Executor Zygand in Brill has commissioned you to slay Captain Vachon and 5 Scarlet Friars. Find: Captain Vachon (level 11) (79, 56); Scarlet Friar (level 9-10) (79, 56).
- Do A New Plague: Apothecary Johaan in the town of Brill wants you to bring him 4 samples of venom from a Vicious Night Web Spider. Find: Vicious Night Web Spider Venom from Vicious Night Web Spider (87, 52).
- Turn in Rear Guard Patrol to Deathguard Linnea (66, 60).
- Turn in A New Plague to Apothecary Johaan (59, 52).
- Accept A New Plague from Apothecary Johaan (59, 52).
- Turn in A New Plague to Captured Mountaineer (62, 51).
- Turn in At War With The Scarlet Crusade to Executor Zygand (61, 52).
- Accept At War With The Scarlet Crusade from Executor Zygand (61, 52).
- Do At War With The Scarlet Crusade: Executor Zygand in the town of Brill wants you to assassinate Captain Melrache and his two bodyguards. Find: Captain Melrache (level 12) (80, 25); Scarlet Bodyguard (level 8) (80, 25). Captain Melrache is in the Scarlet Watch Post in the far north-east.
- Turn in At War With The Scarlet Crusade to Executor Zygand (61, 52).
- Do Proving Allegiance: Obtain a Candle of Beckoning. Summon Lillith Nefara and kill her. Return to Gunther on his island. Find: Lillith Nefara (level 12).
- Turn in Proving Allegiance to Gunther Arcanus (68, 42).
- Accept The Prodigal Lich Returns from Gunther Arcanus (68, 42).
- Turn in The Prodigal Lich Returns to Bethor Iceshard (84, 17 in Undercity).
- Accept Delivery to Silverpine Forest from Apothecary Johaan (59, 52).
The Barrens part 1: the Crossroads and Ratchet, levels 12 to 18
Every Horde race meets in the Barrens. The Crossroads, in the middle of the zone, is your base: almost every quest in this part starts or ends there, with a side trip east to the goblin port of Ratchet. Every coordinate below is on the Barrens map unless it says otherwise.
Arriving at the Crossroads (quests level 12-15). Follow the road west from Far Watch (Orcs and Trolls) or north from Camp Taurajo (Tauren) to the Crossroads.
- Turn in Crossroads Conscription to Sergra Darkthorn (52, 31) if you have it.
- Turn in Journey to the Crossroads to Thork (52, 31) if you have it.
- Accept Plainstrider Menace from Sergra Darkthorn (52, 31).
- Accept Disrupt the Attacks and Supplies for the Crossroads from Thork (52, 31).
- Accept Raptor Thieves from Gazrog (52, 30).
- Accept Fungal Spores and Wharfmaster Dizzywig from Apothecary Helbrim (51, 30).
- Accept The Forgotten Pools from Tonga Runetotem (52, 32).
- Get the Crossroads flight path from Devrak, and make the inn your home. Zargh and Jahan Hawkwing offer short flight errands - Meats to Orgrimmar or A Bundle of Hides - that pay a little XP and teach you the flight path to Orgrimmar or Thunder Bluff.
The Razormane camps east of the Crossroads (quests level 12-14). The Razormane quilboar and the lost supply crates are just east and north-east of the Crossroads.
- Do Plainstrider Menace: Collect 7 Plainstrider Beaks and return them to Sergra Darkthorn in the Crossroads. Find: Plainstrider Beak from Greater Plainstrider (52, 27).
- Do Disrupt the Attacks: Of the Razormane tribe, kill 8 Water Seekers, 8 Thornweavers and 3 Hunters, and then return to Thork in the Crossroads. Find: Razormane Water Seeker (level 10-11) (55, 26); Razormane Thornweaver (level 10-11) (55, 26); Razormane Hunter (level 11-12) (57, 25).
- Do Supplies for the Crossroads: Find and return Crossroads' Supply Crates to Thork in the Barrens. Find: Crossroads' Supply Crates (59, 26).
- Turn in Plainstrider Menace to Sergra Darkthorn (52, 31).
- Accept The Zhevra from Sergra Darkthorn (52, 31).
- Turn in Disrupt the Attacks and Supplies for the Crossroads to Thork (52, 31).
- Accept The Disruption Ends from Thork (52, 31).
The Kolkar and the Forgotten Pools (quests level 13-16). Work the area west and south-west of the Crossroads: the Kolkar centaurs and the mushrooms are around the oasis south-west of town, and Barak Kodobane is north-west.
- Accept Centaur Bracers and Kolkar Leaders from Regthar Deathgate (45, 28).
- Regthar Deathgate stands west of the Crossroads, along the road.
- Do The Forgotten Pools: Report back to Tonga Runetotem with your findings. This is an exploration quest: find the Forgotten Pools and Tonga's quest completes. The quest data has no map point for it, so check the in-game quest text.
- Do Fungal Spores: Bring 4 Fungal Spores to Apothecary Helbrim at the Crossroads. Find: Fungal Spores from Laden Mushroom (47, 40).
- Do Centaur Bracers: Bring 15 Centaur Bracers to Regthar Deathgate, west of the Crossroads. Find: Centaur Bracers from Kolkar Stormer (48, 39).
- Do Kolkar Leaders: Bring Barak's Head to Regthar Deathgate, west of the Crossroads. Find: Barak's Head from Barak Kodobane (43, 24).
- Do The Zhevra: Slay Zhevra Runners to collect 4 Zhevra Hooves for Sergra Darkthorn in the Crossroads. Find: Zhevra Hooves from Zhevra Runner (51, 36).
- If you carried The Demon Seed from Durotar: grab a Flawed Power Stone, take it to the Altar of Fire before the stone expires, then hand the quest in to Ak'Zeloth on the western edge of Durotar (32.7, 44.0 on the Durotar map). The quest data places the altar off the western edge of the Durotar map, in the Barrens.
- Turn in Centaur Bracers and Kolkar Leaders to Regthar Deathgate (45, 28).
- Accept Verog the Dervish from Regthar Deathgate (45, 28).
- Turn in The Forgotten Pools to Tonga Runetotem (52, 32).
- Accept The Stagnant Oasis from Tonga Runetotem (52, 32).
- Turn in Fungal Spores to Apothecary Helbrim (51, 30).
- Accept Apothecary Zamah from Apothecary Helbrim (51, 30).
- Apothecary Zamah has a time limit: fly to Thunder Bluff and hand it in to Apothecary Zamah straight away, or abandon it.
- Turn in The Zhevra to Sergra Darkthorn (52, 31).
- Accept Prowlers of the Barrens from Sergra Darkthorn (52, 31).
South-east to Ratchet (quests level 13-16). On your way east, kill Sunscale raptors for Raptor Thieves and test the seeds at the Stagnant Oasis.
- Do Raptor Thieves: Bring 12 Raptor Heads to Gazrog at the Crossroads. Find: Raptor Head from Sunscale Screecher (57, 42).
- Do The Stagnant Oasis: Return to Tonga at The Crossroads, after investigating the Stagnant Oasis. Find: Test the Dried Seeds (56, 43).
- Turn in Wharfmaster Dizzywig to Wharfmaster Dizzywig (63, 38).
- Accept Southsea Freebooters from Gazlowe (63, 36).
- Accept WANTED: Baron Longshore from WANTED (63, 38).
- Accept Samophlange from Sputtervalve (63, 37).
- Get the Ratchet flight path.
- Do Southsea Freebooters: Kill 12 Southsea Brigands and 6 Southsea Cannoneers for Gazlowe in Ratchet. Find: Southsea Brigand (level 12-13) (64, 46); Southsea Cannoneer (level 13-14) (64, 48). The Southsea pirates are camped on the coast just south of Ratchet.
- Do WANTED: Baron Longshore: Bring the head of Baron Longshore to Gazlowe in Ratchet. Find: Baron Longshore's Head from Baron Longshore (64, 49). The Southsea pirates are camped on the coast just south of Ratchet.
- Turn in Southsea Freebooters to Gazlowe (63, 36).
- Accept The Missing Shipment from Gazlowe (63, 36).
- Turn in The Missing Shipment to Wharfmaster Dizzywig (63, 38).
- Accept The Missing Shipment from Wharfmaster Dizzywig (63, 38).
- Turn in The Missing Shipment and WANTED: Baron Longshore to Gazlowe (63, 36).
- Accept Stolen Booty from Gazlowe (63, 36).
- Do Stolen Booty: Retrieve the Shipment of Boots and Telescopic Lens for Gazlowe in Ratchet. Find: Shipment of Boots from Drizzlik's Emporium (63, 50); Telescopic Lens from Fragile - Do Not Drop (64, 49).
- Turn in Stolen Booty to Gazlowe (63, 36).
Back at the Crossroads (quests level 15-16). Return to the Crossroads to hand in and pick up the next steps.
- Turn in Apothecary Zamah to Apothecary Zamah (23, 21 in Thunder Bluff) if you have it.
- Turn in Raptor Thieves to Gazrog (52, 30).
- Accept Stolen Silver from Gazrog (52, 30).
- Turn in The Stagnant Oasis to Tonga Runetotem (52, 32).
- Accept Altered Beings from Tonga Runetotem (52, 32).
- Accept Harpy Raiders from Darsok Swiftdagger (52, 31).
The northern Barrens (quests level 14-18). Now push north towards the Venture Co. site and the harpy cliffs.
- Do Prowlers of the Barrens: Collect 7 Prowler Claws from Savannah Prowlers for Sergra Darkthorn in the Crossroads. Find: Prowler Claws from Savannah Prowler (42, 27).
- Do The Disruption Ends: Kill 8 Razormane Geomancers, 8 Razormane Defenders, and Kreenig Snarlsnout. Then bring Kreenig Snarlsnout's Tusk to Thork at the Crossroads. Find: Razormane Geomancer (level 12-13) (58, 25); Razormane Defender (level 12-13) (58, 26); Kreenig Snarlsnout's Tusk from Kreenig Snarlsnout (58, 27).
- Do Samophlange: Access the control console at the Venture Company research site. The Venture Co. research site is in the far north of the Barrens.
- Turn in Samophlange to Control Console (52, 12).
- Accept Samophlange from Control Console (52, 12).
- Do Samophlange: Close off the Fuel Control Valve, the Regulator Valve and the Main Control Valve then use the control console again. Find: Shut off Main Control Valve (52, 12); Shut off Fuel Control Valve (52, 11); Shut off Regulator Valve (52, 11).
- Turn in Samophlange to Control Console (52, 12).
- Accept Samophlange from Control Console (52, 12).
- Do Samophlange: Get the Console Key from Tinkerer Sniggles to use on the control console. Find: Console Key from Tinkerer Sniggles (53, 10).
- Turn in Samophlange to Control Console (52, 12).
- Accept Samophlange from Control Console (52, 12).
- Do Harpy Raiders: Collect 8 Witchwing talons. Return them to Darsok Swiftdagger at the Crossroads. Find: Witchwing Talon from Witchwing Slayer (39, 14). The Witchwing harpies are in the north-west.
- Do Altered Beings: Bring 8 Altered Snapjaw Shells to Tonga Runetotem at the Crossroads. Find: Altered Snapjaw Shell from Oasis Snapjaw (47, 40). The Oasis Snapjaws are in the oasis south-west of the Crossroads.
- Turn in Prowlers of the Barrens to Sergra Darkthorn (52, 31).
- Accept Echeyakee from Sergra Darkthorn (52, 31).
- Turn in The Disruption Ends to Thork (52, 31).
- Turn in Altered Beings to Tonga Runetotem (52, 32).
- Accept Mura Runetotem from Tonga Runetotem (52, 32).
- Turn in Harpy Raiders to Darsok Swiftdagger (52, 31).
- Accept Harpy Lieutenants from Darsok Swiftdagger (52, 31).
- Mura Runetotem sends you to Silverpine Forest - keep it if you'll go there, or abandon it.
Undead: Silverpine Forest, levels 10 to 20
Silverpine Forest is the Forsaken's natural next zone - the road south-west from Brill takes you straight there. Orcs, Trolls and Tauren can come too by taking the zeppelin from Orgrimmar to Tirisfal Glades, but they get more from staying in the Barrens. Every coordinate below is on the Silverpine Forest map unless it says otherwise.
The Sepulcher (quests level 10-12). The Sepulcher is the Forsaken base in the middle of Silverpine. Make it your home, and set up the flight path.
- Turn in Delivery to Silverpine Forest to Apothecary Renferrel (43, 41) if you have it.
- Accept Supplying the Sepulcher from Deathguard Podrig (43, 42).
- Turn in Supplying the Sepulcher to Karos Razok (46, 43).
- Accept Ride to the Undercity from Karos Razok (46, 43).
- Karos Razok is the bat handler. The next three steps are a quick flight to Undercity and back that teaches you the route.
- Turn in Ride to the Undercity to Gordon Wendham (62, 42 in Undercity).
- Accept Michael Garrett from Gordon Wendham (62, 42 in Undercity).
- Turn in Michael Garrett to Michael Garrett (63, 49 in Undercity).
- Accept Return to Podrig from Michael Garrett (63, 49 in Undercity).
- Turn in Return to Podrig to Deathguard Podrig (43, 42).
- Accept Prove Your Worth from Dalar Dawnweaver (44, 40).
- Accept Lost Deathstalkers from High Executor Hadrec (43, 41).
- Accept A Recipe For Death from Apothecary Renferrel (43, 41).
- Accept Border Crossings from Shadow Priest Allister (44, 41).
North to the Ivar Patch (quests level 10-12). Follow the road north from the Sepulcher. The Yoricks are hiding in the house at the Ivar Patch, in the far north of the zone.
- Do Prove Your Worth: Dalar Dawnweaver at the Sepulcher wants you to kill 5 Moonrage Whitescalps. Find: Moonrage Whitescalp (level 10-11) (54, 23). The Moonrage worgen are north-east of the Sepulcher, along the road.
- Do A Recipe For Death: Collect 6 Grizzled Bear Hearts and 6 samples of Skittering Blood and deliver them to Master Apothecary Faranell in the Undercity. Find: Grizzled Bear Heart from Giant Grizzled Bear (40, 18); Skittering Blood from Mist Creeper (35, 10).
- Turn in Lost Deathstalkers to Rane Yorick (54, 13).
- Accept Wild Hearts from Rane Yorick (54, 13).
- Accept Escorting Erland from Deathstalker Erland (56, 9).
- Do Escorting Erland: Escort Erland through the wolves, to Rane Yorick. Deathstalker Erland is just north of the Yoricks' house - he walks back with you, so keep him alive.
- Turn in Escorting Erland to Rane Yorick (54, 13).
- Accept The Deathstalkers' Report from Rane Yorick (54, 13).
Back to the Sepulcher (quests level 11-14). Hand in at the Sepulcher, then work the area north and east of it.
- Turn in Prove Your Worth to Dalar Dawnweaver (44, 40).
- Accept Arugal's Folly from Dalar Dawnweaver (44, 40).
- Turn in The Deathstalkers' Report to High Executor Hadrec (43, 41).
- Accept Speak with Renferrel from High Executor Hadrec (43, 41).
- Turn in Speak with Renferrel to Apothecary Renferrel (43, 41).
- Accept Zinge's Delivery from Apothecary Renferrel (43, 41).
- Accept The Dead Fields from High Executor Hadrec (43, 41).
- Zinge's Delivery is handed in to Apothecary Zinge in Undercity - do it on your next trip there.
- Do Arugal's Folly: Retrieve the Remedy of Arugal for Dalar Dawnweaver at the Sepulcher. Find: Remedy of Arugal from Dusty Spellbooks (53, 29). The spellbooks are in the houses north-east of the Sepulcher.
- Do The Dead Fields: Kill rot hide gnolls at the Dead Fields. When Nightlash appears, kill her. Bring the Essence of Nightlash to High Executor Hadrec at the Sepulcher. Find: Essence of Nightlash. The Dead Fields are the Rot Hide gnoll camp north-east of the Sepulcher, near the lake. Nightlash appears after you've killed a few gnolls.
- Turn in Arugal's Folly to Dalar Dawnweaver (44, 40).
- Accept Arugal's Folly from Dalar Dawnweaver (44, 40).
- Turn in The Dead Fields to High Executor Hadrec (43, 41).
- Accept The Decrepit Ferry from High Executor Hadrec (43, 41).
The lake shore and the Dead Fields (quests level 14-17). Head east from the Sepulcher to the lake.
- Do Arugal's Folly: Bring 6 Glutton Shackles and 3 Darksoul Shackles to Dalar Dawnweaver at the Sepulcher. Find: Glutton Shackle from Moonrage Glutton (43, 28); Darksoul Shackle from Moonrage Darksoul (41, 28).
- Do The Decrepit Ferry: Go to the Decrepit Ferry. Search for the reason the Scourge are there. The Corpse Laden Boat is moored on the lake shore east of the Sepulcher.
- Turn in The Decrepit Ferry to Corpse Laden Boat (58, 35).
- Accept Rot Hide Clues from Corpse Laden Boat (58, 35).
- Loot A Talking Head from Rot Hide Bruiser (65, 23) - it starts Resting in Pieces. Right-click it to accept the quest.
- Do Resting in Pieces: Bring Alaric's Head to his grave.
- Turn in Resting in Pieces to Shallow Grave (68, 25).
- Accept The Hidden Niche from Shallow Grave (68, 25).
- Turn in The Hidden Niche to Dusty Shelf (65, 25).
- Accept Wand to Bethor from Dusty Shelf (65, 25).
- Turn in Arugal's Folly to Dalar Dawnweaver (44, 40).
- Accept Arugal's Folly from Dalar Dawnweaver (44, 40).
- Turn in Rot Hide Clues to High Executor Hadrec (43, 41).
- Accept The Engraved Ring and Rot Hide Ichor from High Executor Hadrec (43, 41).
- Do Rot Hide Ichor: Bring 8 bottles of rot hide ichor to Apothecary Renferrel at the Sepulcher. Find: Rot Hide Ichor from Rot Hide Brute (67, 30).
- Do Arugal's Folly: Kill Grimson the Pale and bring his head to Dalar Dawnweaver at the Sepulcher. Find: Head of Grimson from Grimson the Pale (59, 45).
South to Ambermill and the worg lands (quests level 14-18). Shadow Priest Allister sends you to the Dalaran crates and Ambermill, south-east of the Sepulcher.
- Do Border Crossings: Retrieve the contents of one of the Dalaran wizards' crates. You will find Pyrewood Village to the south. The Dalaran crate is beside the road south-east of the Sepulcher.
- Turn in Border Crossings to Dalaran Crate (50, 60).
- Accept Maps and Runes from Dalaran Crate (50, 60).
- Turn in Maps and Runes to Shadow Priest Allister (44, 41).
- Accept Dalar's Analysis from Shadow Priest Allister (44, 41).
- Turn in Dalar's Analysis to Dalar Dawnweaver (44, 40).
- Accept Dalaran's Intentions from Dalar Dawnweaver (44, 40).
- Turn in Dalaran's Intentions to Shadow Priest Allister (44, 41).
- Accept Ambermill Investigations from Shadow Priest Allister (44, 41).
- Turn in Rot Hide Ichor to Apothecary Renferrel (43, 41).
- Accept Rot Hide Origins from Apothecary Renferrel (43, 41).
- Do Ambermill Investigations: Obtain 8 Dalaran Pendants for Shadow Priest Allister at the Sepulcher. Find: Dalaran Pendant from Dalaran Protector (59, 64). Ambermill is the walled village in the south-east.
- Do Wild Hearts: Gather 6 discolored worg hearts and bring them to Apothecary Renferrel at the Sepulcher. Find: Discolored Worg Heart from Bloodsnout Worg (50, 79). The Bloodsnout worgs roam the far south of the zone.
- Turn in Ambermill Investigations to Shadow Priest Allister (44, 41).
- Turn in Arugal's Folly to Dalar Dawnweaver (44, 40).
- Accept Arugal's Folly from Dalar Dawnweaver (44, 40).
- Arugal's Folly is an Elite quest in Pyrewood Village - group up for it or skip it.
- Turn in Wild Hearts to Apothecary Renferrel (43, 41).
- Accept Return to Quinn from Apothecary Renferrel (43, 41).
The Ivar Patch again (quests level 12). Walk back north to the Yoricks.
- Turn in Return to Quinn to Quinn Yorick (53, 13).
- Accept Ivar the Foul from Rane Yorick (54, 13).
- Do Ivar the Foul: Kill Ivar the Foul, and bring Ivar's Head to Rane Yorick at the Ivar Patch. Find: Ivar's Head from Ivar the Foul (52, 14). Ivar the Foul is in the barn next to the house.
- Turn in Ivar the Foul to Rane Yorick (54, 13).
Undercity run (quests level 12-18). Fly to Undercity (or ride through Brill) and clear out the hand-ins there, then fly back to the Sepulcher.
- Turn in A Recipe For Death to Master Apothecary Faranell (49, 69 in Undercity).
- Accept A Recipe For Death from Master Apothecary Faranell (49, 69 in Undercity).
- Turn in Zinge's Delivery to Apothecary Zinge (50, 68 in Undercity).
- Turn in Rot Hide Origins to Bethor Iceshard (84, 17 in Undercity).
- Accept Thule Ravenclaw from Bethor Iceshard (84, 17 in Undercity).
- Turn in Wand to Bethor to Bethor Iceshard (84, 17 in Undercity).
- Magistrate Sevren is in Brill, on the way between Silverpine and Undercity. Raleigh's follow-up is a level 20 quest - take it later if you like.
- Turn in The Engraved Ring to Magistrate Sevren (61, 51 in Tirisfal Glades).
- Accept Raleigh and the Undercity from Magistrate Sevren (61, 51 in Tirisfal Glades).
- Turn in Raleigh and the Undercity to Raleigh Andrean (62, 43 in Undercity).
- Turn in Thule Ravenclaw to Apothecary Renferrel (43, 41).
- Accept Report to Hadrec from Apothecary Renferrel (43, 41).
- Turn in Report to Hadrec to High Executor Hadrec (43, 41).
- A Recipe For Death needs you to get into Pyrewood Village, which is an Elite area - bring a friend, or leave it.
Leaving Silverpine (quests level 19-21). Finish with the Ravenclaw camp, then move on.
- Accept Beren's Peril from Shadow Priest Allister (44, 41).
- Do Beren's Peril: Locate Beren's Peril, then kill 6 Ravenclaw Drudgers and 6 Ravenclaw Guardians, then return to Shadow Priest Allister at the Sepulcher. Find: Ravenclaw Drudger (level 19-20) (59, 71); Ravenclaw Guardian (level 20-21) (58, 71). The Ravenclaw camp is at the southern end of the zone.
- Turn in Beren's Peril to Shadow Priest Allister (44, 41).
- Accept Journey to Hillsbrad Foothills from Apothecary Renferrel (43, 41).
- Journey to Hillsbrad Foothills leads to Tarren Mill in Hillsbrad Foothills, the next zone in the Undead route. If you'd rather join the other Horde races, take the zeppelin from Tirisfal Glades to Orgrimmar and head for the Barrens.
The Barrens part 2: Camp Taurajo and the south, levels 17 to 25
The second half of the Barrens is built around Camp Taurajo, in the south of the zone. The quests here run from level 17 to about 25, so you'll come back to some of them after a trip to Stonetalon Mountains or Hillsbrad Foothills. Every coordinate below is on the Barrens map unless it says otherwise.
Crossroads and Ratchet errands (quests level 16-20). Use the Ratchet and Crossroads flight points to finish the chains from part 1.
- Do Harpy Lieutenants: Collect 6 Harpy Lieutenant Rings from Witchwing Slayers and return them to Darsok Swiftdagger at the Crossroads. Find: Harpy Lieutenant Ring from Witchwing Slayer (39, 14).
- Turn in Harpy Lieutenants to Darsok Swiftdagger (52, 31).
- Accept Serena Bloodfeather from Darsok Swiftdagger (52, 31).
- Accept Raptor Horns from Mebok Mizzyrix (62, 38).
- Accept Miner's Fortune from Wharfmaster Dizzywig (63, 38).
- Accept Trouble at the Docks from Crane Operator Bigglefuzz (63, 38).
- Do Samophlange: Return the Samophlange to Sputtervalve in Ratchet.
- Turn in Samophlange to Sputtervalve (63, 37).
- Accept Wenikee Boltbucket from Sputtervalve (63, 37).
- Turn in Wenikee Boltbucket to Wenikee Boltbucket (49, 11).
- Accept Nugget Slugs from Wenikee Boltbucket (49, 11).
- Do Nugget Slugs: Bring 15 Nugget Slugs to Wenikee Boltbucket in the Barrens. Find: Nugget Slug from Tool Bucket (56, 8).
- Turn in Nugget Slugs to Wenikee Boltbucket (49, 11).
- Accept Rilli Greasygob from Wenikee Boltbucket (49, 11).
- Accept Ignition from Wizzlecrank's Shredder (56, 8).
- Do Ignition: Get the Ignition Key and bring it to Wizzlecrank. Find: Ignition Key from Supervisor Lugwizzle (56, 9).
- Turn in Ignition to Wizzlecrank's Shredder (56, 8).
- Accept The Escape from Wizzlecrank's Shredder (56, 8).
- Do The Escape: Protect Wizzlecrank and the stolen goblin shredder on the way to Sputtervalve in Ratchet. Wizzlecrank's shredder walks you back to Ratchet - stay with it.
- Turn in The Escape to Sputtervalve (63, 37).
- Do Raptor Horns: Gather 5 Intact Raptor Horns from Sunscale Scytheclaws, and bring them to Mebok Mizzyrix in Ratchet. Find: Intact Raptor Horn from Sunscale Scytheclaw (54, 50).
- Do Miner's Fortune: Retrieve the Cats Eye Emerald from one of the Venture Co. Overseers or Enforcers for Wharfmaster Dizzywig at Ratchet. Find: Cats Eye Emerald from Venture Co. Enforcer (61, 4).
- Do Trouble at the Docks: Crane Operator Bigglefuzz in Ratchet wants you to retrieve the bottle of 99-Year-Old Port from Mad Magglish who is hiding in the Wailing Caverns. Find: 99-Year-Old Port from Mad Magglish (46, 34).
- Turn in Miner's Fortune to Wharfmaster Dizzywig (63, 38).
- Turn in Trouble at the Docks to Crane Operator Bigglefuzz (63, 38).
- Turn in Raptor Horns to Mebok Mizzyrix (62, 38).
- Do Stolen Silver: Bring the Stolen Silver to Gazrog in the Crossroads. Find: Stolen Silver (58, 54).
- Turn in Stolen Silver to Gazrog (52, 30).
- Rilli Greasygob is handed in to Rilli Greasygob in Orgrimmar - do it on your next visit to the city.
South of the Crossroads (quests level 17-20). These are the named hunts. Hezrul Bloodmark and the raptor nests are south and south-west of the Crossroads.
- Do Echeyakee: Bring Echeyakee's Hide to Sergra Darkthorn at the Crossroads. Find: Echeyakee's Hide. The quest data has no spawn point for Echeyakee, so expect to search for it.
- Turn in Echeyakee to Sergra Darkthorn (52, 31).
- Accept The Angry Scytheclaws from Sergra Darkthorn (52, 31).
- Do Verog the Dervish: Bring Verog's Head to Regthar Deathgate, west of the Crossroads. Find: Verog's Head. The quest data has no spawn point for Verog, so expect to search for it. The Kolkar camps are south-west of the Crossroads.
- Turn in Verog the Dervish to Regthar Deathgate (45, 28).
- Accept Hezrul Bloodmark from Regthar Deathgate (45, 28).
- Do The Angry Scytheclaws: Kill Sunscale raptors and collect their feathers. Use the feathers on the 3 Scytheclaw nests. Return to Sergra Darkthorn in the Crossroads. Find: Visit Blue Raptor Nest (53, 46); Visit Yellow Raptor Nest (52, 46); Visit Red Raptor Nest (52, 47).
- Do Hezrul Bloodmark: Bring Hezrul's Head to Regthar Deathgate, west of the Crossroads. Find: Hezrul's Head from Hezrul Bloodmark (46, 41).
- Turn in Hezrul Bloodmark to Regthar Deathgate (45, 28).
- Turn in The Angry Scytheclaws to Sergra Darkthorn (52, 31).
- Accept Jorn Skyseer from Sergra Darkthorn (52, 31).
- Accept Consumed by Hatred and Lost in Battle from Mankrik (52, 32).
- Do Serena Bloodfeather: Slay Serena Bloodfeather and return her head to Darsok Swiftdagger at the Crossroads. Find: Serena's Head from Serena Bloodfeather (39, 12).
- Turn in Serena Bloodfeather to Darsok Swiftdagger (52, 31).
- Accept Letter to Jin'Zil from Darsok Swiftdagger (52, 31).
- Letter to Jin'Zil goes to Malaka'jin in southern Stonetalon Mountains - keep it for the Stonetalon section.
Camp Taurajo (quests level 18-25). Camp Taurajo is on the road south of the Crossroads. Jorn Skyseer, Mangletooth and Tatternack Steelforge all have quests here.
- Turn in Jorn Skyseer to Jorn Skyseer (45, 59).
- Accept Ishamuhale from Jorn Skyseer (45, 59).
- Accept Tribes at War from Mangletooth (44, 59).
- Accept Weapons of Choice from Tatternack Steelforge (45, 58).
- Accept The Ashenvale Hunt from Jorn Skyseer (45, 59).
- Get the Camp Taurajo flight path.
- Do Ishamuhale: Bring Ishamuhale's Fang to Jorn at Camp Taurajo. Find: Ishamuhale's Fang. The quest data has no spawn point for Ishamuhale, so expect to search for it.
- Turn in Ishamuhale to Jorn Skyseer (45, 59).
- Accept Enraged Thunder Lizards from Jorn Skyseer (45, 59).
- Do Tribes at War: Kill 6 Bristleback Water Seekers, 12 Bristleback Thornweavers and 12 Bristleback Geomancers and return to Mangletooth at Camp Taurajo in the Barrens. Find: Bristleback Water Seeker (level 16-17) (48, 54); Bristleback Thornweaver (level 18-19) (51, 54); Bristleback Geomancer (level 19-20) (52, 55).
- Do Consumed by Hatred: Bring 60 Bristleback Quilboar Tusks to Mankrik at the Crossroads. Find: Bristleback Quilboar Tusk from Bristleback Geomancer (52, 55).
- Do Lost in Battle: Find Mankrik's wife and then return to him in the Crossroads. Find: Find Mankrik's Wife (49, 50).
- Turn in Tribes at War to Mangletooth (44, 59).
- Accept Blood Shards of Agamaggan from Mangletooth (44, 59).
- Do Blood Shards of Agamaggan: Bring a Blood Shard to Mangletooth in Camp Taurajo in the Barrens. Collect more Blood Shards if you want him to bless you with Agamaggan's power. Find: Blood Shard from Bristleback Geomancer (52, 55).
- Turn in Blood Shards of Agamaggan to Mangletooth (44, 59).
- Accept Betrayal from Within from Mangletooth (44, 59).
- Turn in Consumed by Hatred and Lost in Battle to Mankrik (52, 32).
- Do Enraged Thunder Lizards: Bring 3 Thunder Lizard Blood to Jorn Skyseer at Camp Taurajo. Find: Thunder Lizard Blood from Stormhide (47, 77).
- Turn in Enraged Thunder Lizards to Jorn Skyseer (45, 59).
- Accept Cry of the Thunderhawk from Jorn Skyseer (45, 59).
- Do Cry of the Thunderhawk: Find and slay a Thunderhawk, return its wings to Jorn Skyseer at Camp Taurajo. Find: Thunderhawk Wings from Greater Thunderhawk (46, 77).
- Turn in Cry of the Thunderhawk to Jorn Skyseer (45, 59).
Bael Modan and the far south (quests level 22-25). Gann Stonespire is south of Camp Taurajo, and the Bael'dun dwarf dig site is just south of him.
- Accept Gann's Reclamation from Gann Stonespire (46, 77).
- Do Gann's Reclamation: Gann Stonespire wants you to kill 15 Bael'dun Excavators and 5 Bael'dun Foremen. Bring Khazgorm's Journal to Gann Stonespire. Find: Bael'dun Excavator (level 21-22) (48, 85); Bael'dun Foreman (level 22-23) (48, 85); Khazgorm's Journal from Prospector Khazgorm (48, 86).
- Do Weapons of Choice: Bring a Razormane Backstabber, a Charred Razormane Wand and a Razormane War Shield to Tatternack Steelforge at Camp Taurajo in the Barrens. Find: Razormane Backstabber from Razormane Stalker (43, 82); Charred Razormane Wand from Razormane Seer (42, 81); Razormane War Shield from Razormane Warfrenzy (42, 80).
- Do Betrayal from Within: Kill Nak, Kuz, and Lok Orcbane and bring their skulls to Mangletooth at Camp Taurajo in the Barrens. Find: Kuz's Skull from Kuz (45, 80); Nak's Skull from Nak (44, 83); Lok's Skull from Lok Orcbane (40, 80).
- Turn in Gann's Reclamation to Gann Stonespire (46, 77).
- Accept Revenge of Gann from Gann Stonespire (46, 77).
- Do Revenge of Gann: Gann Stonespire wants you to bring him 6 vials of Nitroglycerin, 6 bundles of Wood Pulp, and 6 samples of Sodium Nitrate. Find: Nitroglycerin from Bael'dun Rifleman (49, 84); Wood Pulp from Bael'dun Rifleman (49, 84); Sodium Nitrate from Bael'dun Rifleman (49, 84).
- Turn in Revenge of Gann to Gann Stonespire (46, 77).
- Accept Revenge of Gann from Gann Stonespire (46, 77).
- Do Revenge of Gann: Destroy the flying machine at Bael Modan and return to Gann Stonespire. Find: Bael Modan Flying Machine destroyed (47, 86).
- Turn in Revenge of Gann to Gann Stonespire (46, 77).
- Turn in Weapons of Choice to Tatternack Steelforge (45, 58).
- Turn in Betrayal from Within to Mangletooth (44, 59).
- Accept Betrayal from Within from Mangletooth (44, 59).
- Betrayal from Within is handed in to Thork at the Crossroads. Look out for four item-started hunts too, all handed in to Jorn Skyseer: Lakota'mani (Lakota'mani, 47, 52), Owatanka (Owatanka, 47, 61), Washte Pawne (Washte Pawne, 45, 79) and The Harvester (Silithid Harvester, 43, 70).
- Turn in Betrayal from Within to Thork (52, 31).
Stonetalon Mountains: Malaka'jin and Sun Rock Retreat, levels 18 to 26
Stonetalon Mountains sits west of the Barrens. Its quests split into two camps: the troll camp of Malaka'jin and the tauren at its edge in the far south of the zone, which are level 18-19, and Sun Rock Retreat in the middle, which are 20-26. Do the south first, around level 18-20, then come back to Sun Rock in the low 20s. Every coordinate below is on the Stonetalon Mountains map unless it says otherwise.
Before you go (Orgrimmar and the Barrens). Two quests send you here from the Barrens side.
- In Orgrimmar, Zor Lonetree (39, 38 on the Orgrimmar map) offers The Spirits of Stonetalon, which sends you to Seereth Stonebreak at the south-eastern edge of Stonetalon - pick it up on your next city visit.
- Carry Letter to Jin'Zil from the Crossroads: it is handed in at Malaka'jin.
Malaka'jin and the south-east (quests level 18-20). Malaka'jin is the troll camp at the southern edge of the zone. Witch Doctor Jin'Zil and Xen'Zilla are there, and the tauren Seereth Stonebreak and Makaba Flathoof are at the south-eastern edge, near the Barrens border.
- Turn in The Spirits of Stonetalon to Seereth Stonebreak (86, 98) if you have it.
- Turn in Letter to Jin'Zil to Witch Doctor Jin'Zil (74, 98) if you have it.
- Accept Blood Feeders from Xen'Zilla (71, 95).
- Accept Report to Kadrak from Darn Talongrip (73, 95).
- Accept Goblin Invaders from Seereth Stonebreak (86, 98).
- Accept Avenge My Village from Makaba Flathoof (86, 98).
- Do Avenge My Village: Kill 8 Grimtotem Ruffians and 6 Grimtotem Mercenaries, and then return to Makaba Flathoof near the southeastern edge of Stonetalon. Find: Grimtotem Ruffian (level 14-15) (82, 87); Grimtotem Mercenary (level 14-15) (82, 88).
- Turn in Avenge My Village to Makaba Flathoof (86, 98).
- Accept Kill Grundig Darkcloud from Makaba Flathoof (86, 98).
- Accept Protect Kaya from Kaya Flathoof (74, 86).
- Do Kill Grundig Darkcloud: Kill Grundig Darkcloud and 6 Grimtotem Brutes, and return to Makaba Flathoof near the southeastern edge of Stonetalon. Find: Grundig Darkcloud (level 18) (74, 86); Grimtotem Brute (level 15-16) (77, 86). Grundig Darkcloud and the Grimtotem Brutes are at the camp north-west of Makaba, where Kaya Flathoof waits.
- Do Protect Kaya: Escort Kaya Flathoof to Camp Aparaje, and then return to Makaba Flathoof near the southeastern edge of Stonetalon. Kaya Flathoof walks with you - keep her alive.
- Turn in Kill Grundig Darkcloud and Protect Kaya to Makaba Flathoof (86, 98).
- Accept Kaya's Alive from Makaba Flathoof (86, 98).
- Do Goblin Invaders: Kill 15 Venture Co. Loggers, then return to Seereth Stonebreak on the border of Stonetalon and the Barrens. Find: Venture Co. Logger (level 18-19) (66, 52). The Venture Co. loggers are in the cleared valley north of Malaka'jin.
- Do Blood Feeders: Xen'zilla at Malaka'Jin needs you to kill 10 Deepmoss Creepers and 7 Deepmoss Venomspitters. Find: Deepmoss Creeper (level 16-17) (58, 76); Deepmoss Venomspitter (level 17-18) (60, 62). The Deepmoss spiders are in the valley between Malaka'jin and the loggers.
- Turn in Blood Feeders to Xen'Zilla (71, 95).
- Turn in Goblin Invaders to Seereth Stonebreak (86, 98).
- Accept The Elder Crone and Shredding Machines from Seereth Stonebreak (86, 98).
- Report to Kadrak is handed in to Kadrak at the watch tower in the far north of the Barrens - do it when you pass. The Elder Crone goes to Magatha Grimtotem in Thunder Bluff. Leave Shredding Machines until you are about 23.
Sun Rock Retreat (quests level 18-23). Sun Rock Retreat is the tauren outpost in the middle of Stonetalon. Tammra Windfield, Mor'rogal, Tsunaman and Ziz Fizziks are all here or just outside.
- Turn in Kaya's Alive to Tammra Windfield (48, 58).
- Accept Cycle of Rebirth from Tammra Windfield (48, 58).
- Accept Boulderslide Ravine from Mor'rogal (47, 64).
- Accept Elemental War and Trouble in the Deeps from Tsunaman (47, 64).
- Accept Super Reaper 6000 from Ziz Fizziks (59, 63).
- Get the Sun Rock Retreat flight path, and make the inn your home.
- Do Boulderslide Ravine: Explore deep into the cave at Boulderslide Ravine and bring back 10 Resonite Crystals for Mor'rogal at Sun Rock Retreat to investigate. Find: Resonite Crystal (60, 91). Boulderslide Ravine is in the far south of the zone, west of Malaka'jin.
- Turn in Boulderslide Ravine to Mor'rogal (47, 64).
- Accept Earthen Arise from Mor'rogal (47, 64).
- Earthen Arise is an Elite fight against Goggeroc in the same cave - group up or skip it.
- Do Cycle of Rebirth: Tammra Windfield at Sun Rock Retreat wants you to gather 10 Gaea Seeds. Find: Gaea Seed (49, 41). The Gaea Seeds are on the ground north of Sun Rock.
- Turn in Cycle of Rebirth to Tammra Windfield (48, 58).
- Accept New Life from Tammra Windfield (48, 58).
- Do Super Reaper 6000: Get the Super Reaper 6000 Blueprints for Ziz Fizziks in the Stonetalon Mountains. Find: Super Reaper 6000 Blueprints from Venture Co. Operator (66, 51). The Venture Co. Operators are north-east of Sun Rock, with the loggers.
- Turn in Super Reaper 6000 to Ziz Fizziks (59, 63).
- Accept Further Instructions from Ziz Fizziks (59, 63).
- Trouble in the Deeps sends you to Je'neu Sancrea at Zoram'gar Outpost in Ashenvale, and Further Instructions to Sputtervalve in Ratchet.
Windshear and the north-east (quests level 22-23). Piznik is mining in the east of the zone; XT:4 and XT:9 are around the same logging area.
- Accept Gerenzo's Orders from Piznik (72, 60).
- Turn in Gerenzo's Orders to Piznik (72, 60).
- Accept Gerenzo's Orders from Piznik (72, 60).
- Do Shredding Machines: Kill the shredders XT:4 and XT:9, then return to Seereth Stonebreak at the border of the Stonetalon Mountains and the Barrens. Find: XT:4 (level 23) (64, 46); XT:9 (level 23) (64, 57). XT:4 and XT:9 patrol the logging areas east of Sun Rock.
- Turn in Gerenzo's Orders to Ziz Fizziks (59, 63).
- Turn in Shredding Machines to Seereth Stonebreak (86, 98).
Sun Rock again (quests level 21-26). Come back to Sun Rock at about level 23 to finish the zone.
- Accept Arachnophobia from Wanted Poster: Besseleth (59, 76).
- Arachnophobia is an Elite spider, Besseleth - only take it with a group.
- Accept Harpies Threaten from Maggran Earthbinder (47, 61).
- Accept Cenarius' Legacy from Braelyn Firehand (46, 60).
- Do New Life: Plant 10 Gaea Seeds in Gaea Dirt Mounds, and then return the remaining Enchanted Gaea Seeds to Tammra at Sun Rock Retreat. Find: Gaea seed planted (33, 68). The Gaea Dirt Mounds are south-west of Sun Rock.
- Do Harpies Threaten: Maggran Earthbinder in Sun Rock Retreat wants you to slay 7 Bloodfury Harpies, 7 Bloodfury Ambushers, 7 Bloodfury Slayers and 7 Bloodfury Roguefeathers. Find: Bloodfury Harpy (level 23-24) (32, 62); Bloodfury Ambusher (level 23-24) (31, 62); Bloodfury Slayer (level 25-26) (32, 69); Bloodfury Roguefeather (level 25-26) (33, 69). The Bloodfury harpies are west and south-west of Sun Rock.
- Do Elemental War: Bring 10 Incendrites to Tsunaman at Sun Rock Retreat. Find: Incendrites from Rogue Flame Spirit (36, 52). The Rogue Flame Spirits are west of Sun Rock.
- Turn in New Life to Tammra Windfield (48, 58).
- Turn in Harpies Threaten to Maggran Earthbinder (47, 61).
- Accept Bloodfury Bloodline from Maggran Earthbinder (47, 61).
- Turn in Elemental War to Tsunaman (47, 64).
- Bloodfury Bloodline is Elite - group up for Bloodfury Ripper or skip it.
- Do Cenarius' Legacy: Kill 4 Sons of Cenarius, 4 Daughters of Cenarius and 4 Cenarion Botanists for Braelyn Firehand near Sun Rock Retreat. Find: Son of Cenarius (level 24-25) (36, 13); Daughter of Cenarius (level 23-25) (36, 13); Cenarion Botanist (level 23-24) (36, 14). The Cenarion druids are in the far north-west of the zone.
- Turn in Cenarius' Legacy to Braelyn Firehand (46, 60).
- Accept Ordanus from Braelyn Firehand (46, 60).
- Accept Calling in the Reserves from Maggran Earthbinder (47, 61).
- Ordanus is level 29: Keeper Ordanus is in Ashenvale, so keep it for later. Calling in the Reserves takes you to Grish Longrunner at the top of the Great Lift between the Barrens and Thousand Needles.
Jin'Zil's Forest Magic (quest level 26). Witch Doctor Jin'Zil at Malaka'jin has one more quest once you're in your mid-20s.
- Accept Jin'Zil's Forest Magic from Witch Doctor Jin'Zil (74, 98).
- Do Jin'Zil's Forest Magic: Witch Doctor Jin'Zil at Malaka'jin wants 5 portions of Stonetalon Sap, 5 Twilight Whiskers, 30 Courser Eyes and a Fey Dragon Scale. Find: Stonetalon Sap from Sap Beast (36, 17); Twilight Whisker from Twilight Runner (33, 10); Courser Eye from Antlered Courser (46, 24); Fey Dragon Scale from Fey Dragon (40, 14). All four ingredients come from the north and north-west of the zone, so do them together with Cenarius' Legacy.
- Turn in Jin'Zil's Forest Magic to Witch Doctor Jin'Zil (74, 98).
Ashenvale: Splintertree Post and Zoram'gar, levels 19 to 30
Ashenvale is a night elf forest north of the Barrens. The Horde has two camps here: Splintertree Post in the east, and Zoram'gar Outpost on the western coast. Walk north out of the Barrens to reach it. Every coordinate below is on the Ashenvale map unless it says otherwise.
Splintertree Post (quests level 20-25). Splintertree Post is the Warsong camp in the east of Ashenvale, at about 73, 62.
- Turn in The Ashenvale Hunt to Senani Thunderheart (74, 62) if you have it.
- Accept The Ashenvale Hunt from Senani Thunderheart (74, 62).
- Turn in The Ashenvale Hunt to Senani Thunderheart (74, 62).
- The Ashenvale Hunt is a starter: Senani explains the three hunts below, and it gives no XP of its own.
- Accept Ashenvale Outrunners from Kuray'bin (71, 68).
- Accept Stonetalon Standstill from Mastok Wrilehiss (74, 60).
- Accept Satyr Horns from Pixel (73, 62).
- Get the Splintertree Post flight path, and make the inn your home.
- Do Ashenvale Outrunners: Kill 9 Ashenvale Outrunners, then return to Kuray'bin at Splintertree Outpost. Find: Ashenvale Outrunner (level 23-24) (74, 72). The Ashenvale Outrunners roam just south of Splintertree.
- Turn in Ashenvale Outrunners to Kuray'bin (71, 68).
South and west of Splintertree (quests level 23-27). Torek waits just south of Splintertree; the lake and Ursangous are south-west.
- Accept Torek's Assault from Torek (68, 75).
- Do Torek's Assault: Escort Torek on his attack against Silverwing Outpost and Duriel Moonfire, then report to Ertog Ragetusk at Splintertree Post. Torek leads an attack on Silverwing Outpost - help him and stay with him.
- Do Stonetalon Standstill: Dispatch 12 Befouled Water Elementals at Mystral Lake, due east of the Talondeep Path and southwest of Splintertree Post. Scout the gazebo on Mystral Lake that overlooks the nearby Alliance outpost. Return to Mastok Wrilehiss at Splintertree Post, Ashenvale. Find: Befouled Water Elemental (level 23-25) (49, 70). The Befouled Water Elementals are at the lake south-west of Splintertree.
- Loot Befouled Water Globe from Tideress (46, 71) - it starts The Befouled Element. Right-click it to accept the quest.
- Tideress, who drops the Befouled Water Globe, is at the same lake.
- Loot Ursangous's Paw from Ursangous (40, 65) - it starts Ursangous's Paw. Right-click it to accept the quest.
- Turn in Torek's Assault to Ertog Ragetusk (73, 62).
- Turn in Stonetalon Standstill and The Befouled Element to Mastok Wrilehiss (74, 60).
- Accept Je'neu of the Earthen Ring from Mastok Wrilehiss (74, 60).
- Je'neu of the Earthen Ring takes the Befouled Water Globe to Je'neu Sancrea at Zoram'gar Outpost - you're heading there next.
Zoram'gar Outpost (quests level 19-26). Zoram'gar Outpost is on the western coast of Ashenvale, at about 12, 34. Get its flight path.
- Turn in Je'neu of the Earthen Ring to Je'neu Sancrea (12, 34).
- Turn in Trouble in the Deeps to Je'neu Sancrea (12, 34) if you have it.
- Accept Naga at the Zoram Strand from Marukai (12, 35).
- Accept Between a Rock and a Thistlefur from Karang Amakkar (12, 34).
- Accept Troll Charm from Mitsuwa (12, 35).
- Je'neu Sancrea, Muglash and Karang Amakkar also offer The Essence of Aku'Mai, Vorsha the Lasher and King of the Foulweald - the first is a Blackfathom Deeps quest and the other two are Elite, so take them only with a group.
- Do Naga at the Zoram Strand: Bring 20 Wrathtail Heads to Marukai along the Zoram Strand. Find: Wrathtail Head from Wrathtail Sorceress (14, 20). The Wrathtail naga are along the shore north of Zoram'gar.
- Turn in Naga at the Zoram Strand to Marukai (12, 35).
Thistlefur Village (quests level 24). The Thistlefur furbolgs are in the hills east of Zoram'gar.
- Accept Freedom to Ruul from Ruul Snowhoof (42, 34).
- Do Between a Rock and a Thistlefur: Take down 8 Thistlefur Avengers and 8 Thistlefur Shaman; most are located east of Zoram Strand in Thistlefur Village. Once completed, return to Karang Amakkar at Zoram'gar Outpost, Ashenvale. Find: Thistlefur Avenger (level 23-24) (36, 37); Thistlefur Shaman (level 23-24) (35, 38).
- Do Troll Charm: Bring 8 Troll Charms to Mitsuwa at the Zoram'gar Outpost. Find: Troll Charm from Troll Chest (41, 34).
- Do Freedom to Ruul: Escort Ruul, then speak with Yama Snowhoof in Splintertree Post. Ruul Snowhoof is held in the Thistlefur camp - escort him out, then hand in at Splintertree.
- Turn in Between a Rock and a Thistlefur to Karang Amakkar (12, 34).
- Turn in Troll Charm to Mitsuwa (12, 35).
Back east to Splintertree (quests level 24-30). Finish the hunts and the satyr horns on your way back. Ursangous is south-west, Shadumbra in the middle of the zone and Sharptalon south of Splintertree; all three are level 24-30 beasts that drop their quest item.
- Turn in Freedom to Ruul to Yama Snowhoof (74, 61).
- Loot Shadumbra's Head from Shadumbra (58, 56) - it starts Shadumbra's Head. Right-click it to accept the quest.
- Do Satyr Horns: Collect 16 Satyr Horns for Pixel in Splintertree Post. Find: Satyr Horns from Bleakheart Shadowstalker (81, 50). The Bleakheart satyrs are north-east of Splintertree.
- Turn in Satyr Horns to Pixel (73, 62).
- Loot Sharptalon's Claw from Sharptalon (72, 70) - it starts Sharptalon's Claw. Right-click it to accept the quest.
- Turn in Ursangous's Paw, Shadumbra's Head and Sharptalon's Claw to Senani Thunderheart (74, 62).
- Once all three hunts are handed in, Senani offers The Hunt Completed, a level 30 follow-up.
- If you took Ordanus in Stonetalon, Keeper Ordanus is at about 62, 51 in Ashenvale; hand his head to Braelyn Firehand back at Sun Rock Retreat.
Hillsbrad Foothills: Tarren Mill, levels 20 to 30
Hillsbrad Foothills is south-east of Silverpine Forest. The Forsaken town of Tarren Mill, in the north-east of the zone, is your base, and most quests here send you to the human farms and Hillsbrad town in the west. Undead come here straight from Silverpine; other races can take the zeppelin to Tirisfal Glades and run south through Silverpine. Every coordinate below is on the Hillsbrad Foothills map unless it says otherwise.
Tarren Mill (quests level 20-24). Tarren Mill is in the north-east of the zone.
- Turn in Journey to Hillsbrad Foothills to Apothecary Lydon (61, 19) if you have it.
- If you did The Elder Crone from Stonetalon, Magatha and Apothecary Zamah in Thunder Bluff send you here with Journey to Tarren Mill. Hand it in to Apothecary Lydon; he follows it with Blood of Innocents (the Syndicate Shadow Mages are at about 79, 42) and Return to Thunder Bluff, back to Thunder Bluff.
- If you came via Silverpine's southern road, Deathstalker Lesh (21, 47) gives Time To Strike, a short message for Darthalia.
- Accept Elixir of Suffering and Elixir of Pain from Apothecary Lydon (61, 19).
- Accept Battle of Hillsbrad from High Executor Darthalia (62, 20).
- Accept WANTED: Syndicate Personnel from WANTED (63, 21).
- Accept The Rescue from Krusk (63, 21).
- Get the Tarren Mill flight path, and make the inn your home.
The east: Durnholde and the hills (quests level 22-24). The gray bears and mountain lions are in the hills south of Tarren Mill; the Giant Moss Creepers are further west.
- Do Elixir of Suffering: Apothecary Lydon of Tarren Mill wants 10 Gray Bear Tongues and some Creeper Ichor. Find: Gray Bear Tongue from Gray Bear (62, 32); Creeper Ichor from Giant Moss Creeper (34, 58).
- Do Elixir of Pain: Bring 10 vials of Mountain Lion Blood to Apothecary Lydon in Tarren Mill. Find: Mountain Lion Blood from Starving Mountain Lion (53, 37).
- Do WANTED: Syndicate Personnel: Kill 10 Syndicate Rogues and 10 Syndicate Watchmen. Return to High Executor Darthalia in Tarren Mill for your reward. Find: Syndicate Rogue (level 21-22) (79, 44); Syndicate Watchman (level 20-21) (79, 43). Durnholde Keep is the Syndicate castle east of Tarren Mill. Drull and Tog'thar are held inside.
- Do The Rescue: Krusk in Tarren Mill needs you to free Drull and Tog'thar from Durnholde Keep. Find: Rescue Drull (75, 42); Rescue Tog'thar (80, 40). Durnholde Keep is the Syndicate castle east of Tarren Mill. Drull and Tog'thar are held inside.
- Turn in Elixir of Suffering to Apothecary Lydon (61, 19).
- Accept Elixir of Suffering from Apothecary Lydon (61, 19).
- Turn in Elixir of Suffering to Umpi (62, 19).
- Turn in Elixir of Pain to Apothecary Lydon (61, 19).
- Accept Elixir of Pain from Apothecary Lydon (61, 19).
- Turn in WANTED: Syndicate Personnel to High Executor Darthalia (62, 20).
- Turn in The Rescue to Krusk (63, 21).
The Hillsbrad farms (quests level 23-26). Ride west to the human farms.
- Do Battle of Hillsbrad: Kill 6 Hillsbrad Farmhands, 6 Hillsbrad Farmers, Farmer Ray and Farmer Getz and report back to Darthalia in Tarren Mill. Find: Hillsbrad Farmer (level 23-24) (33, 39); Hillsbrad Farmhand (level 22-23) (33, 39); Farmer Ray (level 23) (33, 35); Farmer Getz (level 24) (37, 39). The Hillsbrad farms are in the west of the zone, north of Hillsbrad town.
- Turn in Elixir of Pain to Stanley (33, 35).
- Turn in Battle of Hillsbrad to High Executor Darthalia (62, 20).
- Accept Battle of Hillsbrad from High Executor Darthalia (62, 20).
- Accept Souvenirs of Death from Deathguard Samsa (62, 20).
- Do Battle of Hillsbrad: Kill 15 Hillsbrad Peasants and report back to Darthalia in Tarren Mill. Find: Hillsbrad Peasant (level 24-25) (33, 44).
- Turn in Battle of Hillsbrad to High Executor Darthalia (62, 20).
- Accept Battle of Hillsbrad from High Executor Darthalia (62, 20).
- Do Battle of Hillsbrad: Kill Blacksmith Verringtan and 4 Hillsbrad Apprentice Blacksmiths. Retrieve a shipment of iron and report back to Darthalia in Tarren Mill. Find: Blacksmith Verringtan (level 26) (32, 44); Hillsbrad Apprentice Blacksmith (level 24-25) (32, 45); Shipment of Iron (32, 45).
- Turn in Battle of Hillsbrad to High Executor Darthalia (62, 20).
- Accept Battle of Hillsbrad from High Executor Darthalia (62, 20).
Hillsbrad town and the mine (quests level 26-30). Hillsbrad town is in the south-west of the zone.
- Accept Dangerous! from Dangerous! (63, 20).
- Do Battle of Hillsbrad: Kill Magistrate Burnside and 4 Hillsbrad Councilmen. Destroy the Hillsbrad Proclamation. Steal the Hillsbrad Town Registry. Report back to Darthalia in Tarren Mill afterwards. Find: Magistrate Burnside (level 30) (30, 42); Hillsbrad Councilman (level 25-26) (30, 42); Hillsbrad Proclamation destroyed (30, 42); Hillsbrad Town Registry (30, 42). The town hall is in the middle of Hillsbrad town.
- Turn in Battle of Hillsbrad to High Executor Darthalia (62, 20).
- Accept Battle of Hillsbrad from High Executor Darthalia (62, 20).
- Do Battle of Hillsbrad: Kill Foreman Bonds and 10 Hillsbrad Miners and report back to Darthalia in Tarren Mill. Find: Foreman Bonds (level 30) (31, 56); Hillsbrad Miner (level 26-27) (30, 56). The mine is south of Hillsbrad town.
- Do Souvenirs of Death: Deathguard Samsa of Tarren Mill wants 30 Hillsbrad Human Skulls. Find: Hillsbrad Human Skull from Hillsbrad Miner (30, 56). The mine is south of Hillsbrad town.
- Do Dangerous!: High Executor Darthalia of Tarren Mill is offering a bounty on Clerk Horrace Whitesteed, Citizen Wilkes, Miner Hackett and Farmer Kalaba. Find: Clerk Horrace Whitesteed (level 26) (30, 42); Citizen Wilkes (level 25) (33, 40); Miner Hackett (level 29) (31, 59); Farmer Kalaba (level 25) (36, 47). The mine is south of Hillsbrad town.
- Turn in Battle of Hillsbrad to High Executor Darthalia (62, 20).
- Turn in Souvenirs of Death to Deathguard Samsa (62, 20).
- Turn in Dangerous! to High Executor Darthalia (62, 20).
- Accept Elixir of Agony from Apothecary Lydon (61, 19).
- Elixir of Agony needs Mudsnout Blossoms. The quest data has no source for them, so check the quest page. Its follow-ups go through Undercity and end with an Elite step at level 30.
- Darthalia's next step, the Dun Garok assault, is an Elite quest - leave it unless you have a group.
Thousand Needles: Freewind Post, levels 25 to 30
Thousand Needles is the canyon south of the Barrens. Take the Great Lift down from the southern end of the Barrens; Freewind Post sits on the mesas in the middle of the zone. Every coordinate below is on the Thousand Needles map unless it says otherwise.
The Great Lift (quests level 25-28). The Great Lift is at the north-west of the zone, at about 32, 22.
- Turn in Calling in the Reserves to Grish Longrunner (32, 22) if you have it.
- Accept Message to Freewind Post from Brave Moonhorn (32, 22).
Freewind Post (quests level 24-29). Freewind Post is on the mesas in the middle of the zone.
- Turn in Message to Freewind Post to Cliffwatcher Longhorn (46, 51).
- Accept Pacify the Centaur from Cliffwatcher Longhorn (46, 51).
- Accept Alien Egg from Hagar Lightninghoof (45, 50).
- Accept Wind Rider from Elu (45, 49).
- Accept Wanted - Arnak Grimtotem from Wanted Poster - Arnak Grimtotem (46, 51).
- Get the Freewind Post flight path, and make the inn your home.
- Do Pacify the Centaur: Kill 12 Galak Scouts, 10 Galak Wranglers, and 6 Galak Windchasers, and then return to Cliffwatcher Longhorn in Freewind Post. Find: Galak Scout (level 24-25); Galak Wrangler (level 25-26); Galak Windchaser (level 24-25). The quest data has no spawn points for these centaurs; the only Galak spawn it lists is a Galak Messenger at about 39, 33, west of Freewind.
- Loot Assassination Note from Galak Messenger (39, 33) - it starts Assassination Plot. Right-click it to accept the quest.
- Do Alien Egg: Return the Alien Egg to Hagar Lightninghoof in Freewind Post. Find: Alien Egg (54, 53). The Alien Egg is east of Freewind.
- Turn in Pacify the Centaur to Cliffwatcher Longhorn (46, 51).
- Accept Grimtotem Spying from Cliffwatcher Longhorn (46, 51).
- Turn in Alien Egg to Hagar Lightninghoof (45, 50).
- Accept Serpent Wild from Hagar Lightninghoof (45, 50).
Darkcloud Pinnacle and Whitereach Post (quests level 26-29). Whitereach Post, the small camp in the west of the zone at about 22, 32, has Motega Firemane, Kanati Greycloud and Wizlo Bearingshiner.
- Do Grimtotem Spying: Locate and retrieve the three Secret Notes in Darkcloud Pinnacle. Find: Secret Note #1 from Document Chest (36, 41); Secret Note #2 from Document Chest (36, 41); Secret Note #3 from Document Chest (36, 41). Darkcloud Pinnacle is the Grimtotem stronghold north-west of Freewind.
- Accept Free at Last from Lakota Windsong (38, 26).
- Do Free at Last: Escort Lakota Windsong from the Darkcloud Pinnacle, and then talk to Thalia Amberhide at Freewind Post. Lakota Windsong is held in Darkcloud Pinnacle - escort her out.
- Do Wanted - Arnak Grimtotem: Slay Arnak Grimtotem and bring proof of your deed to Cliffwatcher Longhorn in Freewind Post. Find: Arnak's Hoof from Arnak Grimtotem (38, 27). Arnak Grimtotem is in Darkcloud Pinnacle too.
- Turn in Serpent Wild to Motega Firemane (22, 32).
- Accept Sacred Fire from Motega Firemane (22, 32).
- Turn in Assassination Plot to Kanati Greycloud (21, 32).
- Accept Protect Kanati Greycloud from Kanati Greycloud (21, 32).
- Do Protect Kanati Greycloud: Protect Kanati Greycloud from the centaur attack. The centaurs attack in waves - keep Kanati alive.
- Turn in Protect Kanati Greycloud to Kanati Greycloud (21, 32).
- Do Sacred Fire: Gather 10 bushels of Incendia Agave, and then consult Magatha Grimtotem on Elder Rise in Thunderbluff. Find: Incendia Agave (36, 36). The Incendia Agave grows north-west of Freewind.
- Accept Homeward Bound from Pao'ka Swiftmountain (18, 41).
- Do Homeward Bound: Escort Pao'ka Swiftmountain from Highperch, and then talk to Motega Firemane in Whitereach Post. Pao'ka Swiftmountain is at Highperch, the wyvern cliffs in the far west.
- Do Wind Rider: Bring 10 Highperch Wyvern Eggs to Elu in Freewind Post. Find: Highperch Wyvern Egg (13, 37). The Highperch Wyvern Eggs are on the same cliffs.
- Turn in Homeward Bound to Motega Firemane (22, 32).
- Sacred Fire is handed in to Magatha Grimtotem in Thunder Bluff. Its follow-up, Arikara, is Elite.
Back at Freewind (quests level 26-29). Hand everything in at Freewind.
- Turn in Free at Last to Thalia Amberhide (46, 52).
- Turn in Grimtotem Spying and Wanted - Arnak Grimtotem to Cliffwatcher Longhorn (46, 51).
- Turn in Wind Rider to Elu (45, 49).
- Dorn Plainstalker, on the planks north-east of Freewind (54, 42), offers Test of Faith. The tests after it are Elite.
The Shimmering Flats (quests level 30-31). The salt flats in the south-east of the zone are the last stop on the way to 30. The goblin racers are at about 78, 77.
- Accept Salt Flat Venom from Fizzle Brassbolts (78, 77).
- Accept Hardened Shells from Wizzle Brassbolts (78, 77).
- Accept Rocket Car Parts from Kravel Koalbeard (78, 77).
- Accept Load Lightening from Pozzik (80, 76).
- Do Salt Flat Venom: Bring 6 Salty Scorpid Venoms to Fizzle Brassbolts in the Shimmering Flats. Find: Salty Scorpid Venom from Scorpid Reaver (76, 56).
- Do Hardened Shells: Bring 9 Hardened Tortoise Shells to Wizzle Brassbolts in the Shimmering Flats. Find: Hardened Tortoise Shell from Sparkleshell Snapper (84, 60).
- Do Rocket Car Parts: Bring 30 Rocket Car Parts to Kravel Koalbeard in the Shimmering Flats. Find: Rocket Car Parts from Rocket Car Rubble (73, 59).
- Do Load Lightening: Get 10 Hollow Vulture Bones for Pozzik in the Shimmering Flats. Find: Hollow Vulture Bone from Salt Flats Scavenger (88, 66).
- Turn in Salt Flat Venom to Fizzle Brassbolts (78, 77).
- Turn in Hardened Shells to Wizzle Brassbolts (78, 77).
- Turn in Rocket Car Parts to Kravel Koalbeard (78, 77).
- Turn in Load Lightening to Pozzik (80, 76).
Alliance leveling guide: levels 1 to 30
The Alliance races start in three places and spread out more than the Horde: humans stay near Stormwind, Dwarves and Gnomes near Ironforge, and Night Elves in Kalimdor, until they meet in the Wetlands and Duskwood in their 20s. Here's the order of the zones for each race; the sections below are grouped by zone.
- Human: Elwynn Forest (1-10), Westfall (10-18), Redridge Mountains (15-25), Duskwood (20-30), with the Wetlands (20-30) as a second zone for your 20s.
- Dwarf and Gnome: Dun Morogh (1-11), Loch Modan (10-18), then Westfall (take the Deeprun Tram from Ironforge to Stormwind), Redridge Mountains, the Wetlands and Duskwood.
- Night Elf: Teldrassil (1-12), Darkshore (11-20), Ashenvale (19-30) and Stonetalon Mountains (20-28). Then take the boat from Auberdine to Menethil Harbor for the Wetlands, and Duskwood after that.
As with the Horde route, the zones in your 20s overlap. Duskwood, the Wetlands and Ashenvale all run to 30, so use whichever suits you and move on when the quests turn green.
Human: Northshire and Elwynn Forest, levels 1 to 10
Humans start at Northshire Abbey, in the small valley at the north of Elwynn Forest. You'll leave the valley at about level 5 and work out of Goldshire, the town on the road south of the abbey, until you're ready for Westfall at 10. Every coordinate below is on the Elwynn Forest map unless it says otherwise.
Northshire Valley (quests level 1-5). Talk to Deputy Willem right in front of the abbey, then work the valley around it. Your class trainer is inside the abbey.
- Accept A Threat Within from Deputy Willem (48, 43).
- Turn in A Threat Within to Marshal McBride (49, 42).
- Accept Kobold Camp Cleanup from Marshal McBride (49, 42).
- Accept Eagan Peltskinner and Brotherhood of Thieves from Deputy Willem (48, 43).
- Turn in Eagan Peltskinner to Eagan Peltskinner (49, 40).
- Accept Wolves Across the Border from Eagan Peltskinner (49, 40).
- Do Kobold Camp Cleanup: Kill 10 Kobold Vermin, then return to Marshal McBride. Find: Kobold Vermin (level 1-2) (49, 36). The kobolds are in the woods north of the abbey, the wolves all around it, and the Defias thugs east of it.
- Do Wolves Across the Border: Bring 8 pieces of Tough Wolf Meat to Eagan Peltskinner outside Northshire Abbey. Find: Tough Wolf Meat from Young Wolf (47, 42). The kobolds are in the woods north of the abbey, the wolves all around it, and the Defias thugs east of it.
- Do Brotherhood of Thieves: Bring 12 Red Burlap Bandanas to Deputy Willem outside the Northshire Abbey. Find: Red Burlap Bandana from Defias Thug (54, 47). The kobolds are in the woods north of the abbey, the wolves all around it, and the Defias thugs east of it.
- Turn in Kobold Camp Cleanup to Marshal McBride (49, 42).
- Accept Investigate Echo Ridge from Marshal McBride (49, 42).
- Turn in Wolves Across the Border to Eagan Peltskinner (49, 40).
- Accept Milly Osworth from Deputy Willem (48, 43).
- Turn in Brotherhood of Thieves to Deputy Willem (48, 43).
- Accept Bounty on Garrick Padfoot from Deputy Willem (48, 43).
- Turn in Milly Osworth to Milly Osworth (51, 39).
- Accept Milly's Harvest from Milly Osworth (51, 39).
- Do Investigate Echo Ridge: Kill 10 Kobold Workers, then report back to Marshal McBride. Find: Kobold Worker (level 3) (49, 35). Garrick Padfoot and the pumpkin patch are at the Defias camp east of the abbey.
- Do Bounty on Garrick Padfoot: Kill Garrick Padfoot and bring his head to Deputy Willem at Northshire Abbey. Find: Garrick's Head from Garrick Padfoot (58, 48). Garrick Padfoot and the pumpkin patch are at the Defias camp east of the abbey.
- Do Milly's Harvest: Bring 8 crates of Milly's Harvest to Milly Osworth at Northshire Abbey. Find: Milly's Harvest (54, 49). Garrick Padfoot and the pumpkin patch are at the Defias camp east of the abbey.
- Turn in Investigate Echo Ridge to Marshal McBride (49, 42).
- Accept Skirmish at Echo Ridge from Marshal McBride (49, 42).
- Turn in Bounty on Garrick Padfoot to Deputy Willem (48, 43).
- Turn in Milly's Harvest to Milly Osworth (51, 39).
- Accept Grape Manifest from Milly Osworth (51, 39).
- Turn in Grape Manifest to Brother Neals (50, 42).
- Do Skirmish at Echo Ridge: Kill 12 Kobold Laborers, then return to Marshal McBride at Northshire Abbey. Find: Kobold Laborer (level 3-4) (49, 28). Echo Ridge Mine is the kobold cave north of the abbey.
- Turn in Skirmish at Echo Ridge to Marshal McBride (49, 42).
- Accept Report to Goldshire from Marshal McBride (49, 42).
- Accept Rest and Relaxation from Falkhaan Isenstrider (46, 48).
Goldshire (quests level 5-7). Follow the road south out of Northshire to Goldshire.
- Turn in Report to Goldshire to Marshal Dughan (42, 66).
- Accept The Fargodeep Mine from Marshal Dughan (42, 66).
- Turn in Rest and Relaxation to Innkeeper Farley (44, 66).
- Make the Lion's Pride Inn your home.
- Accept Gold Dust Exchange and A Fishy Peril from Remy "Two Times" (42, 67).
- Accept Kobold Candles from William Pestle (43, 66).
- Turn in A Fishy Peril to Marshal Dughan (42, 66).
- Accept Further Concerns from Marshal Dughan (42, 66).
The southern farms and the Fargodeep Mine (quests level 5-8). The Maclure Vineyards and the Stonefield farm are south of Goldshire, across the road from each other. Maybell Maclure is at the vineyards.
- Accept Young Lovers from Maybell Maclure (at the Maclure Vineyards, near Billy Maclure).
- Do The Fargodeep Mine: Explore the Fargodeep Mine, then return to Marshal Dughan in Goldshire. The Fargodeep Mine is south of Goldshire, between the town and the farms.
- Do Gold Dust Exchange: Bring 10 Gold Dust to Remy "Two Times" in Goldshire. Gold Dust is gathered from Kobolds in Elwynn Forest. Find: Gold Dust from Kobold Tunneler (39, 81).
- Do Kobold Candles: Bring 8 Large Candles to William Pestle in Goldshire. Find: Large Candle from Kobold Tunneler (39, 81).
- Turn in Young Lovers to Tommy Joe Stonefield (near the Stonefield farm).
- Accept Speak with Gramma from Tommy Joe Stonefield (near the Stonefield farm).
- Turn in Speak with Gramma to Gramma Stonefield (35, 84).
- Accept Note to William from Gramma Stonefield (35, 84).
- Accept Lost Necklace from "Auntie" Bernice Stonefield (34, 84).
- Accept Princess Must Die! from Ma Stonefield (35, 84).
- Turn in Lost Necklace to Billy Maclure (43, 86).
- Accept Pie for Billy from Billy Maclure (43, 86).
- Do Pie for Billy: Bring 4 Chunks of Boar Meat to Auntie Bernice Stonefield at the Stonefield's Farm. Find: Chunk of Boar Meat from Longsnout (25, 83). Longsnout boars roam the fields west of the Stonefield farm.
- Turn in Pie for Billy to "Auntie" Bernice Stonefield (34, 84).
- Accept Back to Billy from "Auntie" Bernice Stonefield (34, 84).
- Turn in Back to Billy to Billy Maclure (43, 86).
- Accept Goldtooth from Billy Maclure (43, 86).
- Do Goldtooth: Bring Bernice's Necklace to "Auntie" Bernice Stonefield at the Stonefield Farm. Find: Bernice's Necklace from Goldtooth (42, 78). Goldtooth is a kobold inside the Fargodeep Mine.
- Turn in Goldtooth to "Auntie" Bernice Stonefield (34, 84).
Back to Goldshire and the lake (quests level 7-10). Hand in at Goldshire, then go east to the lake. Maybell is back at the vineyards to the south.
- Turn in Note to William to William Pestle (43, 66).
- Accept Collecting Kelp from William Pestle (43, 66).
- Turn in The Fargodeep Mine to Marshal Dughan (42, 66).
- Accept The Jasperlode Mine from Marshal Dughan (42, 66).
- Turn in Gold Dust Exchange to Remy "Two Times" (42, 67).
- Turn in Kobold Candles to William Pestle (43, 66).
- Accept Shipment to Stormwind from William Pestle (43, 66).
- Shipment to Stormwind is handed in to Morgan Pestle in Stormwind - take it on your first visit to the city.
- Do Collecting Kelp: Bring 4 Crystal Kelp Fronds to William Pestle in Goldshire. Find: Crystal Kelp Frond from Murloc (54, 67). The murlocs are around the lake east of Goldshire.
- Turn in Collecting Kelp to William Pestle (43, 66).
- Accept The Escape from William Pestle (43, 66).
- Turn in The Escape to Maybell Maclure (at the Maclure Vineyards, near Billy Maclure).
- Do The Jasperlode Mine: Explore the Jasperlode Mine, then report back to Marshal Dughan in Goldshire. The Jasperlode Mine is north-east of Goldshire. The quest data has no map point for the mine, so check the in-game quest text.
- Turn in The Jasperlode Mine to Marshal Dughan (42, 66).
- Accept Westbrook Garrison Needs Help! from Marshal Dughan (42, 66).
Eastvale and the eastern bridge (quests level 8-10). Guard Thomas stands at the bridge in the east of Elwynn (74, 72). Sara Timberlain and Supervisor Raelen are at the Eastvale logging camp, north-east of him.
- Turn in Further Concerns to Guard Thomas (74, 72).
- Accept Find the Lost Guards, Bounty on Murlocs and Protect the Frontier from Guard Thomas (74, 72).
- Do Find the Lost Guards: Guard Thomas wants you to travel north up the river and search for the two lost guards, Rolf and Malakai. Follow the river north from the bridge.
- Turn in Find the Lost Guards to A half-eaten body (73, 60).
- Accept Discover Rolf's Fate from A half-eaten body (73, 60).
- Turn in Discover Rolf's Fate to Rolf's corpse (80, 56).
- Accept Report to Thomas from Rolf's corpse (80, 56).
- Do Bounty on Murlocs: Bring 8 Torn Murloc Fins to Guard Thomas at the east Elwynn bridge. Find: Torn Murloc Fin from Murloc Lurker (79, 50). The murlocs are along the river north of the bridge; the prowlers are in the south-east corner of the zone.
- Do Protect the Frontier: Kill 8 Prowlers and 5 Young Forest Bears, and then return to Guard Thomas at the east Elwynn bridge. Find: Prowler (level 9-10) (81, 80); Young Forest Bear (level 8-9) (48, 78). The murlocs are along the river north of the bridge; the prowlers are in the south-east corner of the zone.
- Accept A Bundle of Trouble from Supervisor Raelen (81, 66).
- Accept Red Linen Goods from Sara Timberlain (80, 69).
- Do A Bundle of Trouble: Bring 8 Bundles of Wood to Raelen at the Eastvale Logging Camp. Find: Bundle of Wood (80, 60). The bundles of wood are in the Eastvale logging camp.
- Turn in A Bundle of Trouble to Supervisor Raelen (81, 66).
- Turn in Report to Thomas to Guard Thomas (74, 72).
- Accept Deliver Thomas' Report from Guard Thomas (74, 72).
- Turn in Bounty on Murlocs and Protect the Frontier to Guard Thomas (74, 72).
- Do Princess Must Die!: Kill Princess, grab her collar, then bring it back to Ma Stonefield at the Stonefield Farm. Find: Brass Collar from Princess (70, 79). Princess is a pig in the farm south-west of the bridge.
Westbrook Garrison and leaving Elwynn (quests level 9-10). Hand in at the Stonefield farm and Goldshire on the way west. The Westbrook Garrison is on the road west of Goldshire (24, 74).
- Turn in Princess Must Die! to Ma Stonefield (35, 84).
- Turn in Deliver Thomas' Report to Marshal Dughan (42, 66).
- Accept Cloth and Leather Armor from Marshal Dughan (42, 66).
- Cloth and Leather Armor goes to Sara Timberlain at the Eastvale logging camp - hand it in if you pass that way, or skip it.
- Turn in Westbrook Garrison Needs Help! to Deputy Rainer (24, 74).
- Accept Riverpaw Gnoll Bounty from Deputy Rainer (24, 74).
- The Wanted poster for Wanted: "Hogger" is at the garrison, but Hogger is an Elite gnoll - bring a group.
- Do Riverpaw Gnoll Bounty: Bring 8 Painted Gnoll Armbands to Deputy Rainer at the Barracks. Find: Painted Gnoll Armband from Riverpaw Outrunner (68, 42). The data's best spot for the armbands is the Riverpaw camp north-east of Goldshire; the Defias bandits are north of Westbrook.
- Do Red Linen Goods: Bring 6 Red Linen Bandanas to Sara Timberlain at the Eastvale Logging Camp. Find: Red Linen Bandana from Defias Bandit (28, 60). The data's best spot for the armbands is the Riverpaw camp north-east of Goldshire; the Defias bandits are north of Westbrook.
- Turn in Riverpaw Gnoll Bounty to Deputy Rainer (24, 74).
- Turn in Red Linen Goods to Sara Timberlain (80, 69).
- A Gold Pickup Schedule can drop from the Riverpaw gnolls - it starts The Collector, which leads to Manhunt.
Dwarf and Gnome: Dun Morogh, levels 1 to 11
Dwarves and Gnomes both start in Coldridge Valley, in the south-west of Dun Morogh. You'll come out of the valley at about level 5 and work around Kharanos, the dwarf town on the main road, until you head east to Loch Modan at 10 or 11. Every coordinate below is on the Dun Morogh map unless it says otherwise.
Coldridge Valley (quests level 1-5). Talk to Sten Stoutarm where you appear, then work south and west through the valley.
- Accept Dwarven Outfitters from Sten Stoutarm (30, 71).
- Do Dwarven Outfitters: Sten Stoutarm would like 8 pieces of Tough Wolf Meat. Find: Tough Wolf Meat from Ragged Young Wolf (29, 74).
- Turn in Dwarven Outfitters to Sten Stoutarm (30, 71).
- Accept A New Threat from Balir Frosthammer (30, 71).
- Accept Coldridge Valley Mail Delivery from Sten Stoutarm (30, 71).
- Do A New Threat: Balir Frosthammer wants you to kill 6 Rockjaw Troggs and 6 Burly Rockjaw Troggs. Find: Rockjaw Trogg (level 1-2) (30, 76); Burly Rockjaw Trogg (level 2) (25, 74). The troggs are just south of the camp.
- Turn in A New Threat to Balir Frosthammer (30, 71).
- Turn in Coldridge Valley Mail Delivery to Talin Keeneye (23, 71).
- Accept The Boar Hunter and Coldridge Valley Mail Delivery from Talin Keeneye (23, 71).
- Do The Boar Hunter: Talin Keeneye would like you to kill 12 Small Crag Boars. Find: Small Crag Boar (level 3) (23, 72).
- Turn in The Boar Hunter to Talin Keeneye (23, 71).
- Turn in Coldridge Valley Mail Delivery to Grelin Whitebeard (25, 76).
- Accept The Troll Cave from Grelin Whitebeard (25, 76).
- Accept Scalding Mornbrew Delivery from Nori Pridedrift (25, 76).
- Turn in Scalding Mornbrew Delivery to Durnan Furcutter (29, 66).
- Accept Bring Back the Mug from Durnan Furcutter (29, 66).
- Turn in Bring Back the Mug to Nori Pridedrift (25, 76).
- Accept A Refugee's Quandary from Felix Whindlebolt (28, 68).
- Do A Refugee's Quandary: Bring Felix's Box, Felix's Chest and Felix's Bucket of Bolts to Felix Whindlebolt in Anvilmar. Find: Felix's Box (21, 76); Felix's Chest (23, 80); Felix's Bucket of Bolts (26, 79).
- Turn in A Refugee's Quandary to Felix Whindlebolt (28, 68).
- Do The Troll Cave: Grelin Whitebeard would like you to kill 14 Frostmane Troll Whelps. Find: Frostmane Troll Whelp (level 3-4) (26, 80). The Frostmane trolls are in the cave south of Grelin's camp.
- Turn in The Troll Cave to Grelin Whitebeard (25, 76).
- Accept The Stolen Journal from Grelin Whitebeard (25, 76).
- Do The Stolen Journal: Grelin Whitebeard wants you to kill Grik'nir the Cold, and retrieve his journal. Find: Grelin Whitebeard's Journal from Grik'nir the Cold (30, 80). Grik'nir the Cold is at the back of the same cave.
- Turn in The Stolen Journal to Grelin Whitebeard (25, 76).
- Accept Senir's Observations from Grelin Whitebeard (25, 76).
- Turn in Senir's Observations to Mountaineer Thalos (34, 72).
- Accept Senir's Observations from Mountaineer Thalos (34, 72).
- Accept Supplies to Tannok from Hands Springsprocket (34, 72).
Kharanos (quests level 5-8). Leave the valley by the tunnel north-east of Coldridge and follow the road east to Kharanos.
- Turn in Senir's Observations to Senir Whitebeard (47, 54).
- Accept Frostmane Hold from Senir Whitebeard (47, 54).
- Turn in Supplies to Tannok to Tannok Frosthammer (47, 52).
- Accept Beer Basted Boar Ribs from Ragnar Thunderbrew (47, 52).
- Accept Tools for Steelgrill from Tharek Blackstone (46, 52).
- Turn in Tools for Steelgrill to Beldin Steelgrill (50, 49).
- Accept Stocking Jetsteam from Pilot Bellowfiz (49, 48).
- Accept The Grizzled Den from Pilot Stonegear (50, 49).
- Accept Ammo for Rumbleshot from Loslor Rudge (50, 49).
- Accept Operation Recombobulation from Razzle Sprysprocket (46, 49).
- Make the Thunderbrew Distillery your home.
- Do Stocking Jetsteam: Gather 4 Chunks of Boar Meat and 2 Thick Bear Furs, and deliver them to Pilot Bellowfiz at Steelgrill's Depot. Find: Chunk of Boar Meat from Large Crag Boar (38, 51); Thick Bear Fur from Young Black Bear (45, 55). Crag boars and young black bears are all around Kharanos.
- Do Beer Basted Boar Ribs: Ragnar Thunderbrew in Kharanos wants 6 Crag Boar Ribs and a mug of Rhapsody Malt. Find: Crag Boar Rib from Large Crag Boar (38, 51); Rhapsody Malt. The quest data lists no source for the Rhapsody Malt - check the quest page or the Kharanos vendors.
- Turn in Beer Basted Boar Ribs to Ragnar Thunderbrew (47, 52).
- Do Ammo for Rumbleshot: Bring Rumbleshot's Ammo to Hegnar Rumbleshot in Dun Morogh. Find: Rumbleshot's Ammo from Ammo Crate (44, 57). The ammo crate is south-west of Kharanos.
- Turn in Ammo for Rumbleshot to Hegnar Rumbleshot (41, 65).
- Do The Grizzled Den: Gather 8 Wendigo Manes and bring them to Pilot Stonegear. Find: Wendigo Mane from Wendigo (42, 49). The Grizzled Den is the wendigo cave west of Kharanos.
- Turn in The Grizzled Den to Pilot Stonegear (50, 49).
- Turn in Stocking Jetsteam to Pilot Bellowfiz (49, 48).
- Accept Evershine from Pilot Bellowfiz (49, 48).
Brewnall Village and the west (quests level 6-10). Brewnall Village is on the lake west of Kharanos, where Rejold and Marleth Barleybrew are.
- Turn in Evershine to Rejold Barleybrew (30, 46).
- Accept A Favor for Evershine from Rejold Barleybrew (30, 46).
- Accept Bitter Rivals from Marleth Barleybrew (30, 46).
- Accept The Perfect Stout from Rejold Barleybrew (30, 46).
- Do Bitter Rivals: In the basement of the Thunderbrew Distillery in Kharanos, replace a barrel of Thunder Ale with a Barrel of Barleybrew Scalder. The Thunder Ale barrel is in the Thunderbrew Distillery in Kharanos.
- Turn in Bitter Rivals to Unguarded Thunder Ale Barrel (48, 53).
- Accept Return to Marleth from Unguarded Thunder Ale Barrel (48, 53).
- Turn in Return to Marleth to Marleth Barleybrew (30, 46).
- Do The Perfect Stout: Bring 6 Shimmerweeds to Rejold Barleybrew in the Brewnall Village. Find: Shimmerweed from Shimmerweed Basket (42, 35). The Shimmerweed baskets are on the hills north-west of Kharanos.
- Do Frostmane Hold: Explore Frostmane Hold, and kill 5 Frostmane Headhunters for Senir Whitebeard in Kharanos. Find: Frostmane Headhunter (level 8-9) (24, 52). Frostmane Hold is the troll cave west of Kharanos, south of Brewnall.
- Turn in The Perfect Stout to Rejold Barleybrew (30, 46).
- Accept Shimmer Stout from Rejold Barleybrew (30, 46).
- Do A Favor for Evershine: Kill 6 Ice Claw Bears, 8 Elder Crag Boars, and 8 Snow Leopards, and then return to Rejold Barleybrew in Brewnall Village. Find: Ice Claw Bear (level 7-8) (30, 46); Elder Crag Boar (level 7-8) (60, 57); Snow Leopard (level 7-8) (55, 58). The Ice Claw bears are around Brewnall, and the elder boars and snow leopards are east of Kharanos.
- Turn in A Favor for Evershine to Rejold Barleybrew (30, 46).
- Accept Return to Bellowfiz from Rejold Barleybrew (30, 46).
- Turn in Frostmane Hold to Senir Whitebeard (47, 54).
- Accept The Reports from Senir Whitebeard (47, 54).
- The Reports is handed in to Senator Barin Redstone in Ironforge.
Kharanos and Ironforge (quests level 7-10). Hand in at Kharanos, then visit Ironforge, which is up the road north of Kharanos.
- Turn in Return to Bellowfiz to Pilot Bellowfiz (49, 48).
- Do Operation Recombobulation: Bring Razzle Sprysprocket in Kharanos 8 Restabilization Cogs and 8 Gyromechanic Gears. Find: Restabilization Cog from Leper Gnome (26, 40); Gyromechanic Gear from Leper Gnome (26, 40). The leper gnomes are in the north-west of the zone, outside Gnomeregan.
- Turn in Operation Recombobulation to Razzle Sprysprocket (46, 49).
- Turn in The Reports to Senator Barin Redstone (40, 58 in Ironforge).
- Train your class and professions in Ironforge, and get the Ironforge flight path.
Eastern Dun Morogh (quests level 9-12). Follow the road east past Kharanos. Foreman Stonebrow and Senator Mehr Stonehallow are at the Gol'Bolar Quarry (69, 56); Pilot Hammerfoot is further east (84, 39), and Mountaineer Barleybrew guards the tunnel to Loch Modan (86, 49).
- Accept Those Blasted Troggs! from Foreman Stonebrow (69, 56).
- Accept The Public Servant from Senator Mehr Stonehallow (69, 56).
- Do Those Blasted Troggs!: Kill 6 Rockjaw Skullthumpers for Foreman Stonebrow at the Gol'Bolar quarry. Find: Rockjaw Skullthumper (level 8-9) (71, 55). The Rockjaw troggs are in the quarry around Stonebrow and the Senator.
- Do The Public Servant: Kill 10 Rockjaw Bonesnappers for Senator Mehr Stonehallow at the Gol'Bolar quarry. Find: Rockjaw Bonesnapper (level 9-10) (73, 54). The Rockjaw troggs are in the quarry around Stonebrow and the Senator.
- Turn in Those Blasted Troggs! to Foreman Stonebrow (69, 56).
- Turn in The Public Servant to Senator Mehr Stonehallow (69, 56).
- Accept The Lost Pilot from Pilot Hammerfoot (84, 39).
- Turn in The Lost Pilot to A Dwarven Corpse (80, 36).
- Accept A Pilot's Revenge from A Dwarven Corpse (80, 36).
- Do A Pilot's Revenge: Kill Mangeclaw. Bring his Mangy Claw and Hildelve's Journal to Pilot Hammerfoot. Find: Mangy Claw from Mangeclaw (78, 38). Mangeclaw is a wolf near the dwarven corpse.
- Turn in A Pilot's Revenge to Pilot Hammerfoot (84, 39).
- Turn in Shimmer Stout to Mountaineer Barleybrew (86, 49).
- Accept Stout to Kadrell from Mountaineer Barleybrew (86, 49).
- Stout to Kadrell goes to Mountaineer Kadrell in Thelsamar, the first town in Loch Modan - keep it for the next zone.
Night Elf: Teldrassil, levels 1 to 12
Night elves start in Shadowglen, at the east of Teldrassil. You'll leave at about level 5 for Dolanaar, the town in the middle of the island, and finish around Lake Al'Ameth and the north before heading to Darkshore. Every coordinate below is on the Teldrassil map unless it says otherwise.
Shadowglen (quests level 1-5). Talk to Conservator Ilthalaine where you appear. Aldrassil, the great tree in the middle of Shadowglen, has your class trainer and Tenaron Stormgrip at the top.
- Accept The Balance of Nature from Conservator Ilthalaine (59, 44).
- Accept The Woodland Protector from Melithar Staghelm (60, 42).
- Turn in The Woodland Protector to Tarindrella (58, 45).
- Accept The Woodland Protector from Tarindrella (58, 45).
- Accept A Good Friend from Dirania Silvershine (61, 42).
- Accept Webwood Venom from Gilshalan Windwalker (58, 42).
- Do The Balance of Nature: Kill 7 Young Nightsabers and 4 Young Thistle Boars and return to Conservator Ilthalaine. Find: Young Nightsaber (level 1) (61, 43); Young Thistle Boar (level 1-2) (59, 43).
- Do The Woodland Protector: Collect 8 Fel Moss and bring them to Tarindrella. Find: Fel Moss from Grellkin (55, 41).
- Turn in The Balance of Nature to Conservator Ilthalaine (59, 44).
- Accept The Balance of Nature from Conservator Ilthalaine (59, 44).
- Turn in The Woodland Protector to Tarindrella (58, 45).
- Turn in A Good Friend to Iverron (55, 33).
- Accept A Friend in Need from Iverron (55, 33).
- Turn in A Friend in Need to Dirania Silvershine (61, 42).
- Accept Iverron's Antidote from Dirania Silvershine (61, 42).
- Do Iverron's Antidote: Collect 7 Hyacinth Mushrooms, 4 Moonpetal Lilies, and 1 Webwood Ichor for Dirania Silveshine in Shadowglen. Find: Hyacinth Mushroom (59, 42); Moonpetal Lily (58, 38); Webwood Ichor from Webwood Spider (57, 29). The webwood spiders are in the cave north of Shadowglen.
- Do Webwood Venom: Bring 10 Webwood Venom Sacs to Gilshalan Windwalker at Aldrassil. Find: Webwood Venom Sac from Webwood Spider (57, 29). The webwood spiders are in the cave north of Shadowglen.
- Do The Balance of Nature: Conservator Ilthalaine needs you to kill 7 Mangy Nightsabers and 7 Thistle Boars. Find: Mangy Nightsaber (level 2) (61, 36); Thistle Boar (level 2-3) (59, 36). The webwood spiders are in the cave north of Shadowglen.
- Turn in Iverron's Antidote to Dirania Silvershine (61, 42).
- Accept Iverron's Antidote from Dirania Silvershine (61, 42).
- Turn in Iverron's Antidote to Iverron (55, 33).
- Turn in Webwood Venom to Gilshalan Windwalker (58, 42).
- Accept Webwood Egg from Gilshalan Windwalker (58, 42).
- Do Webwood Egg: Bring a Webwood Egg to Gilshalan in Aldrassil. Find: Webwood Egg from Webwood Eggs (57, 26). The eggs are deeper in the same cave.
- Turn in The Balance of Nature to Conservator Ilthalaine (59, 44).
- Turn in Webwood Egg to Gilshalan Windwalker (58, 42).
- Accept Tenaron's Summons from Gilshalan Windwalker (58, 42).
- Turn in Tenaron's Summons to Tenaron Stormgrip (59, 39).
- Accept Crown of the Earth from Tenaron Stormgrip (59, 39).
- Do Crown of the Earth: Fill the Crystal Phial and bring it back to Tenaron Stormgrip atop Aldrassil. Find: Filled Crystal Phial. The quest data has no map point for the moonwell, so check the in-game quest text.
- Turn in Crown of the Earth to Tenaron Stormgrip (59, 39).
- Accept Crown of the Earth from Tenaron Stormgrip (59, 39).
- Accept Dolanaar Delivery from Porthannius (61, 48).
Dolanaar (quests level 4-7). Follow the road south out of Shadowglen to Dolanaar.
- Turn in Dolanaar Delivery to Innkeeper Keldamyr (56, 60).
- Turn in Crown of the Earth to Corithras Moonrage (56, 62).
- Accept Crown of the Earth from Corithras Moonrage (56, 62).
- Make Dolanaar your home.
- Accept A Troubling Breeze from Athridas Bearmantle (56, 57).
- Accept The Emerald Dreamcatcher and Twisted Hatred from Tallonkai Swiftroot (56, 57).
- Accept Denalan's Earth from Syral Bladeleaf (56, 58).
- Accept The Road to Darnassus from Moon Priestess Amara (55, 58).
- Accept Zenn's Bidding from Zenn Foulhoof (60, 56).
- Do The Road to Darnassus: Slay 6 Gnarlpine Ambushers and return to Sentinel Amara Nightwalker outside of Dolanaar. Find: Gnarlpine Ambusher (level 6-7) (46, 53). The Gnarlpine ambushers are on the road west of Dolanaar.
- Do Zenn's Bidding: Bring Zenn Foulhoof outside of Dolanaar 3 Nightsaber Fangs, 3 Strigid Owl Feathers and 3 swatches of Webwood Spider Silk. Find: Nightsaber Fang from Nightsaber (52, 60); Strigid Owl Feather from Strigid Owl (54, 59); Webwood Spider Silk from Webwood Lurker (64, 60). Nightsabers, owls and Webwood lurkers are all around Dolanaar.
- Do Crown of the Earth: Fill the Jade Phial and bring it back to Corithras Moonrage in Dolanaar. Find: Filled Jade Phial. The quest data has no map point for the moonwell, so check the in-game quest text.
- Turn in The Road to Darnassus to Moon Priestess Amara (55, 58).
- Turn in Crown of the Earth to Corithras Moonrage (56, 62).
- Accept Crown of the Earth from Corithras Moonrage (56, 62).
- Turn in Zenn's Bidding to Zenn Foulhoof (60, 56).
- Accept Seek Redemption! from Syral Bladeleaf (56, 58).
Lake Al'Ameth and the Gnarlpine camps (quests level 6-9). Denalan is on the shore of Lake Al'Ameth (61, 68), south-east of Dolanaar. Gaerolas Talvethren is in the hills east of the lake (66, 58).
- Turn in Denalan's Earth to Denalan (61, 68).
- Accept Timberling Seeds and Timberling Sprouts from Denalan (61, 68).
- Do Timberling Sprouts: Bring 12 Timberling Sprouts to Denalan at Lake Al'Ameth. Find: Timberling Sprout (56, 70). The sprouts are on the lakeshore around Denalan.
- Turn in Timberling Sprouts to Denalan (61, 68).
- Turn in A Troubling Breeze to Gaerolas Talvethren (66, 58).
- Accept Gnarlpine Corruption from Gaerolas Talvethren (66, 58).
- Do The Emerald Dreamcatcher: Bring the Emerald Dreamcatcher to Tallonkai Swiftroot in Dolanaar. Find: Emerald Dreamcatcher from Tallonkai's Dresser (68, 60). Tallonkai's Dresser is east of Dolanaar.
- Do Seek Redemption!: Collect 3 Fel Cones and give them to Zenn Foulhoof outside of Dolanaar. Find: Fel Cone (53, 62). The Fel Cones are on the ground south-west of Dolanaar.
- Do Twisted Hatred: Kill Lord Melenas and bring his head to Tallonkai Swiftroot in Dolanaar. Find: Melenas' Head from Lord Melenas (52, 50). Lord Melenas is north-west of Dolanaar.
- Turn in Gnarlpine Corruption to Athridas Bearmantle (56, 57).
- Accept The Relics of Wakening from Athridas Bearmantle (56, 57).
- Turn in The Emerald Dreamcatcher and Twisted Hatred to Tallonkai Swiftroot (56, 57).
- Accept Ferocitas the Dream Eater from Tallonkai Swiftroot (56, 57).
- Do Ferocitas the Dream Eater: Tallonkai Swiftroot in Dolanaar wants you to kill 7 Gnarlpine Mystics and find the Missing Jewel. Find: Gnarlpine Mystic (level 6-7) (69, 53); Tallonkai's Jewel. The Gnarlpine mystics are east of Dolanaar.
- Turn in Ferocitas the Dream Eater to Tallonkai Swiftroot (56, 57).
- Turn in Seek Redemption! to Zenn Foulhoof (60, 56).
The Ban'ethil Barrow Den (quests level 8-10). Oben Rageclaw waits at the entrance to the barrow den (45, 62).
- Accept The Sleeping Druid from Oben Rageclaw (45, 62).
- Do The Relics of Wakening: Retrieve the Relics of Wakening and bring them to Athridas Bearmantle in Dolanaar. Find: Raven Claw Talisman from Chest of the Raven Claw (46, 57); Black Feather Quill from Chest of the Black Feather (44, 61); Sapphire of Sky from Chest of the Sky (45, 62); Rune of Nesting from Chest of Nesting (44, 61). The four chests are inside the barrow den west of Dolanaar.
- Do The Sleeping Druid: Bring a Shaman Voodoo Charm to Oben Rageclaw in the Ban'ethil Barrow Den. Find: Shaman Voodoo Charm from Gnarlpine Shaman (45, 60).
- Turn in The Sleeping Druid to Oben Rageclaw (45, 62).
- Accept Druid of the Claw from Oben Rageclaw (45, 62).
- Do Druid of the Claw: Oben Rageclaw wants you to kill his soulless body, and then use the Voodoo Charm. Find: Rageclaw (level 10) (46, 59). Rageclaw is in the lower part of the barrow den.
- Turn in Druid of the Claw to Oben Rageclaw (45, 62).
- Turn in The Relics of Wakening to Athridas Bearmantle (56, 57).
- Accept Ursal the Mauler from Athridas Bearmantle (56, 57).
- Ursal the Mauler sends you after Ursal the Mauler at about 39, 80 in the south-west; do it now or at the end of the zone.
The north and Darnassus (quests level 9-12). Work north towards Darnassus. Rellian Greenspyre and Arch Druid Fandral Staghelm are in Darnassus.
- Do Timberling Seeds: Bring 8 Timberling Seeds to Denelan at Lake Al'Ameth. Find: Timberling Seed from Elder Timberling (44, 27). The Elder Timberlings are in the north of the island.
- Turn in Timberling Seeds to Denalan (61, 68).
- Accept Rellian Greenspyre from Denalan (61, 68).
- Do Crown of the Earth: Fill the Tourmaline Phial and bring it back to Corithras Moonrage in Dolanaar. Find: Filled Tourmaline Phial. The quest data has no map point for the moonwell, so check the in-game quest text.
- Turn in Crown of the Earth to Corithras Moonrage (56, 62).
- Accept Crown of the Earth from Corithras Moonrage (56, 62).
- Accept The Enchanted Glade from Sentinel Arynia Cloudsbreak (38, 34).
- Do The Enchanted Glade: Acquire 6 Bloodfeather Belts and bring them to Sentinel Arynia Cloudsbreak in the Oracle Glade. Find: Bloodfeather Belt from Bloodfeather Rogue (36, 38). The Bloodfeather harpies are around Sentinel Arynia Cloudsbreak in the Oracle Glade.
- Turn in The Enchanted Glade to Sentinel Arynia Cloudsbreak (38, 34).
- Accept Teldrassil from Sentinel Arynia Cloudsbreak (38, 34).
- Accept Mist from Mist (32, 32).
- Do Mist: Escort Mist to Sentinel Arynia Cloudsbreak at the moon well near the Oracle Tree. Mist is just west of Arynia - escort her back.
- Turn in Mist to Sentinel Arynia Cloudsbreak (38, 34).
- Turn in Rellian Greenspyre to Rellian Greenspyre (38, 22 in Darnassus).
- Accept Tumors from Rellian Greenspyre (38, 22 in Darnassus).
- Do Tumors: Bring 5 Mossy Tumors to Rellian Greenspyre in Darnassus. Find: Mossy Tumor from Elder Timberling (44, 27).
- Turn in Tumors to Rellian Greenspyre (38, 22 in Darnassus).
- Accept Return to Denalan from Rellian Greenspyre (38, 22 in Darnassus).
- Turn in Return to Denalan to Denalan (61, 68).
- Denalan then offers Oakenscowl, an Elite fight - group up for it or skip it.
- Do Crown of the Earth: Fill the Amethyst Phial and bring it back to Corithras Moonrage in Dolanaar. Find: Filled Amethyst Phial. The quest data has no map point for the moonwell, so check the in-game quest text.
- Do Ursal the Mauler: Kill Ursal the Mauler and return to Athridas Bearmantle in Dolanaar. Find: Ursal the Mauler (level 12) (39, 80).
- Turn in Crown of the Earth to Corithras Moonrage (56, 62).
- Accept Crown of the Earth from Corithras Moonrage (56, 62).
- Turn in Ursal the Mauler to Athridas Bearmantle (56, 57).
- Turn in Crown of the Earth and Teldrassil to Arch Druid Fandral Staghelm (35, 9 in Darnassus).
- Train your class in Darnassus, and get your first look at the city.
To Darkshore (level 11-12). Darkshore is across the water from Teldrassil.
- Head down to Rut'theran Village at the foot of Teldrassil. In Darnassus, Mydrannul starts Nessa Shadowsong, which sends you to Nessa Shadowsong in Rut'theran and then on The Bounty of Teldrassil, Flight to Auberdine and Return to Nessa - a free ride that teaches you the flight path to Auberdine in Darkshore.
- Take the boat or the hippogryph from Rut'theran to Auberdine.
Westfall: Sentinel Hill, levels 10 to 18
Westfall is the farmland west of Elwynn Forest, overrun by the Defias Brotherhood. Sentinel Hill, the stone tower in the middle of the zone, is your base. Humans come here straight from Elwynn; Dwarves and Gnomes can take the Deeprun Tram from Ironforge to Stormwind and walk west. Every coordinate below is on the Westfall map unless it says otherwise.
The northern farms (quests level 9-12). Follow the road west out of Elwynn. Farmer and Verna Furlbrow are at the first farm (60, 19); the Saldeans' farm is just south of it (56, 30).
- Accept Westfall Stew from Verna Furlbrow (60, 19).
- Accept The Forgotten Heirloom from Farmer Furlbrow (60, 19).
- If a Westfall Deed drops from the Defias, it starts Furlbrow's Deed - hand it to Farmer Furlbrow here.
- Turn in Westfall Stew to Salma Saldean (56, 30).
- Accept Westfall Stew and Goretusk Liver Pie from Salma Saldean (56, 30).
- Accept The Killing Fields and Report to Gryan Stoutmantle from Farmer Saldean (56, 31).
Sentinel Hill (quests level 10-12). Follow the road south to Sentinel Hill.
- Turn in Report to Gryan Stoutmantle to Gryan Stoutmantle (56, 48).
- Accept The People's Militia from Gryan Stoutmantle (56, 48).
- Accept Patrolling Westfall from Captain Danuvin (56, 48).
- Accept Red Leather Bandanas from Scout Galiaan (54, 53).
- Make Sentinel Hill your home, and get the flight path from Thor.
- Accept A Swift Message from Quartermaster Lewis (57, 47).
- A Swift Message and its follow-ups (Continue to Stormwind, Dungar Longdrink and Return to Lewis) are a free return flight to Stormwind that teaches you the route. They pay a little XP; do them when you next need the city.
The northern fields (quests level 10-14). Work the farms in the north of the zone.
- Accept Poor Old Blanchy from Verna Furlbrow (60, 19).
- Do The Forgotten Heirloom: Farmer Furlbrow wants you to retrieve his pocket watch from the wardrobe in his farmhouse at the pumpkin farm to the West. Find: Furlbrow's Pocket Watch from Furlbrow's Wardrobe (49, 19). The wardrobe is in the farmhouse west of the Furlbrows.
- Do Poor Old Blanchy: Verna Furlbrow in Westfall wants you to bring her 8 Handfuls of Oats. Find: Handful of Oats from Sack of Oats (55, 18). The sacks of oats are in the field next to the Furlbrows' farm.
- Do The People's Militia: Gryan Stoutmantle wants you to kill 15 Defias Trappers and 15 Defias Smugglers then return to him on Sentinel Hill. Find: Defias Trapper (level 12-13) (48, 43); Defias Smuggler (level 11-12) (46, 22). Defias smugglers are in the north of the zone; the trappers are north-west of Sentinel Hill.
- Do The Killing Fields: Farmer Saldean wants you to kill 20 Harvest Watchers. Find: Harvest Watcher (level 14-15) (38, 51). Harvest Watchers walk the fields west of Sentinel Hill.
- Turn in The Forgotten Heirloom to Farmer Furlbrow (60, 19).
- Turn in Poor Old Blanchy to Verna Furlbrow (60, 19).
Sentinel Hill and the middle farms (quests level 12-15). Hand in and push into the middle of the zone.
- Turn in The People's Militia to Gryan Stoutmantle (56, 48).
- Accept The People's Militia from Gryan Stoutmantle (56, 48).
- Turn in The Killing Fields to Farmer Saldean (56, 31).
- Do Goretusk Liver Pie: Salma Saldean needs 8 Goretusk livers to make a Goretusk Liver Pie. Find: Goretusk Liver from Great Goretusk (56, 67). Goretusks, vultures and Harvest Watchers are all around Sentinel Hill; the murlocs are on the coast to the west.
- Do Westfall Stew: Salma Saldean wants 3 Stringy Vulture Meat, 3 Goretusk Snouts, 3 Murloc Eyes, 3 Okra. Find: Stringy Vulture Meat from Greater Fleshripper (60, 56); Murloc Eye from Murloc Hunter (26, 55); Goretusk Snout from Goretusk (46, 57); Okra from Harvest Watcher (38, 51). Goretusks, vultures and Harvest Watchers are all around Sentinel Hill; the murlocs are on the coast to the west.
- Turn in Goretusk Liver Pie and Westfall Stew to Salma Saldean (56, 30).
The southern farms (quests level 13-17). Push south from Sentinel Hill.
- Do Patrolling Westfall: Bring 8 Gnoll Paws to Captain Danuvin on Sentinel Hill. Find: Gnoll Paw from Riverpaw Bandit (58, 71). The Riverpaw gnolls are south of Sentinel Hill.
- Do The People's Militia: Gryan Stoutmantle wants you to kill 15 Defias Pillagers and 15 Defias Looters and return to him on Sentinel Hill. Find: Defias Pillager (level 14-15) (44, 69); Defias Looter (level 13-14) (44, 69). The Defias looters and pillagers are around the farms south-west of Sentinel Hill.
- Do Red Leather Bandanas: Bring 15 Red Leather Bandanas to Scout Galiaan at Sentinel Hill. Find: Red Leather Bandana from Defias Looter (44, 69). The Defias looters and pillagers are around the farms south-west of Sentinel Hill.
- Turn in Patrolling Westfall to Captain Danuvin (56, 48).
- Turn in The People's Militia to Gryan Stoutmantle (56, 48).
- Accept The People's Militia from Gryan Stoutmantle (56, 48).
- Turn in Red Leather Bandanas to Scout Galiaan (54, 53).
- Do The People's Militia: Gryan Stoutmantle wants you to kill 15 Defias Highwaymen, 5 Defias Pathstalkers and 5 Defias Knuckledusters then return to him on Sentinel Hill. Find: Defias Highwayman (level 17-18) (50, 78); Defias Pathstalker (level 15-16) (38, 73); Defias Knuckleduster (level 16-17) (37, 75). The Defias Highwaymen are in the south of the zone; the Pathstalkers and Knuckleduster are in the south-west.
- Turn in The People's Militia to Gryan Stoutmantle (56, 48).
- Accept The Defias Brotherhood from Gryan Stoutmantle (56, 48).
- The Defias Brotherhood sends you to Wiley the Black in Lakeshire, Redridge Mountains. The chain comes back through Stormwind (The Defias Brotherhood, The Defias Brotherhood) and ends at the Deadmines dungeon (The Defias Brotherhood) - well worth a group at level 18-22.
The coast and the lighthouse (quests level 16-20). Captain Grayson is at the lighthouse at the southern tip of the coast (30, 86).
- Accept Keeper of the Flame and The Coast Isn't Clear from Captain Grayson (30, 86).
- A Captain Sander's Treasure Map can drop from the murlocs on the coast - it starts Captain Sander's Hidden Treasure, a short treasure hunt.
- Do Keeper of the Flame: Bring 5 Flasks of Oil to Captain Grayson at the Westfall Lighthouse. Find: Flask of Oil from Harvest Watcher (38, 51). The Flasks of Oil drop from the Harvest Watchers and golems in the fields.
- Do The Coast Isn't Clear: Kill 7 Tidehunters, 7 Warriors, 7 Oracles and 7 Coastrunners and return to Captain Grayson at the Westfall Lighthouse. Find: Murloc Coastrunner (level 12-13) (46, 10); Murloc Warrior (level 15-16) (29, 32); Murloc Tidehunter (level 18-19) (27, 73); Murloc Oracle (level 17-18) (27, 56). The murlocs are spread along the whole western coast.
- Turn in Keeper of the Flame and The Coast Isn't Clear to Captain Grayson (30, 86).
- Accept The Coastal Menace from Captain Grayson (30, 86).
- The Coastal Menace is level 20 - Old Murk-Eye is a tough murloc near the lighthouse. Come back for it later or skip it.
Loch Modan: Thelsamar, levels 10 to 18
Loch Modan is east of Dun Morogh, through the tunnel at the end of the eastern road. Thelsamar, on the west side of the loch, is your base. It's the natural next zone for Dwarves and Gnomes. Every coordinate below is on the Loch Modan map unless it says otherwise.
The southern guard post (quests level 10-12). The tunnel from Dun Morogh opens at the guard post in the south-west of the zone (23, 74).
- Accept In Defense of the King's Lands from Mountaineer Cobbleflint (22, 73).
- Accept The Trogg Threat from Captain Rugelfuss (23, 74).
- Do In Defense of the King's Lands: Mountaineer Cobbleflint of the southern guard tower wants you to kill 10 Stonesplinter Troggs and 10 Stonesplinter Scouts. Find: Stonesplinter Trogg (level 11-12) (32, 74); Stonesplinter Scout (level 11-12) (33, 75). The Stonesplinter troggs are just east of the guard post.
- Turn in In Defense of the King's Lands to Mountaineer Cobbleflint (22, 73).
- Accept In Defense of the King's Lands from Mountaineer Gravelgaw (24, 76).
Thelsamar (quests level 10-12). Follow the road north to Thelsamar.
- Turn in Stout to Kadrell to Mountaineer Kadrell (34, 48) if you have it.
- Accept Rat Catching and Mountaineer Stormpike's Task from Mountaineer Kadrell (34, 48).
- Accept Thelsamar Blood Sausages from Vidra Hearthstove (35, 49).
- Accept Honor Students from Brock Stoneseeker (37, 48).
- Honor Students and its follow-ups (Ride to Ironforge, Gryth Thurden and Return to Brock) are a free return flight to Ironforge that teaches you the route.
- Make Thelsamar your home, and get the flight path from Thorgrum Borrelson.
The north (quests level 11-15). Mountaineer Stormpike is in the north-west of the zone (25, 18).
- Do Rat Catching: Bring 12 Tunnel Rat Ears to Mountaineer Kadrell in Thelsamar. Find: Tunnel Rat Ear from Tunnel Rat Vermin (37, 16). The tunnel rats are north of Thelsamar, along the road to the dam.
- Turn in Mountaineer Stormpike's Task to Mountaineer Stormpike (25, 18).
- Accept Filthy Paws from Mountaineer Stormpike (25, 18).
- Do Filthy Paws: Go to the Silver Stream Mine and collect 4 loads of Miners' Gear. Return to Mountaineer Stormpike. Find: Miners' Gear from Miners' League Crates (36, 24). The Miners' League crates are north-east of Mountaineer Stormpike.
- Turn in Filthy Paws to Mountaineer Stormpike (25, 18).
- Accept Stormpike's Order from Mountaineer Stormpike (25, 18).
- Stormpike's Order goes to Furen Longbeard in Stormwind - take it on your next visit. The engineer at the dam, Chief Engineer Hinderweir VII, has a level 18 chain about a dark threat; it ends in an Elite step.
- Turn in Rat Catching to Mountaineer Kadrell (34, 48).
The east and Ironband's Excavation (quests level 11-18). Bingles Blastenheimer is on the east side of the loch (64, 48). Daryl the Youngling is at the Farstrider Lodge in the east (84, 66), and Prospector Ironband's excavation is in the south-east (66, 66).
- Accept Bingles' Missing Supplies from Bingles Blastenheimer (64, 48).
- Do Thelsamar Blood Sausages: Bring 3 pieces of Bear Meat, 3 Boar Intestines, and 3 Spider Ichor to Vidra Hearthstove in Thelsamar. Find: Boar Intestines from Elder Mountain Boar (64, 39); Bear Meat from Black Bear Patriarch (73, 41); Spider Ichor from Wood Lurker (77, 38). The boars, bears and spiders are on the eastern side of the loch.
- Turn in Thelsamar Blood Sausages to Vidra Hearthstove (35, 49).
- Accept A Hunter's Boast from Daryl the Youngling (84, 66).
- Do A Hunter's Boast: Kill 6 Mountain Buzzards and return to Daryl the Youngling in the Farstrider Lodge within 15 minutes. Find: Mountain Buzzard (level 15-16) (76, 72).
- Turn in A Hunter's Boast to Daryl the Youngling (84, 66).
- Accept A Hunter's Challenge from Daryl the Youngling (84, 66).
- Do A Hunter's Challenge: Kill 5 Elder Mountain Boars and return to Daryl the Youngling in the Farstrider Lodge within 12 minutes. Find: Elder Mountain Boar (level 16-17) (64, 39).
- Turn in A Hunter's Challenge to Daryl the Youngling (84, 66).
- Accept Excavation Progress Report from Prospector Ironband (66, 66).
- Turn in Excavation Progress Report to Jern Hornhelm (37, 47).
- Accept Report to Ironforge from Jern Hornhelm (37, 47).
- Report to Ironforge goes to Prospector Stormpike in Ironforge, and the chain comes back here through Jern Hornhelm in Thelsamar.
- Accept Ironband's Excavation from Jern Hornhelm (37, 47).
- Turn in Ironband's Excavation to Magmar Fellhew (65, 67).
- Accept Gathering Idols from Magmar Fellhew (65, 67).
- Do Gathering Idols: Bring Magmar Fellhew 8 Carved Stone Idols. Find: Carved Stone Idol from Stonesplinter Digger (70, 65).
- Turn in Gathering Idols to Magmar Fellhew (65, 67).
- Do Bingles' Missing Supplies: Find and return Bingles' supplies: Bingles' Wrench, Bingles' Screwdriver, Bingles' Hammer, and Bingles' Blastencapper. Find: Bingles' Wrench from Bingles's Toolbucket (49, 30); Bingles' Screwdriver from Bingles's Toolbucket (48, 20); Bingles' Hammer from Bingles's Toolbucket (52, 24); Bingles' Blastencapper from Bingles's Blastencapper (54, 27). Bingles' toolbuckets are around the north end of the loch.
- Turn in Bingles' Missing Supplies to Bingles Blastenheimer (64, 48).
Ironforge and back (quests level 15). Fly to Ironforge, then back to Thelsamar for Jern Hornhelm.
- Turn in Report to Ironforge to Prospector Stormpike (75, 12 in Ironforge).
- Accept Powder to Ironband from Prospector Stormpike (75, 12 in Ironforge).
- Turn in Powder to Ironband to Jern Hornhelm (37, 47).
- Accept Resupplying the Excavation from Jern Hornhelm (37, 47).
- Turn in Resupplying the Excavation to Huldar (52, 69).
- Accept After the Ambush from Huldar (52, 69).
- Turn in After the Ambush to Miran (52, 69).
- Accept Protecting the Shipment from Miran (52, 69).
- Turn in Protecting the Shipment to Prospector Ironband (66, 66).
The southern troggs (quests level 13-17). Finish the trogg chain at the southern guard post.
- Do In Defense of the King's Lands: Mountaineer Gravelgaw in the southern guard tower wants you to kill 10 Stonesplinter Skullthumpers and 10 Stonesplinter Seers and report back to him. Find: Stonesplinter Skullthumper (level 13-14) (33, 85); Stonesplinter Seer (level 13-14) (33, 85). The Stonesplinter Skullthumpers and Seers are at the trogg camp in the south of the zone.
- Do The Trogg Threat: Bring 8 Trogg Stone Teeth to Captain Rugelfuss in the southern guard tower. Find: Trogg Stone Tooth from Stonesplinter Seer (33, 85). The Stonesplinter Skullthumpers and Seers are at the trogg camp in the south of the zone.
- Turn in In Defense of the King's Lands to Mountaineer Gravelgaw (24, 76).
- Accept In Defense of the King's Lands from Mountaineer Wallbang (24, 74).
- Turn in The Trogg Threat to Captain Rugelfuss (23, 74).
- Do In Defense of the King's Lands: Mountaineer Wallbang in the southern guard tower wants you to kill 10 Stonesplinter Shaman and 10 Stonesplinter Bonesnappers. Find: Stonesplinter Shaman (level 15-16) (36, 92); Stonesplinter Bonesnapper (level 15-16) (36, 92). Wallbang's troggs are deeper in the same valley.
- Turn in In Defense of the King's Lands to Mountaineer Wallbang (24, 74).
- Accept In Defense of the King's Lands from Captain Rugelfuss (23, 74).
- Do In Defense of the King's Lands: Kill the Trogg leader, Grawmug, and his two guards, Gnasher and Brawler then report back to Captain Rugelfuss in the southern guard tower. Find: Grawmug (level 17) (35, 90); Gnasher (level 16) (35, 91); Brawler (level 16) (35, 91). Grawmug, Gnasher and Brawler are at the far end of the valley.
- Turn in In Defense of the King's Lands to Captain Rugelfuss (23, 74).
- The poster in Thelsamar and Magistrate Bluntnose offer two Elite ogre quests; leave them unless you have a group.
Darkshore: Auberdine, levels 11 to 20
Darkshore is the long coast south-east of Teldrassil. The port of Auberdine, halfway down it, is your base for every quest here. It's the natural next zone for Night Elves; other races can take the boat from Menethil Harbor in the Wetlands. Every coordinate below is on the Darkshore map unless it says otherwise.
Auberdine (quests level 10-14). Auberdine is on the coast in the west of Darkshore.
- If you're on the free flight from Rut'theran, hand Flight to Auberdine's collection to Laird in Auberdine and take Return to Nessa back.
- Accept Buzzbox 827 from Wizbang Cranktoggle (37, 44).
- Accept Washed Ashore from Gwennyth Bly'Leggonde (37, 46).
- Accept Plagued Lands from Tharnariun Treetender (39, 43).
- Accept How Big a Threat? from Terenthis (39, 44).
- Turn in How Big a Threat? to Terenthis (39, 44).
- Accept How Big a Threat? and Thundris Windweaver from Terenthis (39, 44).
- Accept The Red Crystal from Sentinel Glynda Nal'Shea (38, 43).
- Turn in Thundris Windweaver to Thundris Windweaver (37, 40).
- Accept Bashal'Aran, Tools of the Highborne and The Cliffspring River from Thundris Windweaver (37, 40).
- Make Auberdine your home, and get the flight path.
Around Auberdine (quests level 10-14). Start with the beaches.
- Do Buzzbox 827: Collect 6 Crawler Legs and place them in Buzzbox 827. Find: Crawler Leg from Raging Reef Crawler (56, 16). Reef crawlers live along the beaches. The buzzbox is just south of the town.
- Turn in Buzzbox 827 to Buzzbox 827 (37, 46).
- Accept Buzzbox 411 from Buzzbox 827 (37, 46).
- Do Washed Ashore: Recover Sea Creature Bones from the beached sea creature just south of Auberdine, and then return with it to Gwennyth Bly'Leggonde in Auberdine. Find: Sea Creature Bones from Beached Sea Creature (36, 51). The sea creature bones are on the beach just south of Auberdine.
- Turn in Washed Ashore to Gwennyth Bly'Leggonde (37, 46).
- Accept Washed Ashore from Gwennyth Bly'Leggonde (37, 46).
- Do Washed Ashore: Recover the Sea Turtle Remains from the Skeletal Sea Turtle in the waters west of Auberdine, and then speak with Gwennyth Bly'Leggonde back in Auberdine. Find: Sea Turtle Remains from Skeletal Sea Turtle (32, 46).
- Turn in Washed Ashore to Gwennyth Bly'Leggonde (37, 46).
- Washed Ashore opens up a set of beached-creature quests up and down the coast - pick them up when you see one.
- Do Buzzbox 411: Collect 3 Thresher Eyes from Darkshore Threshers in the deep sea near Buzzbox 411. Find: Thresher Eye from Darkshore Thresher (34, 34). The threshers are in the deep water off the coast north of Auberdine.
- Turn in Buzzbox 411 to Buzzbox 411 (42, 29).
- Accept Buzzbox 323 from Buzzbox 411 (42, 29).
North-east: Bashal'Aran and the Cliffspring River (quests level 12-15). Asterion is at Bashal'Aran, the ruins north-east of Auberdine (44, 36).
- Turn in Bashal'Aran to Asterion (44, 36).
- Accept Bashal'Aran from Asterion (44, 36).
- Do Bashal'Aran: Acquire 8 Grell Earrings for Asterion in Bashal'Aran. Find: Grell Earring from Wild Grell (46, 38).
- Turn in Bashal'Aran to Asterion (44, 36).
- Accept Bashal'Aran from Asterion (44, 36).
- Do Bashal'Aran: Obtain the Ancient Moonstone Seal and bring it to Asterion in Bashal'Aran. Find: Ancient Moonstone Seal from Deth'ryll Satyr (47, 38).
- Turn in Bashal'Aran to Asterion (44, 36).
- Accept Bashal'Aran from Asterion (44, 36).
- Do Buzzbox 323: Collect 6 Moonstalker Fangs and place them in Buzzbox 323. Find: Moonstalker Fang from Moonstalker Runt (42, 44). The Moonstalker runts are around the road east of Auberdine.
- Turn in Buzzbox 323 to Buzzbox 323 (51, 25).
- Accept Buzzbox 525 from Buzzbox 323 (51, 25).
- Do The Red Crystal: Travel east of Auberdine and look for a large, red crystal along Darkshore's eastern mountain range. Report back what you find to Sentinel Glynda Nal'Shea in Auberdine. Follow the Cliffspring River east from Auberdine to the mountain wall.
- Turn in The Red Crystal to Sentinel Glynda Nal'Shea (38, 43).
- Accept As Water Cascades from Sentinel Glynda Nal'Shea (38, 43).
- Do The Cliffspring River: Travel north of Auberdine to the first waterfall along the Cliffspring River and draw a sample from the pool there. Return to Thundris Windweaver in Auberdine with the Cliffspring River Sample. Find: Cliffspring River Sample. The first waterfall on the Cliffspring River is north-east of Auberdine.
- Do Plagued Lands: Capture a living Rabid Thistle Bear and bring it back to Tharnariun. Should you fail to capture a Rabid Thistle Bear and lose your trap, return to Tharnariun Treetender and request another trap. Find: Rabid Thistle Bear Captured. Use Tharnariun's trap on a Rabid Thistle Bear north-east of Auberdine.
Auberdine again (quests level 13-16). Head back to town to hand in and restock.
- Do As Water Cascades: Fill the Empty Water Tube at the Auberdine moonwell, and then investigate the red crystal along Darkshore's eastern mountain wall. Find: Moonwell Water Tube. Fill the tube at the Auberdine moonwell before you go back to the red crystal.
- Turn in As Water Cascades to Mysterious Red Crystal (east of Auberdine, along the Cliffspring River).
- Accept The Fragments Within from Mysterious Red Crystal (east of Auberdine, along the Cliffspring River).
- Turn in The Fragments Within to Sentinel Glynda Nal'Shea (38, 43).
- Turn in The Cliffspring River to Thundris Windweaver (37, 40).
- Accept The Blackwood Corrupted from Thundris Windweaver (37, 40).
- Turn in Plagued Lands to Tharnariun Treetender (39, 43).
- Accept Cleansing of the Infected from Tharnariun Treetender (39, 43).
- Accept For Love Eternal from Cerellean Whiteclaw (36, 44).
- Accept The Family and the Fishing Pole and Fruit of the Sea from Gubber Blump (36, 45).
- The Family and the Fishing Pole needs you to fish up 6 Darkshore Grouper - any fishing pole will do.
South: the Blackwood camps and Ameth'Aran (quests level 12-17). Sentinel Tysha Moonblade is at Ameth'Aran (40, 60).
- Do How Big a Threat?: Kill 8 Blackwood Pathfinders and 5 Windtalkers and return to Terenthis in Auberdine. Find: Blackwood Pathfinder (level 12-13) (40, 54); Blackwood Windtalker (level 13-14) (40, 54). The Blackwood furbolgs are at the camp south of Auberdine.
- Turn in How Big a Threat? to Terenthis (39, 44).
- Accept The Fall of Ameth'Aran from Sentinel Tysha Moonblade (40, 60).
- Do The Fall of Ameth'Aran: Study the tablets which tell of Ameth'Aran and of its fall, then return to Sentinel Tysha Moonblade in Darkshore. Find: Read the Lay of Ameth'Aran (43, 59); Read the Fall of Ameth'Aran (43, 63). Ameth'Aran is the ruined town south of Auberdine, with the ancient flame at its south end.
- Do Tools of the Highborne: Retrieve 7 Highborne Relics for Thundris Windweaver in Auberdine. Find: Highborne Relic from Writhing Highborne (42, 61). Ameth'Aran is the ruined town south of Auberdine, with the ancient flame at its south end.
- Do Bashal'Aran: Destroy the Ancient Moonstone Seal at the ancient flame in Ameth'Aran, then return to Asterion in Bashal'Aran. Find: Destroy the seal at the ancient flame (42, 62). Ameth'Aran is the ruined town south of Auberdine, with the ancient flame at its south end.
- Do For Love Eternal: Free the spirit of Anaya Dawnrunner and bring her pendant back to Cerellean Whiteclaw in Auberdine. Find: Anaya's Pendant from Anaya Dawnrunner (42, 61). Ameth'Aran is the ruined town south of Auberdine, with the ancient flame at its south end.
- Turn in The Fall of Ameth'Aran to Sentinel Tysha Moonblade (40, 60).
- Do Cleansing of the Infected: Cleanse the forest of 20 Rabid Thistle Bears and return to Tharnariun Treetender in Darkshore. Find: Rabid Thistle Bear (level 13-14) (49, 30). Rabid Thistle Bears are all over the middle of the zone.
- Turn in Tools of the Highborne to Thundris Windweaver (37, 40).
- Turn in For Love Eternal to Cerellean Whiteclaw (36, 44).
- Turn in Cleansing of the Infected to Tharnariun Treetender (39, 43).
- Accept Tharnariun's Hope from Tharnariun Treetender (39, 43).
- Turn in Bashal'Aran to Asterion (44, 36).
The north: the Tower of Althalaxx and the wrecks (quests level 16-20). Balthule Shadowstrike is near the Tower of Althalaxx in the north-east (55, 25).
- Accept The Tower of Althalaxx from Sentinel Elissa Starbreeze (39, 44).
- Accept Cave Mushrooms from Barithras Moonshade (37, 44).
- Accept Deep Ocean, Vast Sea from Gorbold Steelhand (38, 41).
- Turn in The Tower of Althalaxx to Balthule Shadowstrike (55, 25).
- Accept The Tower of Althalaxx from Balthule Shadowstrike (55, 25).
- Do The Tower of Althalaxx: Collect 4 Worn Parchments for Balthule Shadowstrike near the Tower of Althalaxx. Find: Worn Parchment from Dark Strand Fanatic (56, 27).
- Turn in The Tower of Althalaxx to Balthule Shadowstrike (55, 25).
- Accept The Tower of Althalaxx from Balthule Shadowstrike (55, 25).
- The Tower of Althalaxx goes to Delgren the Purifier in Ashenvale - keep it for the Ashenvale section.
- Do Tharnariun's Hope: Find and kill the Den Mother. Find: Den Mother (level 18-19) (52, 38). The Den Mother is east of Auberdine.
- Do The Blackwood Corrupted: Fill the Empty Cleansing Bowl at the Auberdine Moonwell. Gather a sample of fruit, nut, and grain from the northern Blackwood furbolg camps. Mix the bowl and place it near the bonfire closest to the Cliffspring River at the northern camp, thus summoning the satyr corruptor. Take the Talisman of Corruption and bring it to Thundris Windweaver in Auberdine. Find: Talisman of Corruption. The northern Blackwood camps are north-east of Auberdine.
- Do Fruit of the Sea: Collect 6 Fine Crab Chunks for Gubber Blump in Auberdine. Find: Fine Crab Chunks from Reef Crawler (47, 21). The reef crawlers are on the northern beaches.
- Do Deep Ocean, Vast Sea: Recover the Silver Dawning's Lockbox and the Mist Veil's Lockbox for Gorbold Steelhand in Auberdine. Both items should be found aboard the wreckage of the ships to the north of the village. Find: Silver Dawning's Lockbox (38, 29); Mist Veil's Lockbox (40, 28). The two wrecks are just off the coast north of Auberdine.
- Do Cave Mushrooms: Bring 5 Scaber Stalks and 1 Death Cap to Barithras Moonshade in Auberdine. Find: Scaber Stalk (55, 34); Death Cap. The Scaber Stalks are east of Auberdine. The quest data has no location for the Death Cap.
- Turn in Tharnariun's Hope to Tharnariun Treetender (39, 43).
- Turn in The Blackwood Corrupted to Thundris Windweaver (37, 40).
- Turn in Fruit of the Sea to Gubber Blump (36, 45).
- Turn in Deep Ocean, Vast Sea to Gorbold Steelhand (38, 41).
- Turn in Cave Mushrooms to Barithras Moonshade (37, 44).
- Accept Onu from Barithras Moonshade (37, 44).
The south: the Grove of the Ancients and the Master's Glaive (quests level 16-20). Onu is at the Grove of the Ancients in the south of the zone (44, 76). The Master's Glaive and the Twilight camp are further south.
- Accept A Lost Master from Terenthis (39, 44).
- Accept The Absent Minded Prospector from Archaeologist Hollee (37, 42).
- Turn in Onu to Onu (44, 76).
- Accept The Master's Glaive from Onu (44, 76).
- Turn in The Master's Glaive to Scrying Bowl (the bowl you create with the Phial of Scrying).
- Accept The Twilight Camp from Scrying Bowl (the bowl you create with the Phial of Scrying).
- Do Buzzbox 525: Collect 4 Grizzled Scalps from Grizzled Thistle Bears to the south of Auberdine and place them in Buzzbox 525. Find: Grizzled Scalp from Grizzled Thistle Bear (39, 79). The Grizzled Thistle Bears are south of Auberdine.
- Turn in Buzzbox 525 to Buzzbox 525 (41, 81).
- Do A Lost Master: Find 5 Fine Moonstalker Pelts and return them to Terenthis in Auberdine. Find: Fine Moonstalker Pelt from Moonstalker Sire (41, 82). The Moonstalker Sires are in the south of the zone.
- Turn in The Twilight Camp to Twilight Tome (38, 86).
- Accept Return to Onu from Twilight Tome (38, 86).
- Turn in The Absent Minded Prospector to Prospector Remtravel (36, 84).
- Accept The Absent Minded Prospector from Prospector Remtravel (36, 84).
- The Absent Minded Prospector is an Elite escort - Prospector Remtravel needs protecting while he searches, so bring a friend.
- Turn in Return to Onu to Onu (44, 76).
- Accept Mathystra Relics from Onu (44, 76).
- Mathystra Relics sends you back north for the Mathystra Relics (around 60, 21) - do it with the northern quests if you like.
- Turn in A Lost Master to Terenthis (39, 44).
- Accept A Lost Master from Terenthis (39, 44).
- Turn in A Lost Master to Volcor (45, 85).
- Accept Escape Through Stealth from Volcor (45, 85).
- Do Escape Through Stealth: Escape the Furbolg cave and meet Terenthis in Auberdine. Volcor is in the furbolg cave south of the Grove - sneak or fight your way out, then report to Terenthis.
- Turn in Escape Through Stealth to Terenthis (39, 44).
Leaving Darkshore (quests level 15-20). Ashenvale is south of Darkshore.
- Three escorts at the southern end of the zone all finish at Maestra's Post in Ashenvale: One Shot. One Kill. (Sentinel Aynasha, 46, 90), The Sleeper Has Awakened (Kerlonian Evershade, 44, 76) and Therylune's Escape (Therylune, 39, 87). Do them on your way south.
- Follow the road south out of Darkshore into Ashenvale.
Redridge Mountains: Lakeshire, levels 15 to 25
Redridge Mountains is east of Elwynn Forest - follow the road east out of Elwynn past the bridge. Lakeshire, the town on the north-west shore of Lake Everstill, is your base. Every coordinate below is on the Redridge Mountains map unless it says otherwise.
Guard Parker and Lakeshire (quests level 15-18). Guard Parker patrols the road in the south-west of the zone that leads to Darkshire (10, 72). Deputy Feldon is just south of Lakeshire (26, 60).
- Accept Encroaching Gnolls from Guard Parker (10, 72).
- Turn in Encroaching Gnolls to Deputy Feldon (26, 60).
- Accept Assessing the Threat from Deputy Feldon (26, 60).
- Accept A Free Lunch from Darcy (22, 44).
- Accept Hilary's Necklace from Shawn (24, 54).
- Accept The Lost Tools from Foreman Oslow (27, 49).
- Accept Redridge Goulash from Chef Breanna (18, 44).
- Accept The Price of Shoes from Verner Osgood (26, 47).
- Make Lakeshire your home, and get the flight path.
- Do Hilary's Necklace: Find Hilary's Necklace, and return it to Hilary in Lakeshire. Find: Hilary's Necklace from Glinting Mud (24, 54). The Glinting Mud is in the lake right beside Shawn.
- Turn in Hilary's Necklace to Hilary (24, 54).
West and south of Lakeshire (quests level 15-18). Work the road west of town and the lake.
- Do Assessing the Threat: Kill 10 Redridge Mongrels and 6 Redridge Poachers, then report back to Deputy Feldon in Lakeshire. Find: Redridge Mongrel (level 15-16) (10, 63); Redridge Poacher (level 16-17) (27, 82). The mongrels are along the road west of Lakeshire; the poachers are in the south of the zone.
- Turn in A Free Lunch to Guard Parker (10, 72).
- Accept Visit the Herbalist from Guard Parker (10, 72).
- Do The Lost Tools: Foreman Oslow of Lakeshire wants you to retrieve his toolbox from the bottom of Lake Everstill. Find: Oslow's Toolbox from Sunken Chest (36, 55). The sunken chest is on the bottom of the lake east of Lakeshire.
- Do Redridge Goulash: Chef Breanna of Lakeshire wants five pieces of Tough Condor Meat, five Great Goretusk Snouts and five helpings of Crisp Spider Meat. Find: Great Goretusk Snout from Bellygrub (11, 49); Tough Condor Meat from Dire Condor (43, 35); Crisp Spider Meat from Greater Tarantula (48, 41). The condors and tarantulas are in the hills north-east of Lakeshire; Great Goretusks are west of town.
Lakeshire (quests level 16-21). Martie Jainrose is just west of Lakeshire (17, 46).
- Turn in Visit the Herbalist to Martie Jainrose (17, 46).
- Accept Delivering Daffodils from Martie Jainrose (17, 46).
- Turn in Delivering Daffodils to Darcy (22, 44).
- Turn in Assessing the Threat to Deputy Feldon (26, 60).
- Turn in The Lost Tools to Foreman Oslow (27, 49).
- Accept The Everstill Bridge from Foreman Oslow (27, 49).
- Turn in Redridge Goulash to Chef Breanna (18, 44).
- Accept Selling Fish and Murloc Poachers from Dockmaster Baren (23, 47).
- Accept Blackrock Menace from Marshal Marris (28, 49).
A trip to Goldshire (quest level 18). Smith Argus is in Goldshire in Elwynn Forest. Do this delivery when you next pass through Elwynn.
- Turn in The Price of Shoes to Smith Argus (42, 66 in Elwynn Forest).
- Accept Return to Verner from Smith Argus (42, 66 in Elwynn Forest).
- Turn in Return to Verner to Verner Osgood (26, 47).
- Accept Underbelly Scales and A Baying of Gnolls from Verner Osgood (26, 47).
Northern Redridge (quests level 18-22). Push north into the gnoll hills.
- Do The Everstill Bridge: Bring 5 Iron Pikes and 5 Iron Rivets to Foreman Oslow in Lakeshire. Find: Iron Pike from Redridge Basher (24, 27); Iron Rivet from Redridge Basher (24, 27). The Redridge gnolls are in the hills north of Lakeshire.
- Do A Baying of Gnolls: Kill 10 Redridge Brutes and 8 Redridge Mystics, then return to Verner Osgood. Find: Redridge Brute (level 17-18) (18, 36); Redridge Mystic (level 18-19) (23, 26). The Redridge gnolls are in the hills north of Lakeshire.
- Do Selling Fish: Bring 10 Spotted Sunfish to Dockmaster Baren in Lakeshire. Find: Spotted Sunfish from Murloc Scout (52, 52). The murloc scouts are along the shore of the lake.
- Do Murloc Poachers: Bring 8 Murloc Fins to Dockmaster Baren in Lakeshire. Find: Murloc Fin from Murloc Scout (52, 52). The murloc scouts are along the shore of the lake.
- Do Underbelly Scales: Gather 6 Underbelly Whelp Scales from Black Dragon Whelps, and bring them to Verner Osgood in Redridge. Find: Underbelly Whelp Scale from Black Dragon Whelp (29, 73). The Black Dragon Whelps are in the south of the zone.
- Turn in The Everstill Bridge to Foreman Oslow (27, 49).
- Turn in Underbelly Scales and A Baying of Gnolls to Verner Osgood (26, 47).
- Accept Howling in the Hills from Verner Osgood (26, 47).
- Turn in Selling Fish and Murloc Poachers to Dockmaster Baren (23, 47).
Stonewatch and the east (quests level 21-25). Marshal Marris is in Lakeshire (28, 49).
- Accept Solomon's Law from Bailiff Conacher (25, 44).
- Do Blackrock Menace: Bring 10 Battleworn Axes to Marshal Marris in Lakeshire. Find: Battleworn Axe from Blackrock Sentry (62, 55). The Blackrock orcs hold Stonewatch Keep, the fort east of the lake.
- Do Solomon's Law: Bring 10 Shadowhide Pendants to Bailiff Conacher in the Lakeshire Town Hall. Find: Shadowhide Pendant from Shadowhide Warrior (73, 40). The Shadowhide gnolls are in the east of the zone.
- Turn in Blackrock Menace to Marshal Marris (28, 49).
- Turn in Solomon's Law to Bailiff Conacher (25, 44).
- Marshal Marris's follow-ups, Shadow Magic and Tharil'zun, are Elite - leave them unless you have a group.
Finishing Redridge (quests level 24-26). Come back at about 24 to finish the zone, or carry on to Duskwood and return later.
- Accept An Unwelcome Guest from Martie Jainrose (17, 46).
- Accept Blackrock Bounty from Guard Howe (26, 58).
- Accept Wanted: Lieutenant Fangore from Wanted: Lieutenant Fangore (22, 46).
- Do An Unwelcome Guest: Martie Jainrose of Lakeshire wants you to kill Bellygrub. Bring her his tusk as proof. Find: Bellygrub's Tusk from Bellygrub (11, 49). Bellygrub is a big boar west of Lakeshire.
- Do Howling in the Hills: Bring Yowler's Paw to Verner Osgood in Lakeshire. Find: Yowler's Paw from Yowler (23, 21). Yowler is in the far north of the zone.
- Do Blackrock Bounty: Kill 15 Blackrock Champions and Guard Howe in Lakeshire will reward you. Find: Blackrock Champion (level 24-25) (25, 11). The Blackrock Champions are at the Blackrock camp in the far north.
- Accept Missing In Action from Corporal Keeshan (23, 13).
- Do Missing In Action: Protect Corporal Keeshan on the journey back to Redridge. Corporal Keeshan is hiding in the far north - escort him back to Lakeshire.
- Do Wanted: Lieutenant Fangore: Kill Lieutenant Fangore and return to Magistrate Solomon in Lakeshire with his paw. Find: Fangore's Paw from Lieutenant Fangore (75, 38). Lieutenant Fangore is in the east of the zone.
- Turn in An Unwelcome Guest to Martie Jainrose (17, 46).
- Turn in Howling in the Hills to Verner Osgood (26, 47).
- Turn in Blackrock Bounty to Guard Howe (26, 58).
- Turn in Missing In Action to Marshal Marris (28, 49).
- Turn in Wanted: Lieutenant Fangore to Magistrate Solomon (25, 44).
Wetlands: Menethil Harbor, levels 20 to 30
The Wetlands are north of Loch Modan and Dun Morogh. Menethil Harbor, on the west coast, is your base, with boats to Darkshore and Theramore. Dwarves and Gnomes come here from Loch Modan through the Algaz Gauntlet in the south; Night Elves can take the boat from Auberdine. Every coordinate below is on the Wetlands map unless it says otherwise.
The Algaz Gauntlet (quests level 20-21). Mountaineer Rockgar is at the southern entrance to the Wetlands, at the end of the road from Loch Modan (56, 92).
- In Thelsamar, Mountaineer Kadrell gives Report to Mountaineer Rockgar, which starts you at the southern end of the Wetlands.
- Turn in Report to Mountaineer Rockgar to Mountaineer Rockgar (56, 92) if you have it.
- Accept The Algaz Gauntlet from Mountaineer Rockgar (56, 92).
- Do The Algaz Gauntlet: Traverse Dun Algaz. Kill 8 Dragonmaw Scouts and 6 Dragonmaw Grunts. Report to Valstag Ironjaw in Menethil Harbor. Find: Dragonmaw Scout (level 19-20) (49, 77); Dragonmaw Grunt (level 20-21) (48, 76). The Dragonmaw orcs are along the road north of Mountaineer Rockgar.
Menethil Harbor (quests level 20-24). Menethil Harbor is the port on the west coast.
- Turn in The Algaz Gauntlet to Valstag Ironjaw (10, 57).
- Accept Report to Captain Stoutfist from Valstag Ironjaw (10, 57).
- Turn in Report to Captain Stoutfist to Captain Stoutfist (10, 58).
- Accept War Banners from Captain Stoutfist (10, 58).
- Accept Claws from the Deep from Karl Boran (8, 59).
- Accept Young Crocolisk Skins from James Halloran (8, 56).
- Accept Digging Through the Ooze from Sida (12, 58).
- Accept The Greenwarden from First Mate Fitzsimmons (11, 60).
- Accept In Search of The Excavation Team from Tarrel Rockweaver (12, 52).
- Make Menethil Harbor your home, and get the flight path.
- Do Claws from the Deep: Kill 12 Bluegill Murlocs. Slay Gobbler and take his head. Bring Gobbler's Head to Karl Boran in Menethil Harbor. Find: Bluegill Murloc (level 20-21) (16, 40); Gobbler's Head from Gobbler (18, 40). The Bluegill murlocs are on the coast north of Menethil.
- Turn in Claws from the Deep to Karl Boran (8, 59).
- Accept Reclaiming Goods from Karl Boran (8, 59).
- Do Reclaiming Goods: Search the crates and barrels at the coastal Murloc camps. Karl's goods are in the murloc huts on the same coast.
- Turn in Reclaiming Goods to Damaged Crate (14, 41).
- Accept The Search Continues from Damaged Crate (14, 41).
- Turn in The Search Continues to Sealed Barrel (14, 38).
- Accept Search More Hovels from Sealed Barrel (14, 38).
- Turn in Search More Hovels to Half-buried Barrel (14, 35).
- Accept Return the Statuette from Half-buried Barrel (14, 35).
- Turn in Return the Statuette to Karl Boran (8, 59).
The road east (quests level 21-25). Tarrel Rockweaver is in Menethil; Merrin Rockweaver, Ormer Ironbraid and Prospector Whelgar are at the dig site east of town (39, 52). Rethiel the Greenwarden is further east (56, 40).
- Turn in In Search of The Excavation Team to Merrin Rockweaver (39, 52).
- Accept In Search of The Excavation Team from Merrin Rockweaver (39, 52).
- Turn in In Search of The Excavation Team to Tarrel Rockweaver (12, 52).
- Accept Ormer's Revenge from Ormer Ironbraid (38, 51).
- Accept Uncovering the Past from Prospector Whelgar (39, 52).
- Do Ormer's Revenge: Ormer Ironbraid at the Whelgar Excavation Site wants you to kill 10 Mottled Screechers and 10 Mottled Raptors. Find: Mottled Raptor (level 22-23) (25, 48); Mottled Screecher (level 24-25) (24, 53). The Mottled raptors are between Menethil and the dig site.
- Turn in Ormer's Revenge to Ormer Ironbraid (38, 51).
- Accept Ormer's Revenge from Ormer Ironbraid (38, 51).
- Do Young Crocolisk Skins: Obtain 4 Young Crocolisk Skins for James Halloran in Menethil Harbor. Find: Young Crocolisk Skin from Young Wetlands Crocolisk (52, 36). The young crocolisks are along the water in the middle of the zone.
- Do Digging Through the Ooze: One of the oozes at Ironbeard's Tomb has Sida's bag, retrieve it and bring it back to her in Menethil Harbor. Find: Sida's Bag from Black Ooze (45, 26). The Black Oozes are in the north of the zone.
- Turn in The Greenwarden to Rethiel the Greenwarden (56, 40).
- Accept Tramping Paws from Rethiel the Greenwarden (56, 40).
The Greenwarden and the east (quests level 21-26). Rethiel the Greenwarden stands in the middle of the Wetlands.
- Do Tramping Paws: Kill 15 Mosshide Gnolls and 10 Mosshide Mongrels, then return to Rethiel the Greenwarden in the Wetlands. Find: Mosshide Gnoll (level 20-21) (60, 73); Mosshide Mongrel (level 21-22) (63, 63). The Mosshide gnolls are south and south-east of the Greenwarden.
- Turn in Tramping Paws to Rethiel the Greenwarden (56, 40).
- Accept Fire Taboo from Rethiel the Greenwarden (56, 40).
- Do Fire Taboo: Bring Rethiel the Greenwarden 9 Crude Flints. Find: Crude Flint from Mosshide Fenrunner (42, 34). The Mosshide Fenrunners are around the middle of the zone.
- Turn in Fire Taboo to Rethiel the Greenwarden (56, 40).
- Accept Blisters on The Land from Rethiel the Greenwarden (56, 40).
- Accept Daily Delivery from Einar Stonegrip (50, 39).
- Einar Stonegrip (50, 39) gives Daily Delivery, a delivery back to James Halloran in Menethil.
Back to Menethil (quests level 22-26). Hand in at Menethil Harbor.
- Turn in Young Crocolisk Skins to James Halloran (8, 56).
- Accept Apprentice's Duties from James Halloran (8, 56).
- Turn in Daily Delivery to James Halloran (8, 56).
- Turn in Digging Through the Ooze to Sida (12, 58).
- Do Blisters on The Land: Kill 8 Fen Creepers, then return to Rethiel the Greenwarden in the Wetlands. Find: Fen Creeper (level 24-25) (23, 32). The Fen Creepers are in the marsh north-east of Menethil.
- Do Apprentice's Duties: Collect 6 Giant Crocolisk Skins and bring them to James Halloran in Menethil Harbor. Find: Giant Crocolisk Skin from Giant Wetlands Crocolisk (20, 24). The giant crocolisks are in the north-west.
- Turn in Apprentice's Duties to James Halloran (8, 56).
The dig site and the Dragonmaw (quests level 25-30). Finish the raptors and the Dragonmaw as you reach your late 20s.
- Do Ormer's Revenge: Ormer Ironbraid wants you to kill 10 Mottled Scytheclaw raptors and 10 Mottled Razormaw raptors then return to him at the Whelgar Excavation Site. Find: Mottled Scytheclaw (level 25-26) (34, 48); Mottled Razormaw (level 26-27) (34, 48).
- Turn in Ormer's Revenge to Ormer Ironbraid (38, 51).
- Accept Ormer's Revenge from Ormer Ironbraid (38, 51).
- Do Ormer's Revenge: Ormer Ironbraid at the Whelgar Excavation Site wants you to kill Sarltooth and return to him with one of his talons once the task is fulfilled. Find: Sarltooth's Talon from Sarltooth (33, 52).
- Turn in Ormer's Revenge to Ormer Ironbraid (38, 51).
- Do Uncovering the Past: Prospector Whelgar wants you to scour the excavation site in search of the 4 missing tablet fragments: Ados, Modr, Golm and Neru. Find: Ados Fragment from Ancient Relic (34, 49); Modr Fragment from Ancient Relic (35, 47); Golm Fragment from Ancient Relic (35, 46); Neru Fragment from Loose Soil (34, 47). The relics are around the dig site.
- Turn in Uncovering the Past to Prospector Whelgar (39, 52).
- Turn in Blisters on The Land to Rethiel the Greenwarden (56, 40).
- Do War Banners: Bring 8 Dragonmaw War Banners to Captain Stoutfist. Find: Dragonmaw War Banner from Dragonmaw Raider (46, 45). The Dragonmaw Raiders are in the middle of the zone.
- Turn in War Banners to Captain Stoutfist (10, 58).
- First Mate Fitzsimmons in Menethil starts The Third Fleet, a level 27-30 chain about the Third Fleet; the Dun Modr quests in the north-east are mostly Elite.
Duskwood: Darkshire, levels 20 to 30
Duskwood is the dark forest south of Elwynn Forest. Darkshire, in the east of the zone, is your base, and the west of the zone is Raven Hill and its cemetery. Its chains run all the way to 30. Every coordinate below is on the Duskwood map unless it says otherwise.
Darkshire (quests level 20-24). Follow the road south out of Elwynn to Darkshire, in the east of the zone.
- Accept The Night Watch from Commander Althea Ebonlocke (74, 47).
- Accept Raven Hill, Deliveries to Sven and The Hermit from Elaine Carevin (75, 49).
- Accept Look To The Stars from Viktori Prism'Antras (80, 48).
- Accept The Totem of Infliction from Madame Eva (76, 45).
- Make Darkshire your home, and get the flight path.
- Madame Eva also starts The Legend of Stalvan, a long chain that sends you across Westfall, Elwynn and Stormwind - it's level 28; take it now if you want to do it on your travels.
Around Darkshire (quests level 20-25). Watcher Dodds is on the road west of Darkshire (45, 67). Blind Mary lives in the house east of town (82, 59).
- Accept Eight-Legged Menaces from Watcher Dodds (45, 67).
- Do The Night Watch: Commander Althea Ebonlocke of Darkshire wants you to kill 8 Skeletal Warriors and 6 Skeletal Mages. Find: Skeletal Warrior (level 21-22) (79, 70); Skeletal Mage (level 22-23) (80, 71). The skeletons are in the cemetery south of Darkshire.
- Do Look To The Stars: Viktori Prism'Antras of Darkshire wants you to bring him a bronze tube. Find: Bronze Tube from Arcane Nullifier X-21. The quest data has no spawn for the Arcane Nullifier X-21, so check the quest page.
- Turn in The Night Watch to Commander Althea Ebonlocke (74, 47).
- Accept The Night Watch from Commander Althea Ebonlocke (74, 47).
- Turn in Look To The Stars to Viktori Prism'Antras (80, 48).
- Accept Look To The Stars from Viktori Prism'Antras (80, 48).
- Turn in Look To The Stars to Blind Mary (82, 59).
- Accept Look To The Stars from Blind Mary (82, 59).
- Do Look To The Stars: Retrieve Blind Mary's Looking Glass from the Insane Ghoul and give it to Viktori in Darkshire. Find: Mary's Looking Glass from Insane Ghoul (81, 72).
- Turn in Look To The Stars to Viktori Prism'Antras (80, 48).
- Viktori's last step, Look To The Stars, is level 30 - Zzarc'Vul is in the southern ogre mound (37, 80).
Raven Hill and the west (quests level 20-25). Jitters is at Raven Hill (18, 56); Sven Yorgen and Lars are at their camp on the western border (8, 34); Abercrombie's shack is north of the Raven Hill cemetery (28, 32).
- Turn in Raven Hill to Jitters (18, 56).
- Accept Jitters' Growling Gut from Jitters (18, 56).
- Do Eight-Legged Menaces: Kill 15 Pygmy Venom Web Spiders, and then report back to Watcher Dodds in Duskwood. Find: Pygmy Venom Web Spider (level 18-19) (10, 56). The Pygmy Venom Web spiders are in the far west, near Raven Hill.
- Turn in Deliveries to Sven to Sven Yorgen (8, 34).
- Accept Sven's Revenge from Sven Yorgen (8, 34).
- Accept Wolves at Our Heels from Lars (8, 33).
- Do Wolves at Our Heels: Kill 12 Starving Dire Wolves and 8 Rabid Dire Wolves, then return to Lars at Sven's Camp on the western border of Duskwood. Find: Starving Dire Wolf (level 19-20) (35, 23); Rabid Dire Wolf (level 20-21) (17, 29). The dire wolves are north of Raven Hill.
- Turn in Wolves at Our Heels to Lars (8, 33).
- Turn in The Hermit to Abercrombie (28, 32).
- Accept Supplies from Darkshire from Abercrombie (28, 32).
- Turn in Eight-Legged Menaces to Watcher Dodds (45, 67).
Back east (quests level 20-25). Chef Grual is in Darkshire.
- Turn in Jitters' Growling Gut to Chef Grual (74, 44).
- Accept Dusky Crab Cakes from Chef Grual (74, 44).
- Turn in Supplies from Darkshire to Madame Eva (76, 45).
- Accept Ghost Hair Thread from Madame Eva (76, 45).
- Turn in Ghost Hair Thread to Blind Mary (82, 59).
- Accept Return the Comb from Blind Mary (82, 59).
- Turn in Return the Comb to Madame Eva (76, 45).
- Accept Deliver the Thread from Madame Eva (76, 45).
- Do Dusky Crab Cakes: Gather 6 Gooey Spider Legs and bring them to Chef Grual in Darkshire. Find: Gooey Spider Leg from Black Widow Hatchling (31, 52). The Black Widow Hatchlings are in the woods between Darkshire and Raven Hill.
- Do Sven's Revenge: Go to Sven's Farm and find what was buried behind the old stump. Sven's Farm is in the south of the zone, by the old stump.
- Turn in Sven's Revenge to Mound of loose dirt (50, 78).
- Accept Sven's Camp from Mound of loose dirt (50, 78).
- Turn in Dusky Crab Cakes to Chef Grual (74, 44).
- Accept Return to Jitters from Chef Grual (74, 44).
The Raven Hill chains (quests level 24-28). Walk west again, handing in at Jitters, Sven and Abercrombie.
- Turn in Return to Jitters to Jitters (18, 56).
- Turn in Sven's Camp to Sven Yorgen (8, 34).
- Accept The Shadowy Figure from Sven Yorgen (8, 34).
- Turn in Deliver the Thread to Abercrombie (28, 32).
- Accept Zombie Juice from Abercrombie (28, 32).
- Do The Night Watch: Commander Althea Ebonlocke of Darkshire wants you to kill 15 Skeletal Fiends and 15 Skeletal Horrors. Find: Skeletal Fiend (level 24-25) (20, 44); Skeletal Horror (level 23-24) (20, 46). The Skeletal Fiends and Horrors are in the Raven Hill cemetery; the Plague Spreaders are in the mausoleum.
- Do The Totem of Infliction: Bring 10 Ghoul Fangs, 10 Skeleton Fingers and 5 Vials of Spider Venom to Madame Eva in Darkshire. Find: Ghoul Fang from Plague Spreader (24, 33); Vial of Spider Venom from Black Widow Hatchling (31, 52); Skeleton Finger from Skeletal Horror (20, 46). The Skeletal Fiends and Horrors are in the Raven Hill cemetery; the Plague Spreaders are in the mausoleum.
- Kill Skeletal Horrors for Rot Blossoms too - you'll need them for Tavernkeep Smitts' next step.
Darkshire: the Shadowy Figure (quests level 24-25). Back in Darkshire, follow the clues around the town.
- Turn in The Shadowy Figure to Madame Eva (76, 45).
- Accept The Shadowy Search Continues from Madame Eva (76, 45).
- Turn in The Shadowy Search Continues to Clerk Daltry (72, 47).
- Accept Inquire at the Inn from Clerk Daltry (72, 47).
- Turn in Zombie Juice to Tavernkeep Smitts (74, 44).
- Accept Gather Rot Blossoms from Tavernkeep Smitts (74, 44).
- Turn in Inquire at the Inn to Tavernkeep Smitts (74, 44).
- Accept Finding the Shadowy Figure from Tavernkeep Smitts (74, 44).
- Turn in The Night Watch to Commander Althea Ebonlocke (74, 47).
- Accept The Night Watch from Commander Althea Ebonlocke (74, 47).
- Turn in The Totem of Infliction to Madame Eva (76, 45).
- Accept Worgen in the Woods from Calor (76, 48).
Raven Hill again (quests level 24-30). Finish the western chains.
- Do Gather Rot Blossoms: Gather 8 Rot Blossoms and bring them to Tavernkeep Smitts in Darkshire. Find: Rot Blossom from Skeletal Horror (20, 46).
- Turn in Finding the Shadowy Figure to Jitters (18, 56).
- Accept Return to Sven from Jitters (18, 56).
- Turn in Return to Sven to Sven Yorgen (8, 34).
- Accept Proving Your Worth from Sven Yorgen (8, 34).
- Do Proving Your Worth: Kill 15 Skeletal Raiders, 3 Skeletal Healers and 3 Skeletal Warders, and then return to Sven. Find: Skeletal Raider (level 27-28) (16, 36); Skeletal Healer (level 26-27) (16, 37); Skeletal Warder (level 28-29) (16, 34). The Skeletal Raiders, Healers and Warders are just east of Sven's camp - they're level 26-29.
- Do The Night Watch: Commander Althea Ebonlocke of Darkshire wants you to kill 20 Plague Spreaders in the eastern Raven Hill mausoleum. Find: Plague Spreader (level 27-28) (24, 33).
- Turn in Proving Your Worth to Sven Yorgen (8, 34).
- Sven follows up with Seeking Wisdom, which goes to Stormwind and on to the Wetlands.
Darkshire and the Nightbane (quests level 24-30). Calor is in Darkshire (76, 48).
- Turn in Gather Rot Blossoms to Tavernkeep Smitts (74, 44).
- Accept Juice Delivery from Tavernkeep Smitts (74, 44).
- Juice Delivery goes to Abercrombie; he follows with Ghoulish Effigy and Ogre Thieves, which runs to level 30.
- Do Worgen in the Woods: Kill 6 Nightbane Shadow Weaver worgen for Calor in Darkshire. Find: Nightbane Shadow Weaver (level 27-28) (64, 70). The Nightbane Shadow Weavers are in the south of the zone.
- Turn in Worgen in the Woods to Calor (76, 48).
- Accept Worgen in the Woods from Calor (76, 48).
- Do Worgen in the Woods: Kill 12 Nightbane Dark Runner worgen for Calor in Darkshire. Find: Nightbane Dark Runner (level 28-29) (64, 72).
- Turn in Worgen in the Woods to Calor (76, 48).
- Turn in The Night Watch to Commander Althea Ebonlocke (74, 47).
Ashenvale: Maestra's Post and Astranaar, levels 19 to 30
Ashenvale is the forest south of Darkshore. Coming down the road from Darkshore you reach Maestra's Post first, in the north-west; Astranaar, the night elf town in the middle of the zone, is your main base. Every coordinate below is on the Ashenvale map unless it says otherwise.
Maestra's Post (quests level 19-21). Delgren the Purifier and Orendil Broadleaf are at Maestra's Post (26, 39).
- Turn in One Shot. One Kill. to Sentinel Onaeya (27, 37) if you have it.
- Turn in The Sleeper Has Awakened to Liladris Moonriver (27, 36) if you have it.
- Turn in The Tower of Althalaxx to Delgren the Purifier (26, 39).
- Accept The Tower of Althalaxx from Delgren the Purifier (26, 39).
- Accept Bathran's Hair from Orendil Broadleaf (26, 39).
- Do Bathran's Hair: Bring 5 Bathran's Hair to Orendil Broadleaf in Ashenvale. Find: Bathran's Hair from Plant Bundle (32, 23). The plant bundles are north-east of Maestra's Post.
- Do The Tower of Althalaxx: Collect a Glowing Soul Gem and return it to Delgren the Purifier at Maestra's Post. Find: Glowing Soul Gem from Dark Strand Cultist (31, 31). The Dark Strand cultists are north-east of Maestra's Post.
- Turn in Bathran's Hair to Orendil Broadleaf (26, 39).
- Accept Orendil's Cure from Orendil Broadleaf (26, 39).
- Turn in The Tower of Althalaxx to Delgren the Purifier (26, 39).
- Accept The Tower of Althalaxx from Delgren the Purifier (26, 39).
Astranaar (quests level 19-22). Follow the road south-east to Astranaar.
- Turn in Orendil's Cure to Pelturas Whitemoon (37, 52).
- Accept Elune's Tear from Pelturas Whitemoon (37, 52).
- Accept Raene's Cleansing from Raene Wolfrunner (37, 50).
- Accept The Zoram Strand from Shindrell Swiftfire (35, 49).
- Accept On Guard in Stonetalon from Sentinel Thenysil (35, 50).
- Accept Journey to Stonetalon Peak from Faldreas Goeth'Shael (36, 49).
- Make Astranaar your home, and get the flight path.
- Journey to Stonetalon Peak sends you to Keeper Albagorm on Stonetalon Peak, and On Guard in Stonetalon to Kaela Shadowspear in Stonetalon - keep both for the Stonetalon section.
The west and the Zoram Strand (quests level 19-22). Talen is camped near the Zoram Strand (15, 31).
- Do Raene's Cleansing: Find Teronis in Ashenvale. Teronis' corpse is by the water west of Astranaar.
- Turn in Raene's Cleansing to Teronis' Corpse (20, 42).
- Accept Raene's Cleansing from Teronis' Corpse (20, 42).
- Do Raene's Cleansing: Find the Glowing Gem and return to Raene Wolfrunner in Astranaar with Teronis' Journal. Find: Glowing Gem from Saltspittle Warrior (21, 42). The Saltspittle murlocs are right around Teronis.
- Accept The Ancient Statuette from Talen (15, 31).
- Do The Zoram Strand: Bring 20 Wrathtail Heads to Shindrell Swiftfire in Astranaar. Find: Wrathtail Head from Wrathtail Sorceress (14, 20). The Wrathtail naga and the statuette are on the Zoram Strand, the coast in the far north-west.
- Do The Ancient Statuette: Bring the Ancient Statuette to Talen, in his camp near the Zoram Strand. Find: Ancient Statuette (14, 21). The Wrathtail naga and the statuette are on the Zoram Strand, the coast in the far north-west.
- Turn in The Ancient Statuette to Talen (15, 31).
- Talen follows up with Ruuzel, level 25 - Lady Vespia is on the same strand.
Astranaar and the moonwell (quests level 21-25). Hand in at Astranaar and work the middle of the zone.
- Turn in Raene's Cleansing to Raene Wolfrunner (37, 50).
- Accept Raene's Cleansing and An Aggressive Defense from Raene Wolfrunner (37, 50).
- Turn in The Zoram Strand to Shindrell Swiftfire (35, 49).
- Accept Pridewings of Stonetalon from Shindrell Swiftfire (35, 49).
- Pridewings of Stonetalon is done in Stonetalon Mountains - keep it.
- Do Elune's Tear: Bring Elune's Tear to Pelturas in Astranaar. Find: Elune's Tear (46, 46). Elune's Tear is east of Astranaar.
- Turn in Elune's Tear to Pelturas Whitemoon (37, 52).
- Accept The Ruins of Stardust from Pelturas Whitemoon (37, 52).
- Do Raene's Cleansing: Find Shael'dryn at the moonwell to the northeast. Shael'dryn is at the moonwell north-east of Astranaar.
- Turn in Raene's Cleansing to Shael'dryn (54, 46).
- Do An Aggressive Defense: Kill 1 Den Watcher, 2 Ursas, 10 Totemics, and 12 Warriors of the Foulweald tribe, and then return to Raene Wolfrunner in Astranaar. Find: Foulweald Den Watcher (level 24-25) (52, 61); Foulweald Ursa (level 24-25) (52, 61); Foulweald Totemic (level 23-24) (54, 63); Foulweald Warrior (level 23-24) (53, 62). The Foulweald furbolgs are south-east of Astranaar.
- Do The Ruins of Stardust: Bring 5 Handfuls of Stardust to Pelturas in Astranaar. Find: Handful of Stardust from Stardust Covered Bush (33, 68). The Stardust Covered Bushes are south of Astranaar.
- Turn in An Aggressive Defense to Raene Wolfrunner (37, 50).
- Turn in The Ruins of Stardust to Pelturas Whitemoon (37, 52).
- Accept Culling the Threat from Raene Wolfrunner (37, 50).
- Do Culling the Threat: Bring Dal Bloodclaw's Skull to Raene Wolfrunner in Astranaar. Find: Dal Bloodclaw's Skull from Dal Bloodclaw (38, 35). Dal Bloodclaw is north of Astranaar.
- Turn in Culling the Threat to Raene Wolfrunner (37, 50).
Ilkrud Magthrull and Feero (quests level 24). Ilkrud's tome takes you back to Maestra's Post.
- Do The Tower of Althalaxx: Bring Ilkrud Magthrull's Tome to Delgren the Purifier at Maestra's Post. Find: Ilkrud Magthrull's Tome from Ilkrud Magthrull (25, 61). Ilkrud Magthrull is in the south-west of the zone.
- Turn in The Tower of Althalaxx to Delgren the Purifier (26, 39).
- Accept Supplies to Auberdine from Feero Ironhand (26, 39).
- Do Supplies to Auberdine: Speak with Delgren the Purifier at Maestra's Post after seeing Feero safely through Ashenvale Forest. Feero Ironhand is at Maestra's Post - escort him through the forest.
- Turn in Supplies to Auberdine to Delgren the Purifier (26, 39).
- Delgren's next step, The Tower of Althalaxx, is level 28 and sends you to Night Run and Satyrnaar in the east.
The late 20s (quests level 25-30). Ashenvale's last quests are best left until your late 20s.
- Shael'dryn's chain continues with Raene's Cleansing (level 27) and runs on to level 30; Pelturas's last step, Fallen Sky Lake, and Kayneth Stillwind from Shindrell both take you to the east of the zone at 29-30. Do them once Stonetalon and the Wetlands are done.
Stonetalon Mountains for the Alliance, levels 20 to 28
The Alliance has two footholds in Stonetalon Mountains: Stonetalon Peak in the far north, and Kaela Shadowspear and Gaxim Rustfizzle overlooking Windshear Crag in the east. The Talondeep Path links the south-west of Ashenvale to the east of Stonetalon (around 78, 45). Every coordinate below is on the Stonetalon Mountains map unless it says otherwise.
Windshear Crag (quests level 21-22). Kaela Shadowspear and Gaxim Rustfizzle are at 60, 67. Ziz Fizziks is nearby (59, 63) and Piznik is mining further east (72, 60).
- Turn in On Guard in Stonetalon to Kaela Shadowspear (60, 67).
- Accept On Guard in Stonetalon from Kaela Shadowspear (60, 67).
- Turn in On Guard in Stonetalon to Gaxim Rustfizzle (60, 67).
- Accept A Gnome's Respite from Gaxim Rustfizzle (60, 67).
- Do Pridewings of Stonetalon: Bring 12 Pridewing Venom Sacs to Shindrell Swiftfire in Astranaar. Find: Pridewing Venom Sac from Pridewing Consort (51, 43). The Pridewing wyverns are around the middle of the zone.
- Do A Gnome's Respite: Kill 10 Venture Co. Loggers, and 10 Venture Co. Deforesters and return to Gaxim Rustfizzle in Stonetalon. Find: Venture Co. Logger (level 18-19) (66, 52); Venture Co. Deforester (level 19-20) (66, 52). The Venture Co. loggers are north-east of Kaela.
- Turn in A Gnome's Respite to Gaxim Rustfizzle (60, 67).
- Accept An Old Colleague and A Scroll from Mauren from Gaxim Rustfizzle (60, 67).
- An Old Colleague and A Scroll from Mauren go to Ironforge and Stormwind, and each leads back here with a Covert Ops quest. They're long trips; take them only if you're going to those cities anyway.
- Accept Super Reaper 6000 from Ziz Fizziks (59, 63).
- Do Super Reaper 6000: Get the Super Reaper 6000 Blueprints for Ziz Fizziks in the Stonetalon Mountains. Find: Super Reaper 6000 Blueprints from Venture Co. Operator (66, 51).
- Turn in Super Reaper 6000 to Ziz Fizziks (59, 63).
- Accept Gerenzo's Orders from Piznik (72, 60).
- Turn in Gerenzo's Orders to Piznik (72, 60).
- Accept Gerenzo's Orders from Piznik (72, 60).
- Turn in Gerenzo's Orders to Ziz Fizziks (59, 63).
Stonetalon Peak (quests level 18-27). Keeper Albagorm is at the top of Stonetalon Peak in the far north (37, 8).
- Turn in Journey to Stonetalon Peak to Keeper Albagorm (37, 8).
- Accept Reclaiming the Charred Vale from Keeper Albagorm (37, 8).
- Do Reclaiming the Charred Vale: Keeper Albagorm on Stonetalon Peak wants you to slay 7 Bloodfury Harpies, 7 Bloodfury Ambushers, 7 Bloodfury Slayers and 7 Bloodfury Roguefeathers. Find: Bloodfury Harpy (level 23-24) (32, 62); Bloodfury Ambusher (level 23-24) (31, 62); Bloodfury Slayer (level 25-26) (32, 69); Bloodfury Roguefeather (level 25-26) (33, 69). The Bloodfury harpies are in the Charred Vale, in the south-west of the zone.
- Turn in Reclaiming the Charred Vale to Keeper Albagorm (37, 8).
- Albagorm's next step, Reclaiming the Charred Vale, sends you on to Falfindel Waywarder, outside this guide's range.
Back to Ashenvale (quest level 21). Hand the Pridewing venom sacs to Shindrell Swiftfire in Astranaar.
- Turn in Pridewings of Stonetalon to Shindrell Swiftfire (35, 49 in Ashenvale).
Sources
- Quests, quest givers, objectives and coordinates: the WoW: Forever game files (build 1.60.1.70532), matched to CMaNGOS classic-db Classic quest data (GPL-3.0), as shown on our quest pages (October 29, 2026)
- Skyborne starting zone: our Skyborne lore article (October 5, 2026)
- Skyborne factions: our races and classes article (October 24, 2026)